MDmanx buildup w/ pics

General discussion area. A place to take a break and share your buggy world with others.
Post Reply
Gene-C
Posts: 2949
Joined: Fri Feb 12, 2010 6:00 am

MDmanx buildup w/ pics

Post by Gene-C »

I will be using this post as a log of my manx buildup over the next few months. I will be constantly adding updates w/ pics to this post. All and any opinions and Ideas are welcome! My projected finish date is May 1st 2006, but we all know how that goes. My Meyers Manx fiberglass kit consists of a tub, side pods, hard top, removable soft windows, and rare funky engine cover. Image Image 
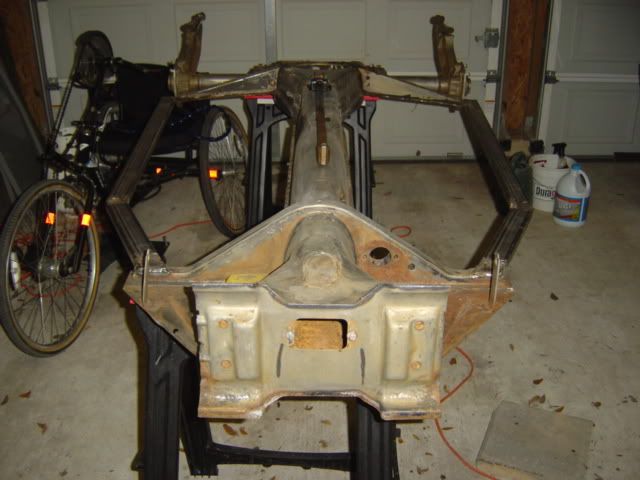
I have started by stripping my manx down to the bare vw chassis. Image I have cut the rusty floorboards out, and I am now contemplating removing the stock side rails of the pan, as they are pretty roached. Image I want to replace the stock round side rails with 1" box material. Has anyone done this with success? Thanks -Brian
Gene-C
Posts: 2949
Joined: Fri Feb 12, 2010 6:00 am

Post by Gene-C »

I did Image Image Image 
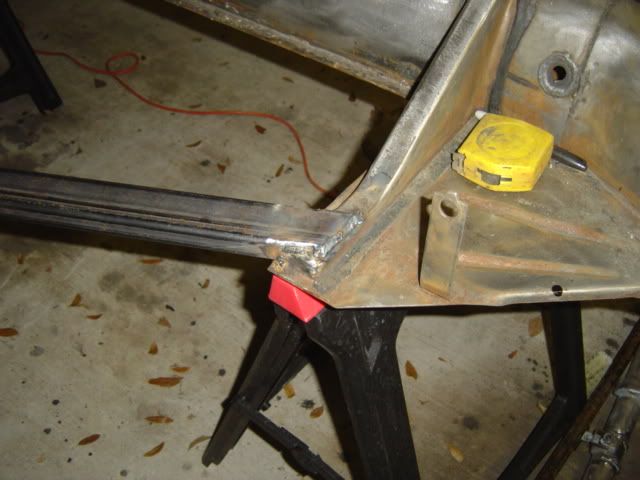
1x2 box tubing .116" or 2.86mm thick
Gene-C
Posts: 2949
Joined: Fri Feb 12, 2010 6:00 am

Post by Gene-C »

do all vws have those side rails ???? do i need them??
Gene-C
Posts: 2949
Joined: Fri Feb 12, 2010 6:00 am

Post by Gene-C »

[QUOTE="dirtydeedss"]do all vws have those side rails ???? do i need them??[/QUOTE] The side rails are what support the outside of the body, and the floor pans, aka: the seat you are sitting in. Murz, your work looks great! what measurements did you need to take to do that? I want to use stock replacement floor pans, so I think I need to use 1" square, so the pans can fit down over my rails.
Gene-C
Posts: 2949
Joined: Fri Feb 12, 2010 6:00 am

Post by Gene-C »

In that case, fit the pans, then just use 1x1 box tubing in the channels afterwards. EASY.
Gene-C
Posts: 2949
Joined: Fri Feb 12, 2010 6:00 am

Post by Gene-C »

Here is a pic of a modified pan on the Berrien site. Check 'em out here. Cool project! Keep the pics comin'. Image
CairoManx
Posts: 858
Joined: Sat Mar 26, 2011 5:00 am

Post by CairoManx »

Brian, In the pictures of your chassis, it looks like the rear floorpan bulkheads have been removed. The rear bulkhead slopes down from the tunnel to the rear of each channel section. The floorpans are attached to the front and rear bulkheads and along the side of the tunnel. You have to have a left and right rear bulkhead. Below is a Berrien chassis which is similar to what you want to do.Image
CairoManx
Posts: 858
Joined: Sat Mar 26, 2011 5:00 am

Post by CairoManx »

Michael, You beat me to the draw.
Gene-C
Posts: 2949
Joined: Fri Feb 12, 2010 6:00 am

Post by Gene-C »

Only by 2 minutes! That's pretty wild!:D
allen pierce
Posts: 228
Joined: Mon Mar 14, 2005 9:00 pm

Post by allen pierce »

Nice metal work! (mexineering at it's best). Let's see a picture of the "Bustle" (rare funky engine cover). Bruce unoffically called them a "diaper". But, it's still cool history.
Gene-C
Posts: 2949
Joined: Fri Feb 12, 2010 6:00 am

Post by Gene-C »

so did they come stock and do i need them with stock floor pans? [QUOTE=MDmanx]The side rails are what support the outside of the body, and the floor pans, aka: the seat you are sitting in. Murz, your work looks great! what measurements did you need to take to do that? I want to use stock replacement floor pans, so I think I need to use 1" square, so the pans can fit down over my rails.[/QUOTE]
Gene-C
Posts: 2949
Joined: Fri Feb 12, 2010 6:00 am

Post by Gene-C »

[QUOTE="CairoManx"]Brian, In the pictures of your chassis, it looks like the rear floorpan bulkheads have been removed. The rear bulkhead slopes down from the tunnel to the rear of each channel section. [/QUOTE] The new floorpans I bought have the rear bulkheads already attached. That berrin chassis looks very nice.
Gene-C
Posts: 2949
Joined: Fri Feb 12, 2010 6:00 am

Post by Gene-C »

Here is an article about some pan work. Just scroll thru using the buttons at the bottom. Chirco Baja
Post Reply