joescoolcustoms wrote: ↑Tue Mar 10, 2015 6:50 pm
Since it is raining like crazy, and waiting on the garage to heat up, another update on Loretta.
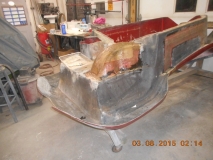
Since I was in the fiberglass mood, I also prepped the spare tire well for it's repair. Both the spare tire well and the battery well were badly hacked by PO's in order to clear the rear IRS suspension. One of the purposes to building the chassis with a 2 inch body lift was to clear the wells properly, then restore the wells back to original. Since the doors were restored back to original, why not the rest of the body, right?
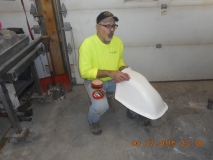
I know this follically challenged dude down South that has a buggy or two, likes to huff resin fumes when he can, and knows a little about fiberglass. We struck a deal and he made a couple of "plugs" for me. One of the spare tire well and one of the battery well. These are not only for Loretta, but for the Franken Manx I have, so they will get used more than once.
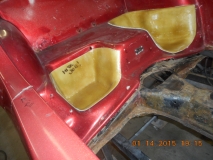
A tight fit of the plug to the body is essential, and since each body varies do to the environment is has been exposed to in the past 40 years, warppage and shrinkage change their shape. I fit it as close to the body as possible, but in case it had gaps, I waxed the original gel coat of the body several times so any resin leakage past the plug would not stick to the body. Then also waxed the plug mold several times.
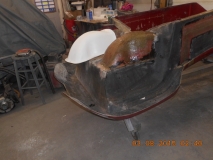
Bolted the plug mold into the body and started cutting fiberglass mat in prep of the lay up.
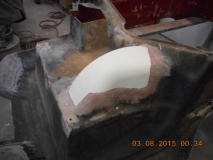
Notice how the tapering of the old glass come down to a knife edge and smoothly transitions into the plug mold. This helps make the repair very smooth surface-to-surface once set up. Ready to start laying the glass on.

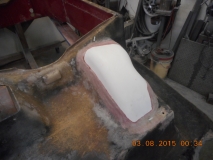
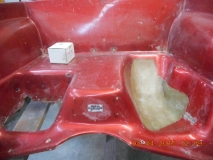
And glassed in. First layer against the plug mold was 2 ounce mat. Next two layers was 6 ounce woven cloth. Next three layers was 2 ounce mat for a finished thickness of about 5/16 inch. The cloth is a lot stronger than the mat due to the lattice like matrix it has. But, if used by itself, it can give a texture look to the repair and show up later in the correct light. Since the mat does not have any pattern, when it shows up, it looks so scattered that it does not pull your eye to it. Mixing the two causes no problems because both are glass, but it builds strength into the repair. And the final exposed surface tends to match the original chopper gun texture the best and not pop out as a repair when being looked at.
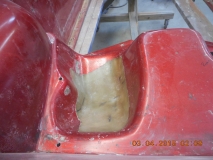
Once the layup started building heat and was solid to touch, I pulled the bolts out and shortly the plug mold popped off the body.
It is kind of hard to see and tell from the pictures, but incredibly smooth and the transition is almost dead on from the repair to the body. Very little interior work to be done. As with the tail light section described above, I over cut out the body eliminating about 30 small holes that also needed to be repaired. Why fix two small areas and 30 holes when I can just make one repair and get it all. A lot less finish body work to do. The dark areas are the sharpie pen marks I made to orient me during lay up prep and show through the translucent resin.

I am pleased with how it turned out. Thanks to Chris, Vince and Tom for the help and guidance on doing this style of repair. I know I have asked Vince a thousand questions at his fiberglass courses he teaches during MOTB. And Chris with the late night calls to ask one more question. But that is what makes life fun, right?