Updating my '67 Manx UPDATED PHOTOS
-
- Posts: 400
- Joined: Mon Mar 01, 2010 6:00 am
Updating my '67 Manx UPDATED PHOTOS
David is almost done with the Blue Manx! When I dropped it off, I told him that I wasn't in a hurry for it, and that he could use it a filler work when time allowed. Well he has made spectacular progress the past couple weeks. Heck, I even heard and saw the engine run. Maybe Buellton? If not, Big Bear! Here's the latest photos:
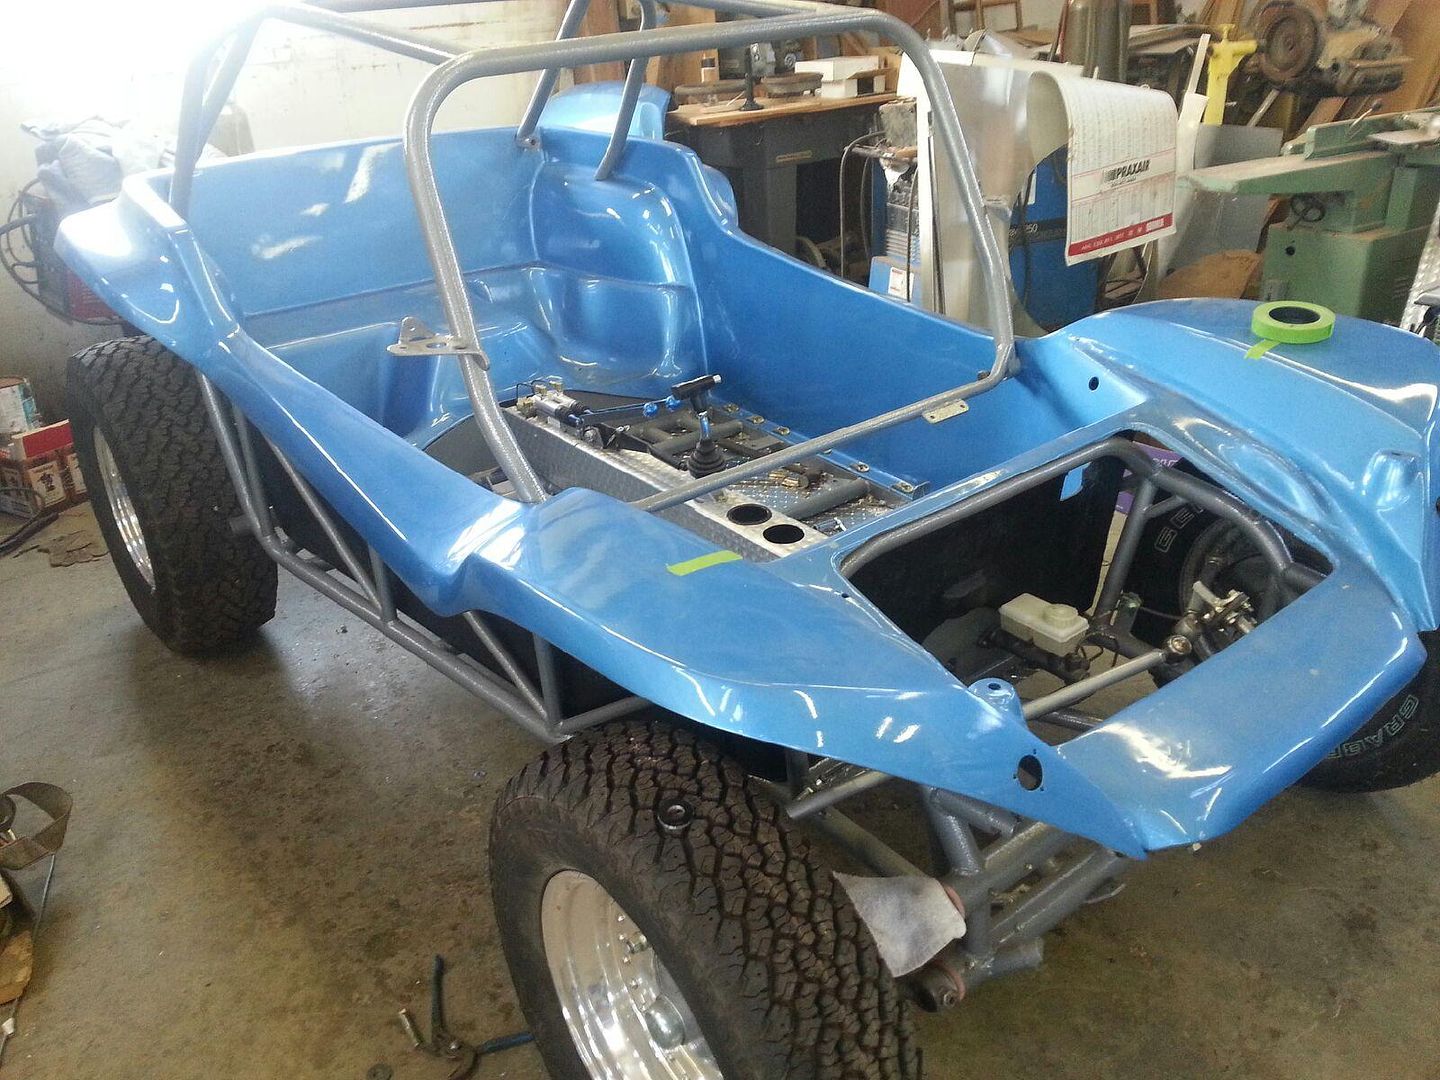
Chassis complete and powder coated, the body work complete and repainted:
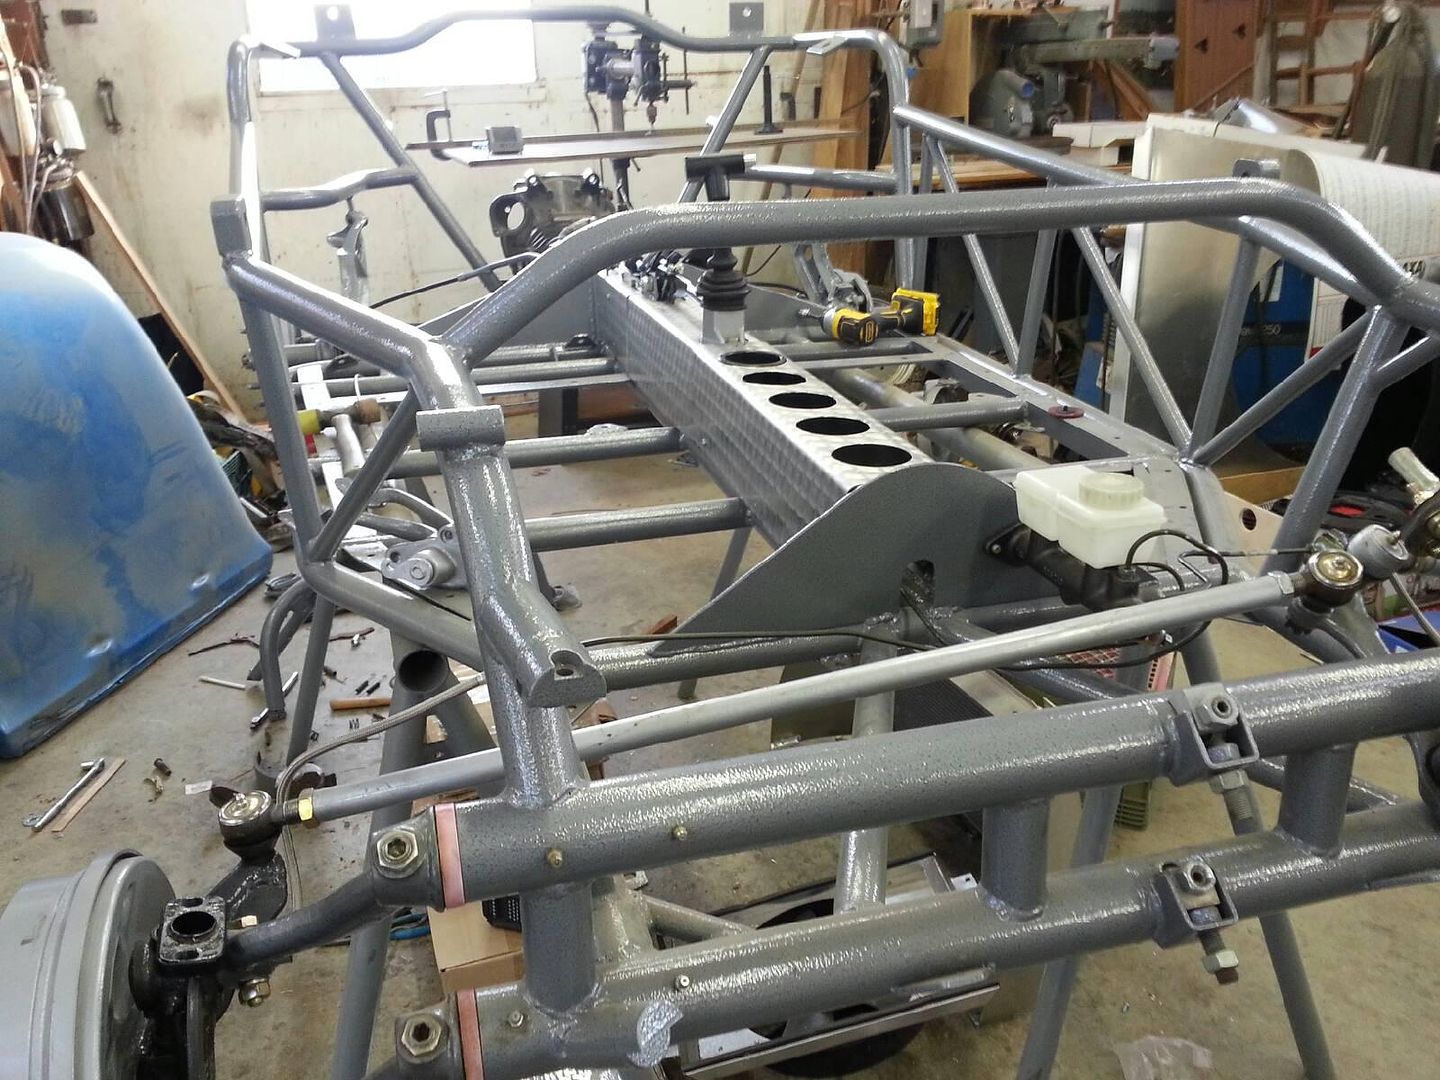
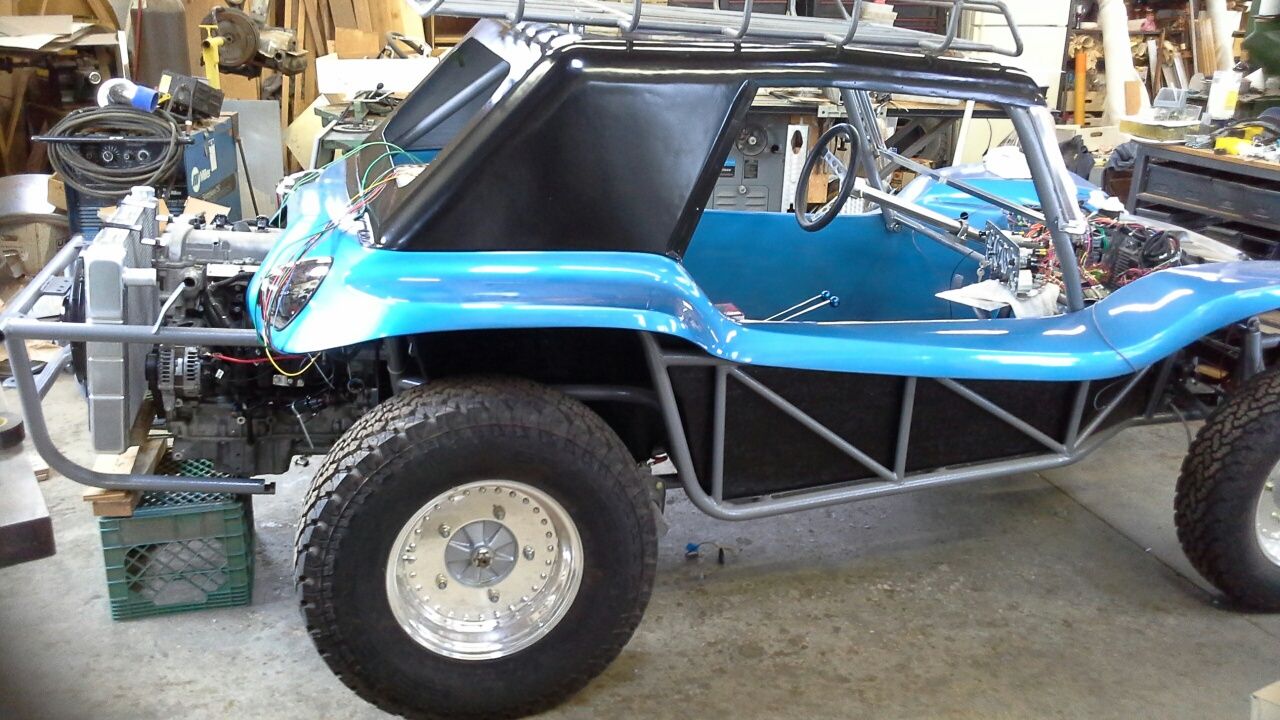
Its a roller with the cage attached. Note that the ecotech doesn't protrude into the back seat area. One of the requirements I asked him to try and adhere to was to
keep the body as stock looking as possible. I was trying to avoid the addition of any unnecessary holes into the body. This extended the wheel base about 3 inches
longer than a shortened pan buggy, but it's not really noticeable from the side view that the wheels are a little bit further back.
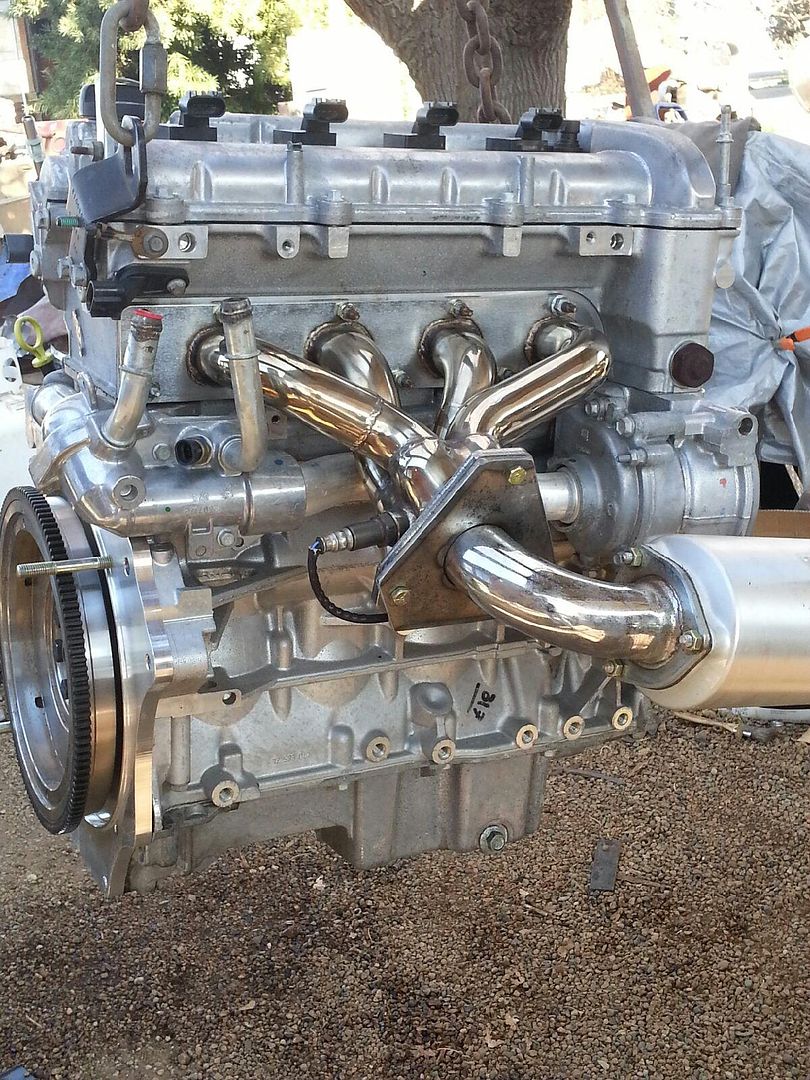
Here's the Ecotec. David sent me a video of it running during a bench test
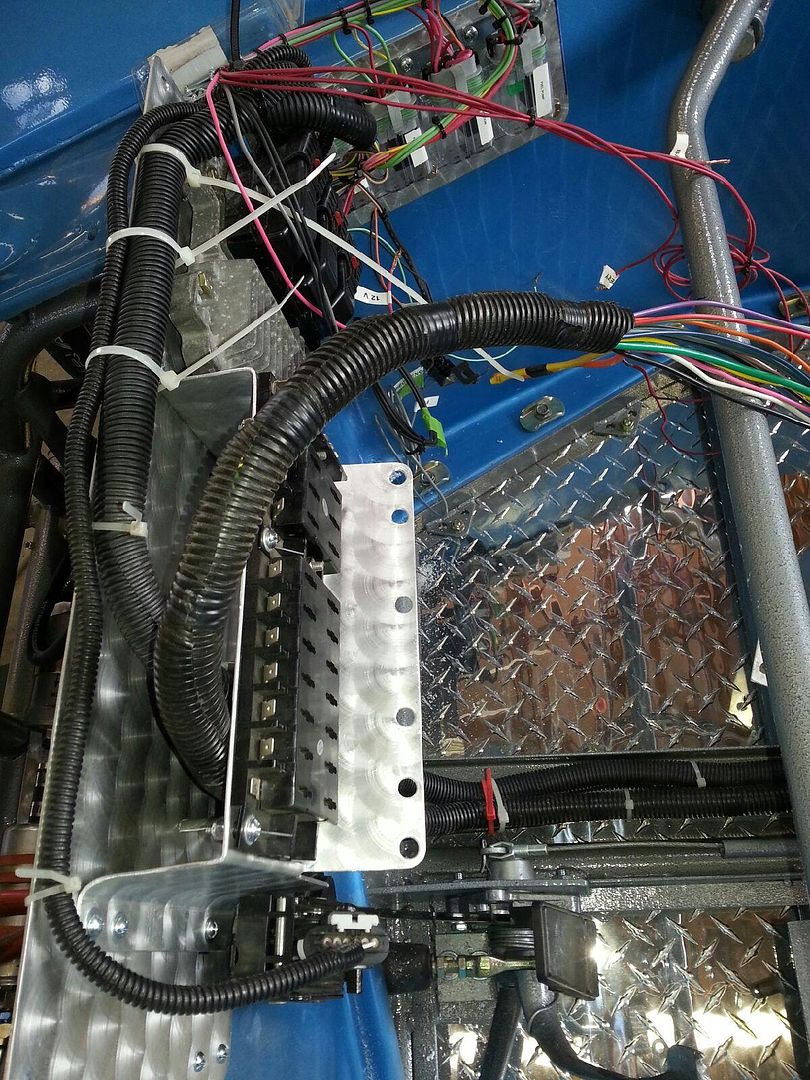
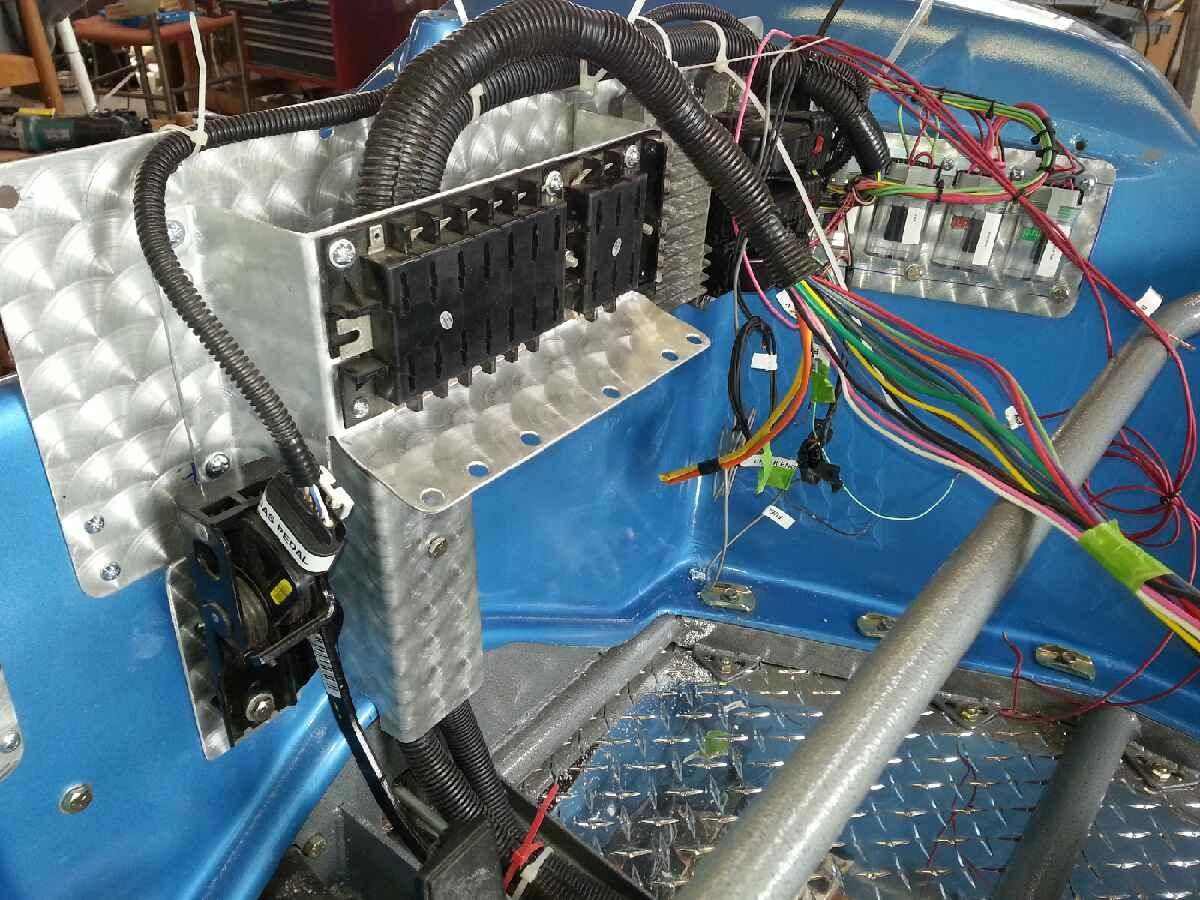
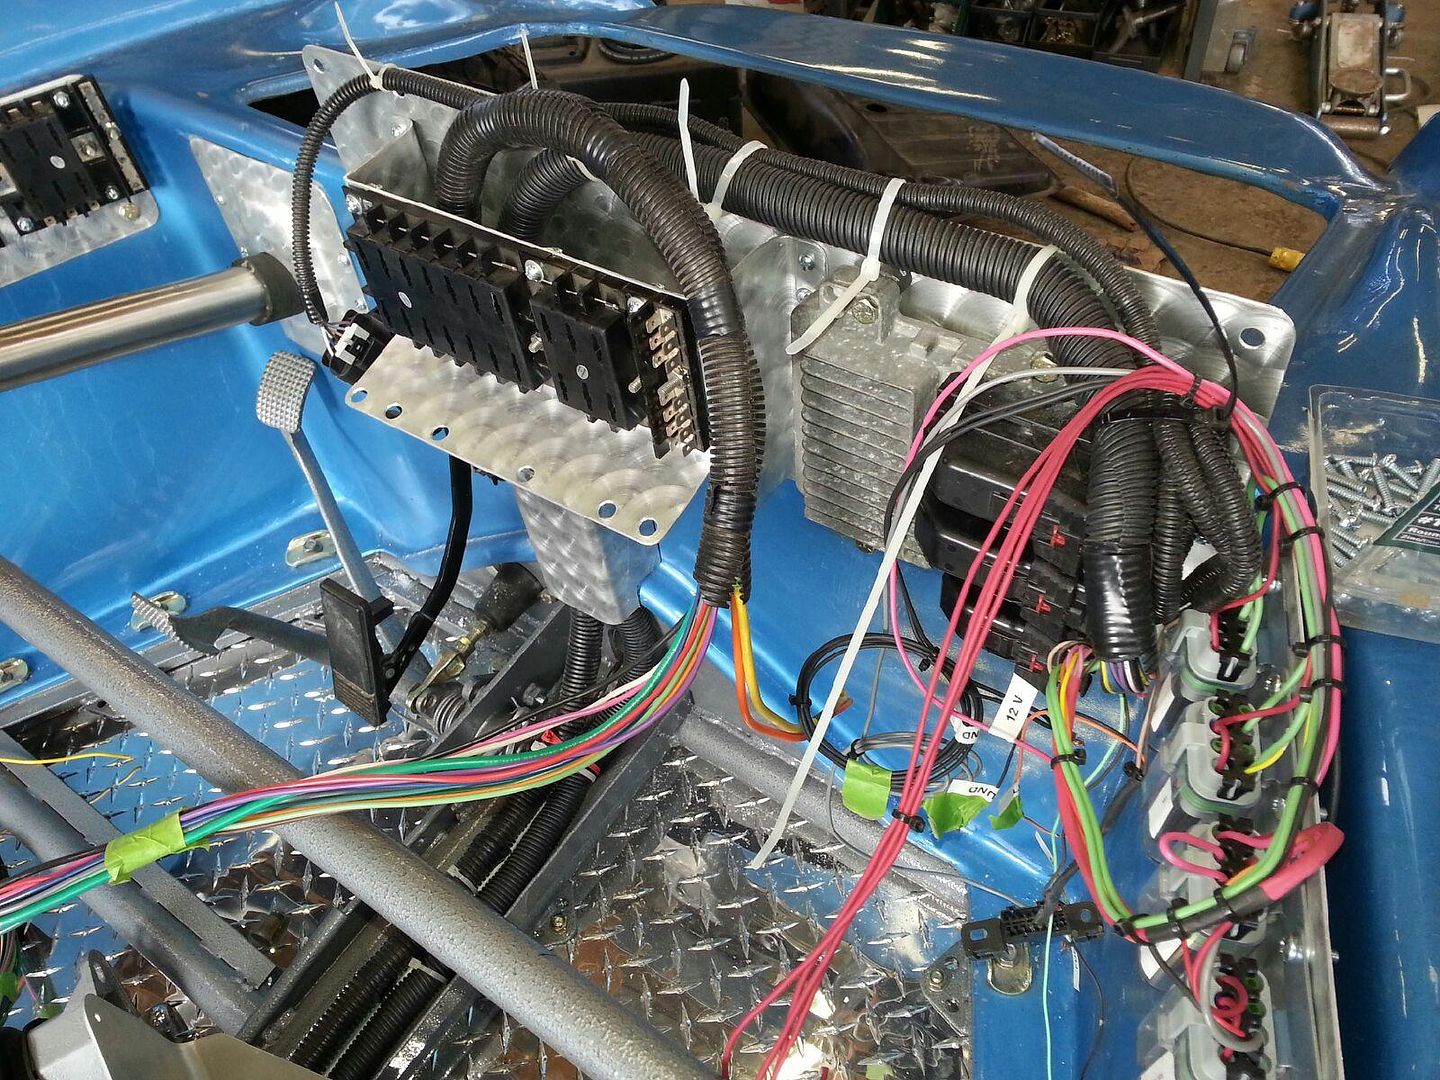
This is the front firewall area. David used this area for the fuse block (center of photo) which will be reached by opening the drop down dash.
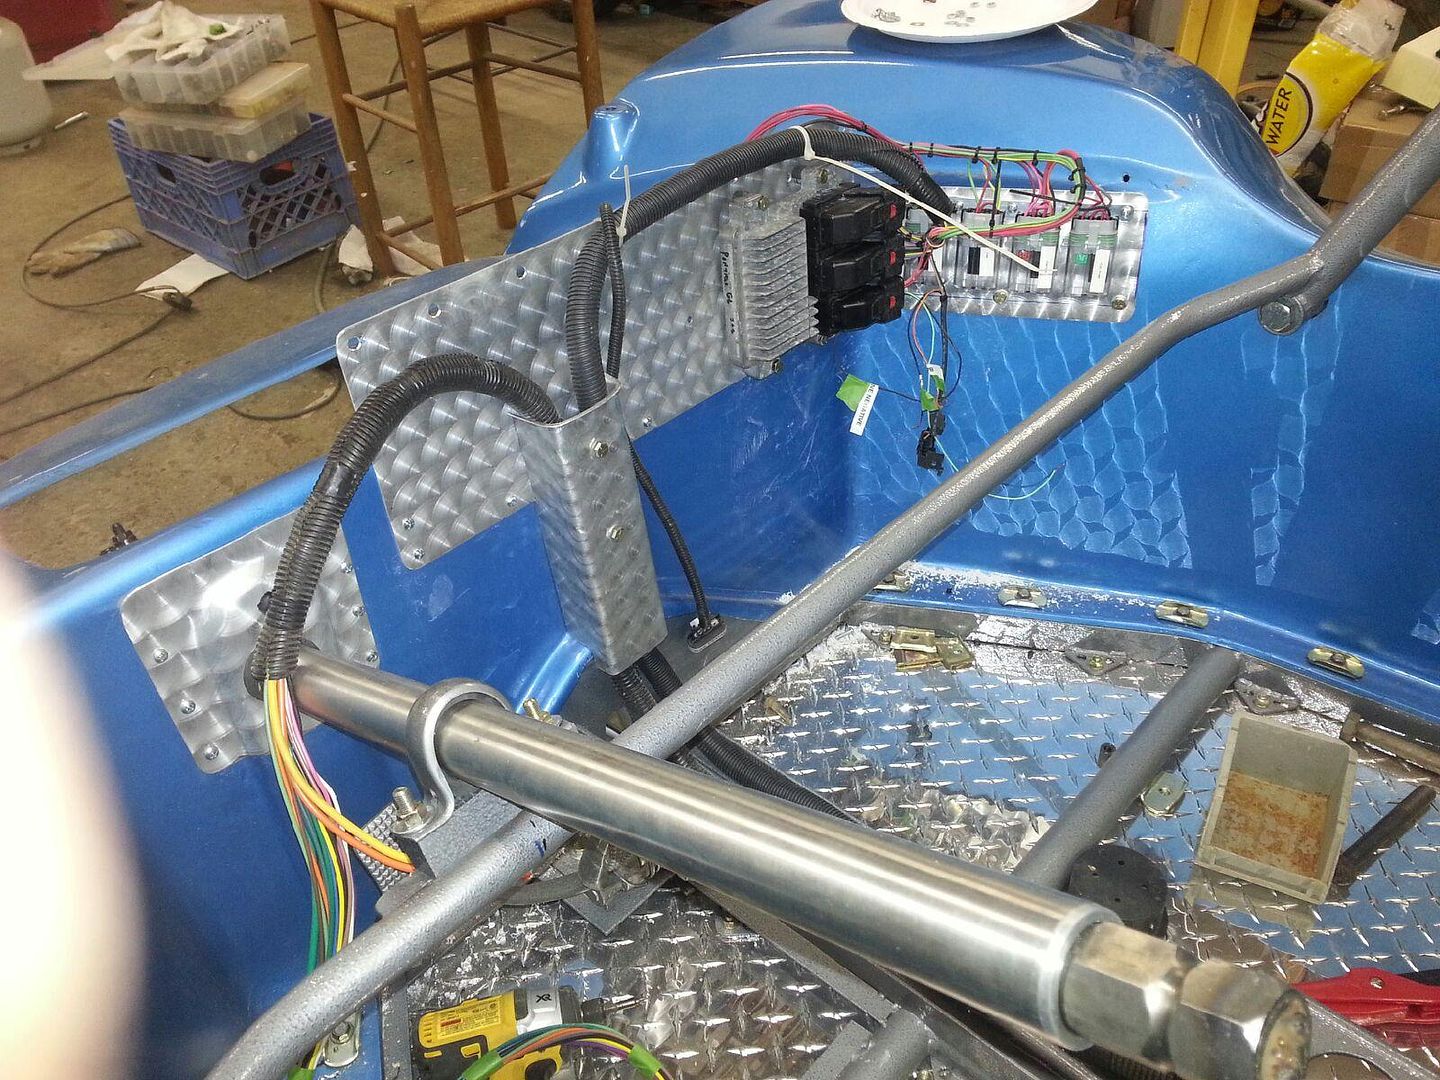
Wiring is a bit complex due to the ECM and brain installation (right side of photo). You can also see the electric gas pedal module:
A couple more views of the area
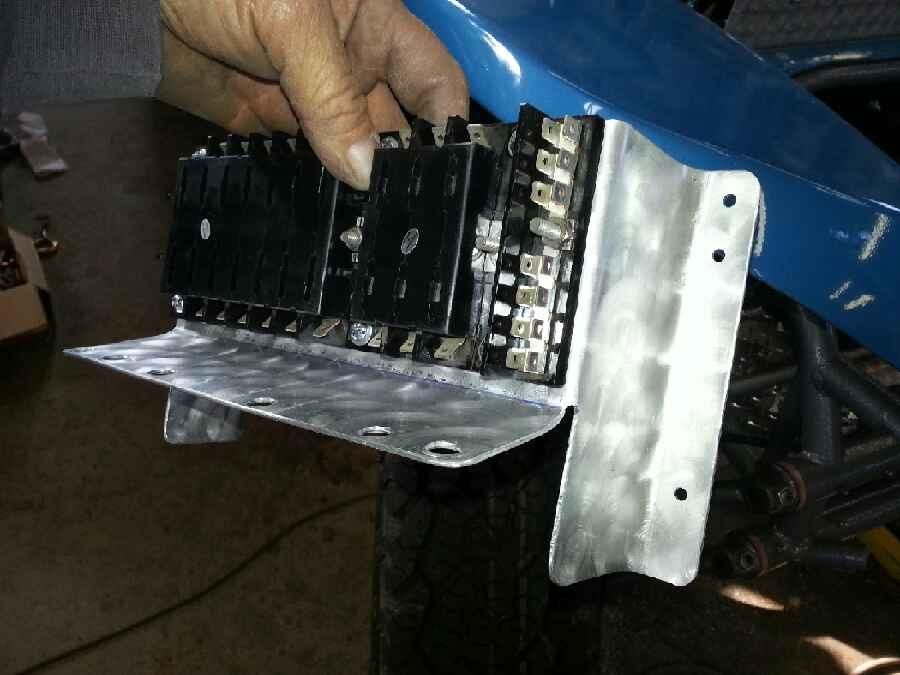
Fuse block behind the drop down dash
Chassis complete and powder coated, the body work complete and repainted:
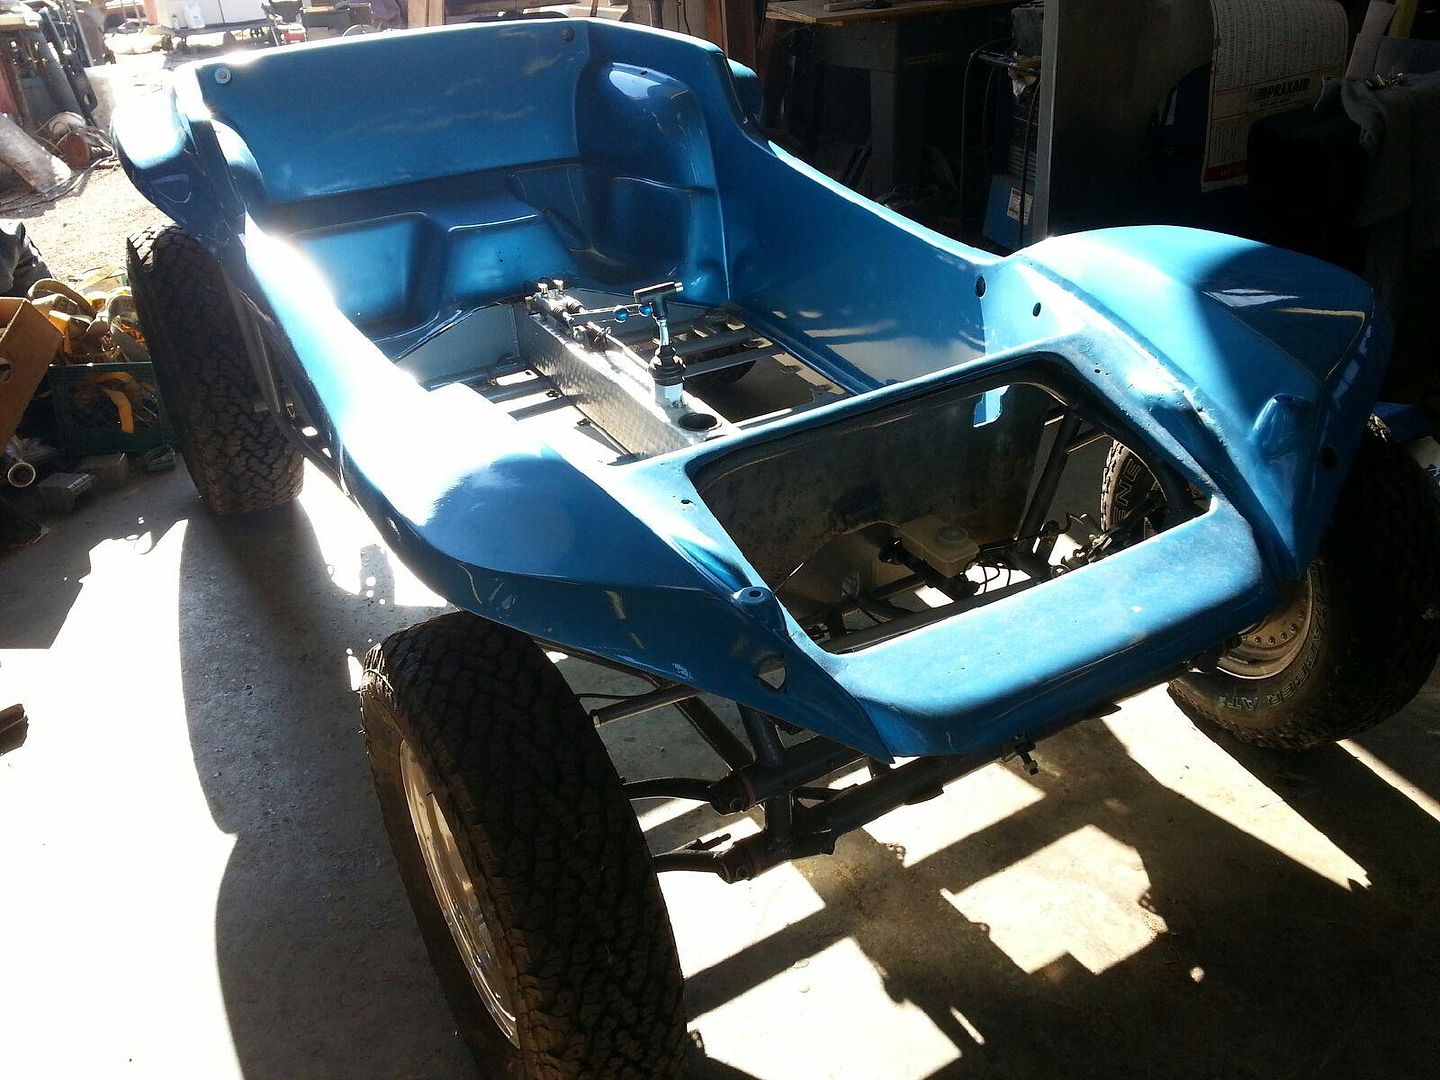
Its a roller with the cage attached. Note that the ecotech doesn't protrude into the back seat area. One of the requirements I asked him to try and adhere to was to
keep the body as stock looking as possible. I was trying to avoid the addition of any unnecessary holes into the body. This extended the wheel base about 3 inches
longer than a shortened pan buggy, but it's not really noticeable from the side view that the wheels are a little bit further back.
Here's the Ecotec. David sent me a video of it running during a bench test
This is the front firewall area. David used this area for the fuse block (center of photo) which will be reached by opening the drop down dash.
Wiring is a bit complex due to the ECM and brain installation (right side of photo). You can also see the electric gas pedal module:
A couple more views of the area
Fuse block behind the drop down dash
Last edited by Scott-Drolet on Mon Jan 27, 2014 5:17 am, edited 1 time in total.
Scott Drolet
MC Vice President
MC 47, DSB, RBC, Long Haul League, '64 Monocoque, '67 Manx, '73 Manxter, '64 Stainless Burro, '64 Corvair Burro, '65 Corvair Burro
http://www.ManxClub.com" onclick="window.open(this.href);return false;
http://www.SeaToSeaSafari.com" onclick="window.open(this.href);return false;
http://www.BurroBuggies.com" onclick="window.open(this.href);return false;
-
- Posts: 400
- Joined: Mon Mar 01, 2010 6:00 am
Updating my '67 Manx UPDATED PHOTOS
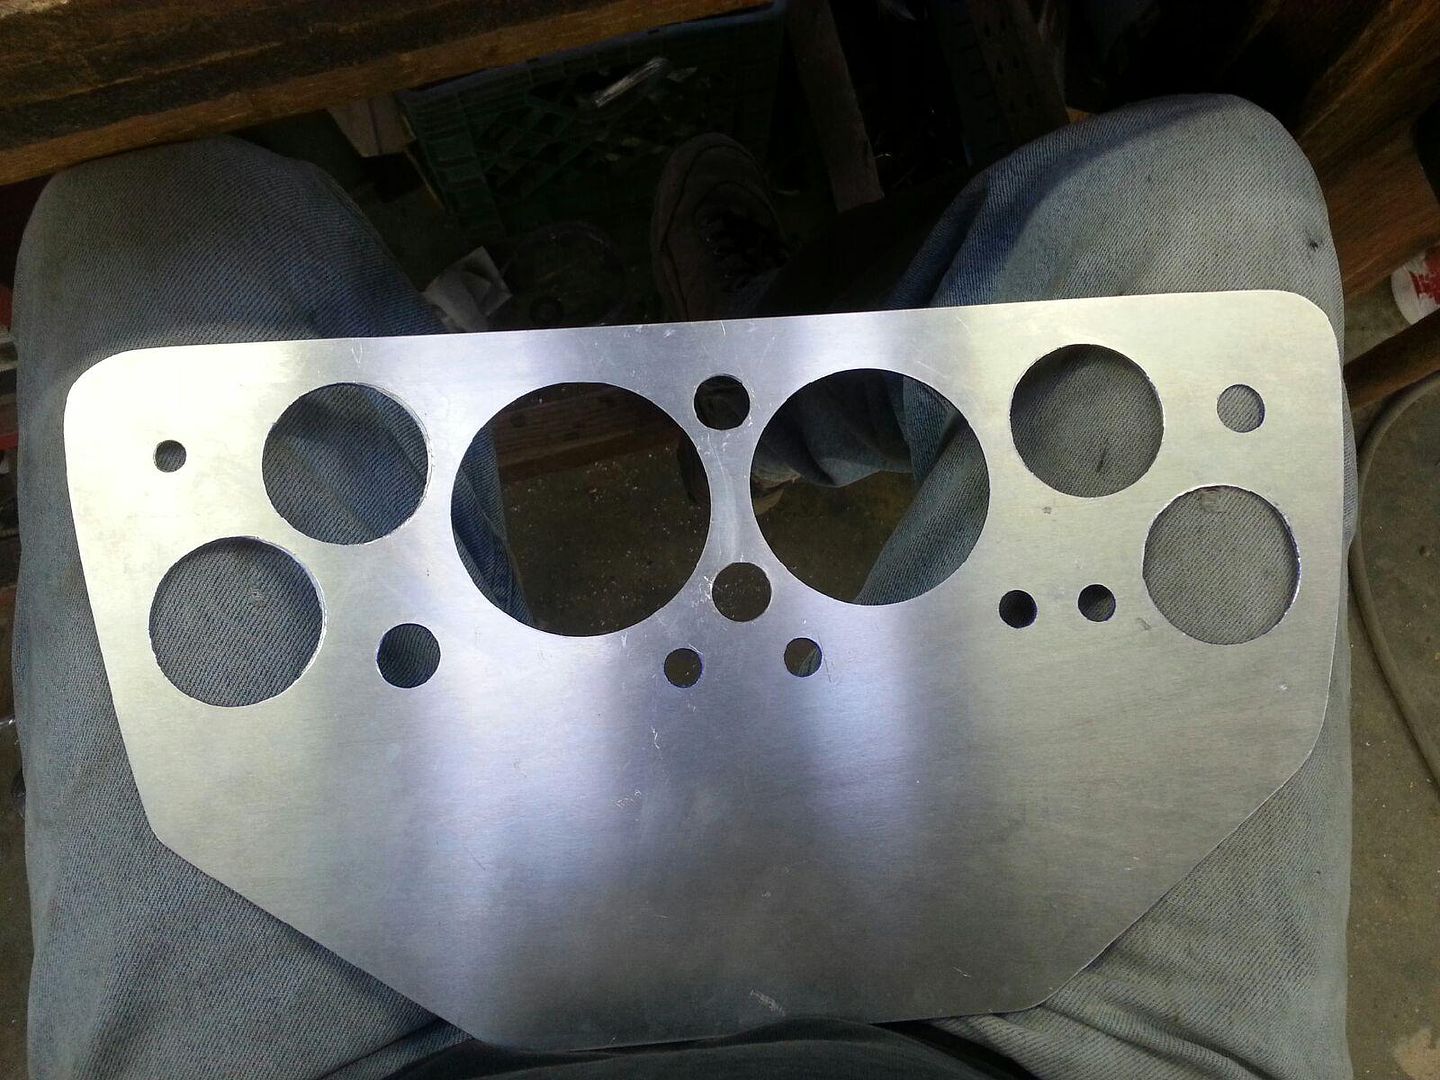
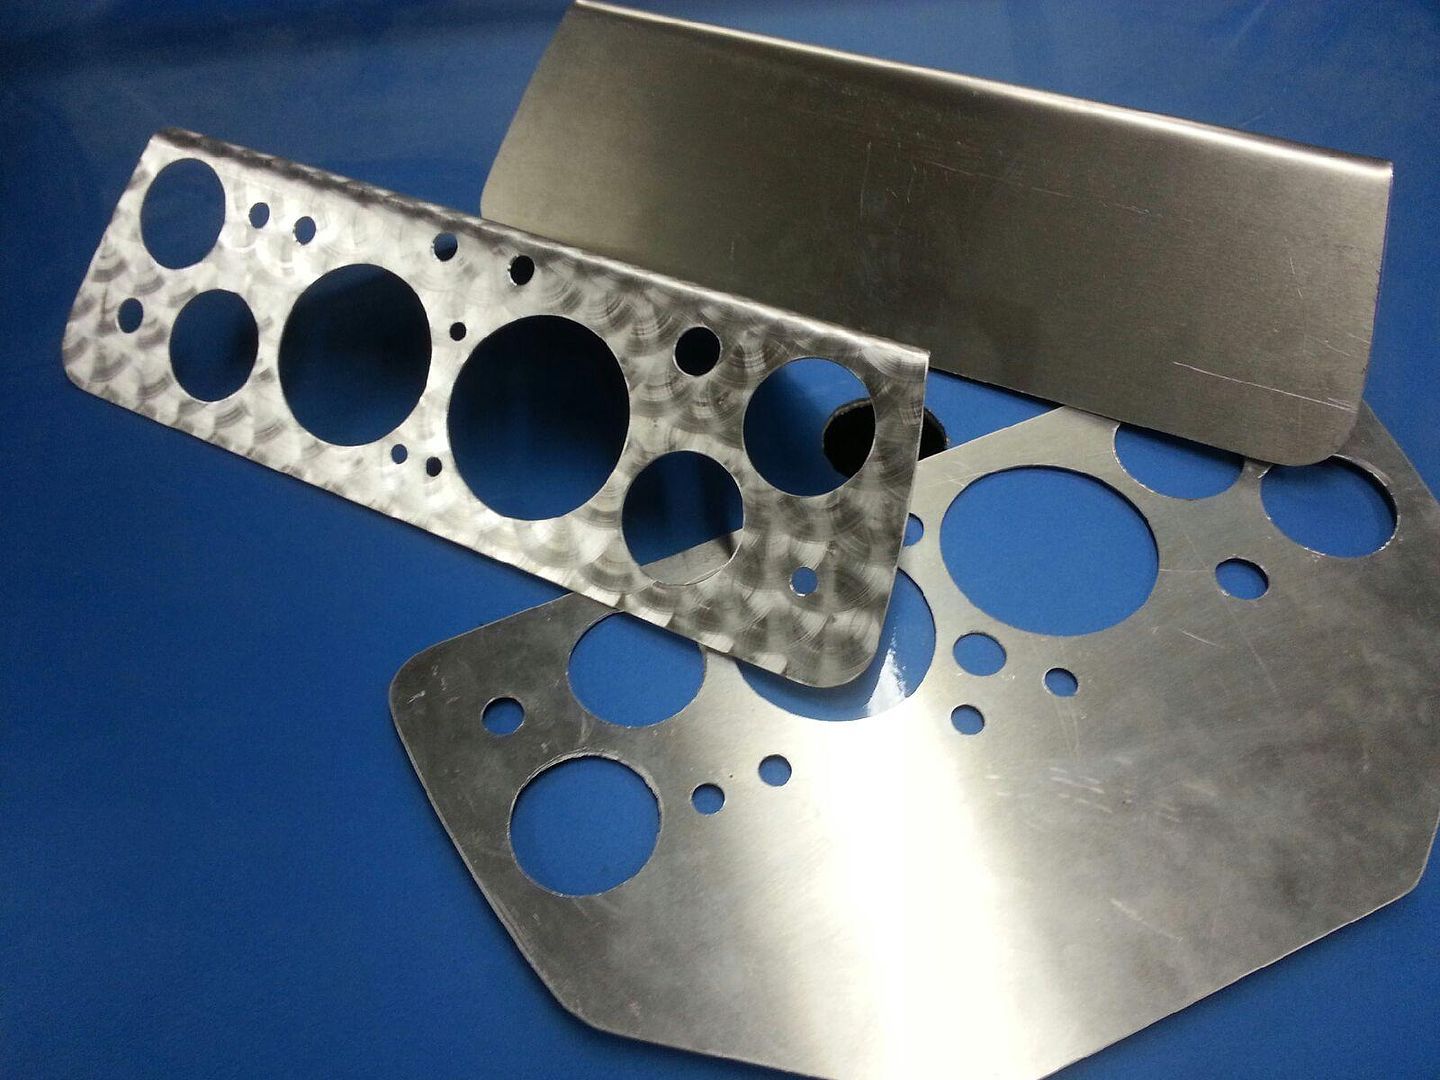
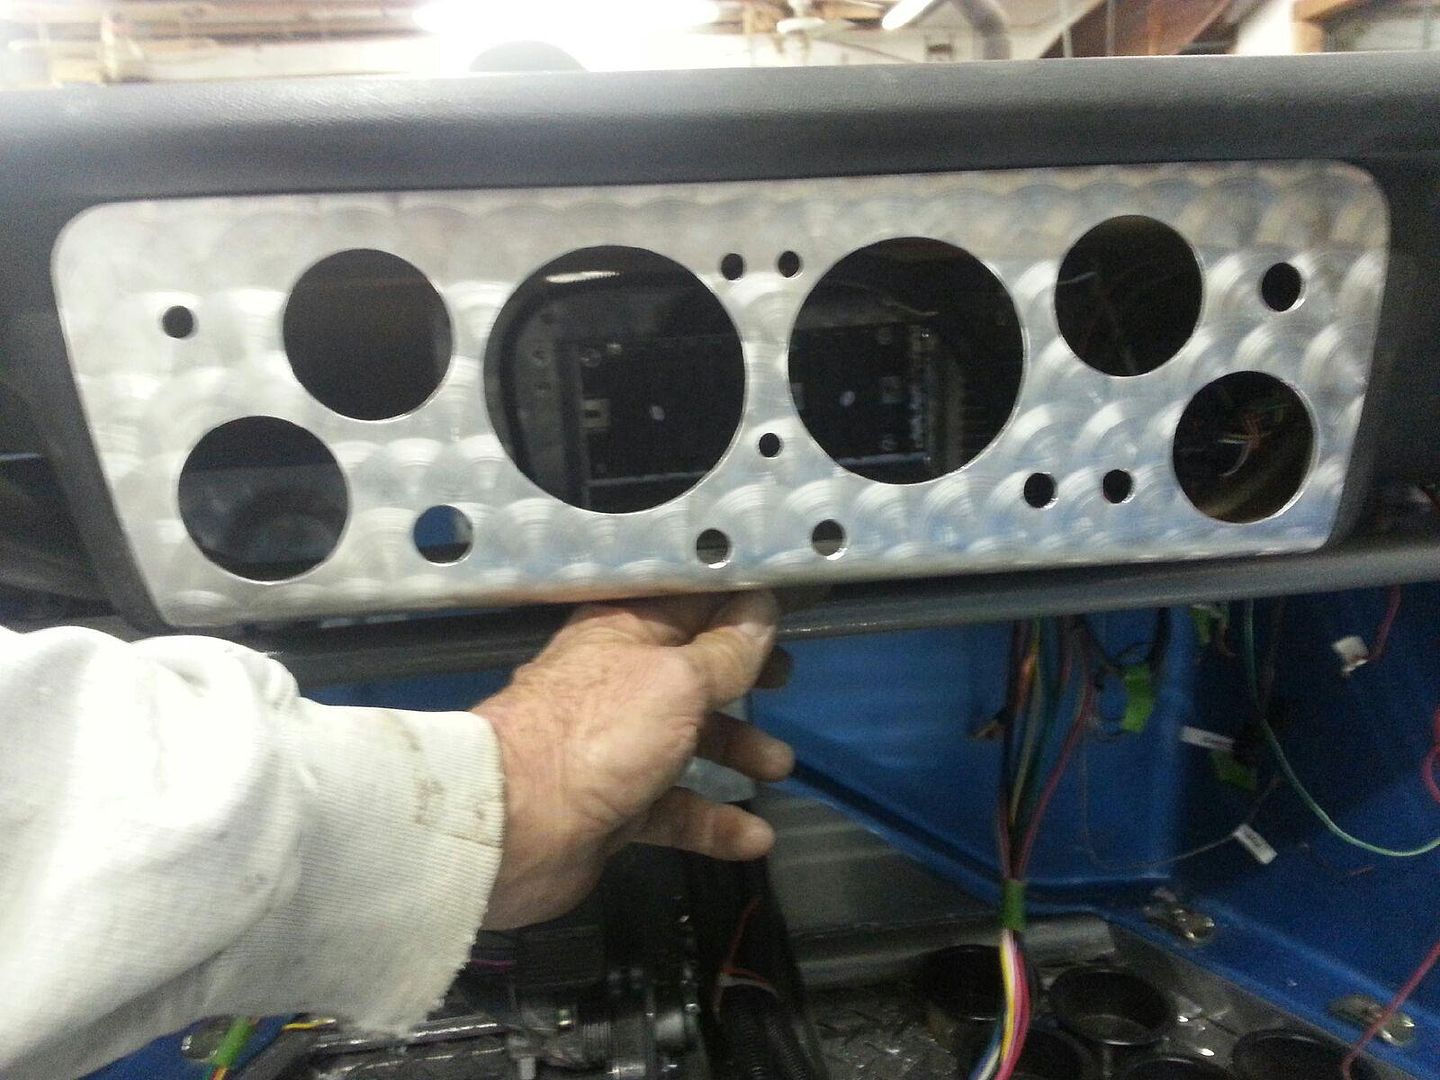
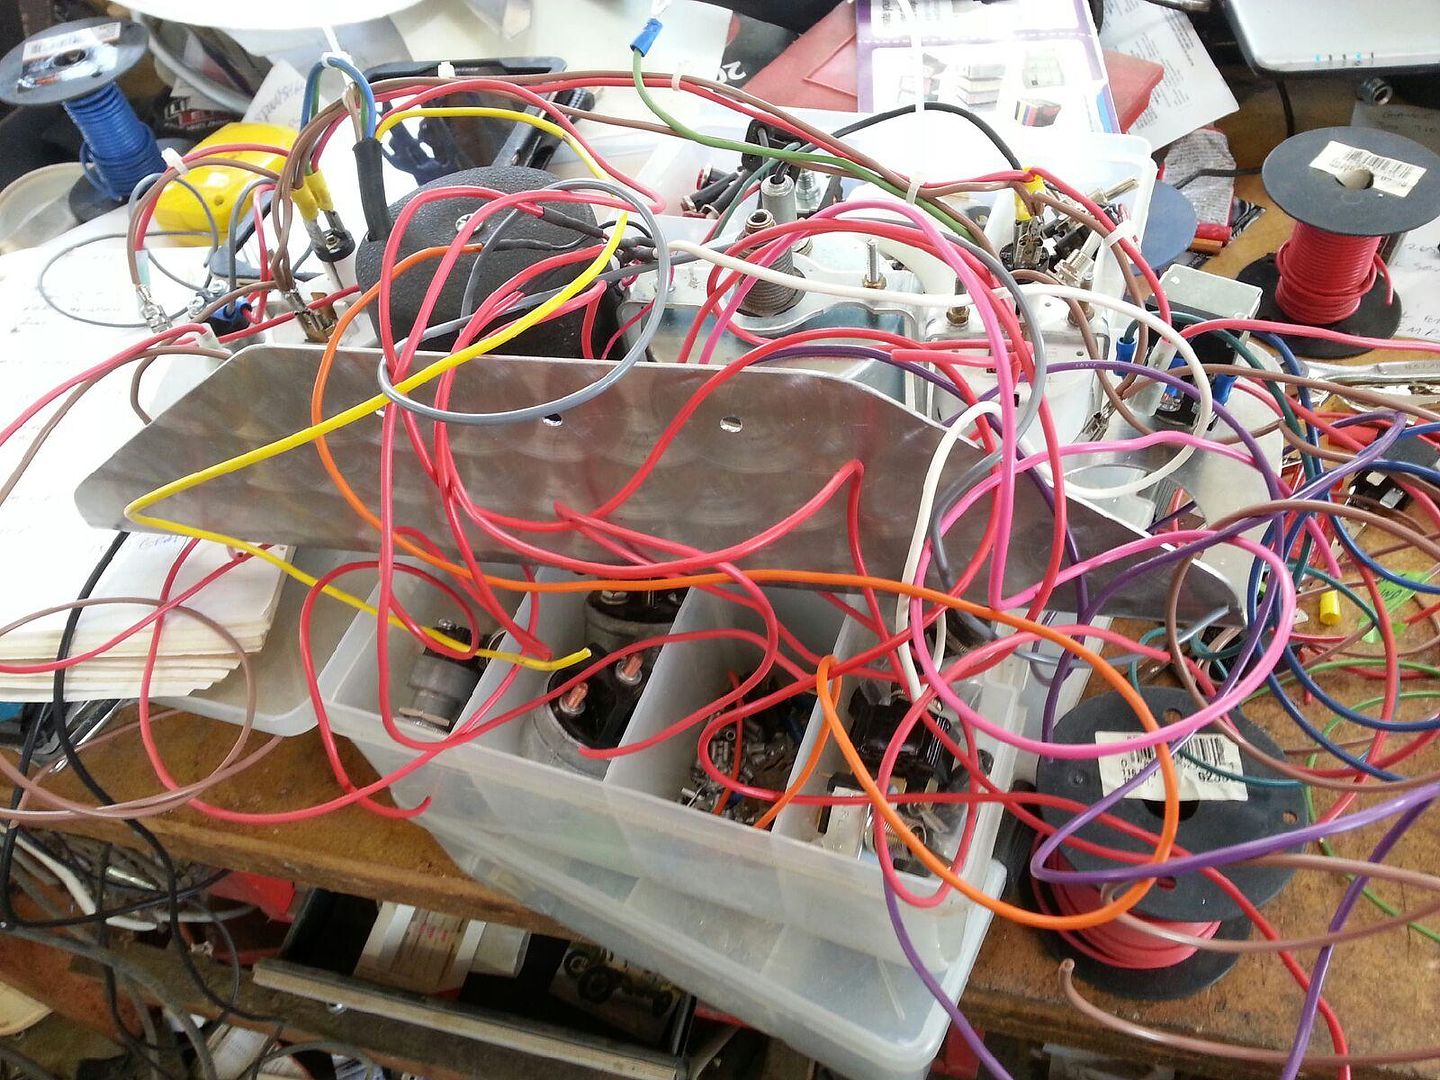
David spent today working on wiring for the gauges on the Manx drop-down dash. The aluminum center insert I had been using in the car had numerous appearance issues created by me when I laid out and cut the holes for the gauges many years ago. Apparently, this drove David nuts and he made a brand new, engine-turned dash insert for me today. Of course, that really means he had to make 6 of them given his fabrication methods. But . . .Very Cool!
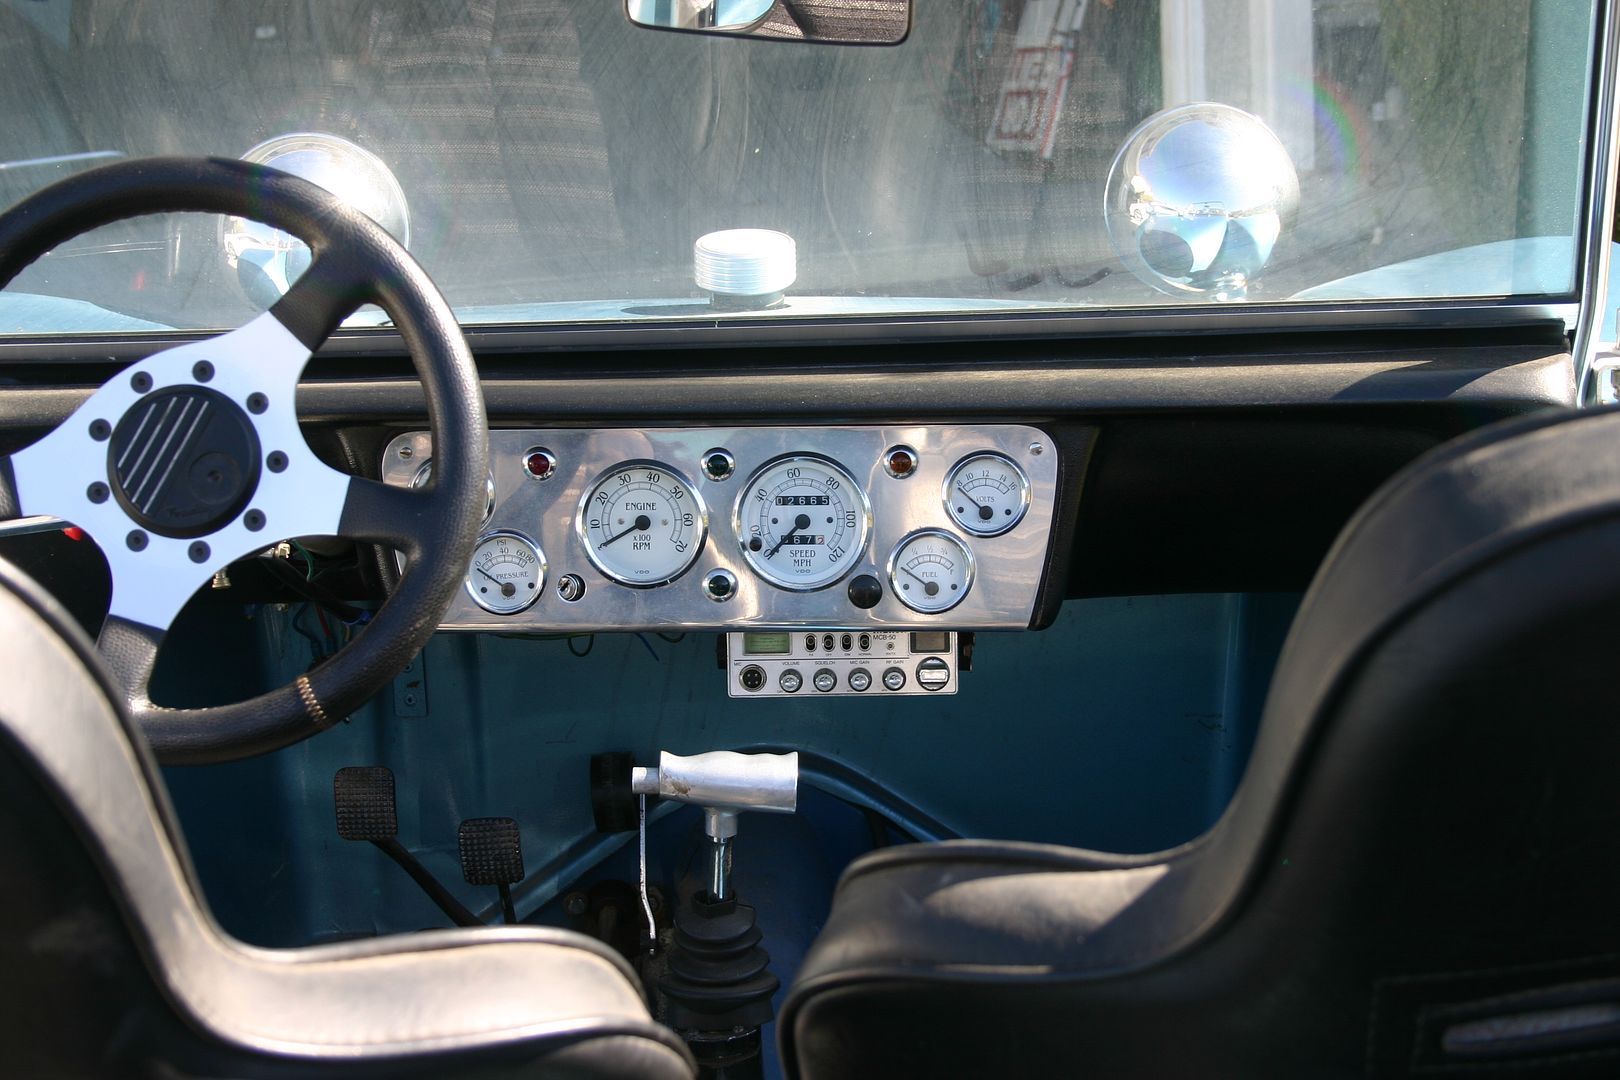
Here's what the dash looked like before (You can see the jacked-up ignition switch hole, plus it was really scratched up. The engine turned design will hide scratches.):
Scott Drolet
MC Vice President
MC 47, DSB, RBC, Long Haul League, '64 Monocoque, '67 Manx, '73 Manxter, '64 Stainless Burro, '64 Corvair Burro, '65 Corvair Burro
http://www.ManxClub.com" onclick="window.open(this.href);return false;
http://www.SeaToSeaSafari.com" onclick="window.open(this.href);return false;
http://www.BurroBuggies.com" onclick="window.open(this.href);return false;
MC Vice President
MC 47, DSB, RBC, Long Haul League, '64 Monocoque, '67 Manx, '73 Manxter, '64 Stainless Burro, '64 Corvair Burro, '65 Corvair Burro
http://www.ManxClub.com" onclick="window.open(this.href);return false;
http://www.SeaToSeaSafari.com" onclick="window.open(this.href);return false;
http://www.BurroBuggies.com" onclick="window.open(this.href);return false;
Updating my '67 Manx UPDATED PHOTOS
Scott, things are looking great. I really like the muffler choice!!
Can't wait to see it.
Doran
Can't wait to see it.
Doran
-
- Posts: 400
- Joined: Mon Mar 01, 2010 6:00 am
Updating my '67 Manx UPDATED PHOTOS
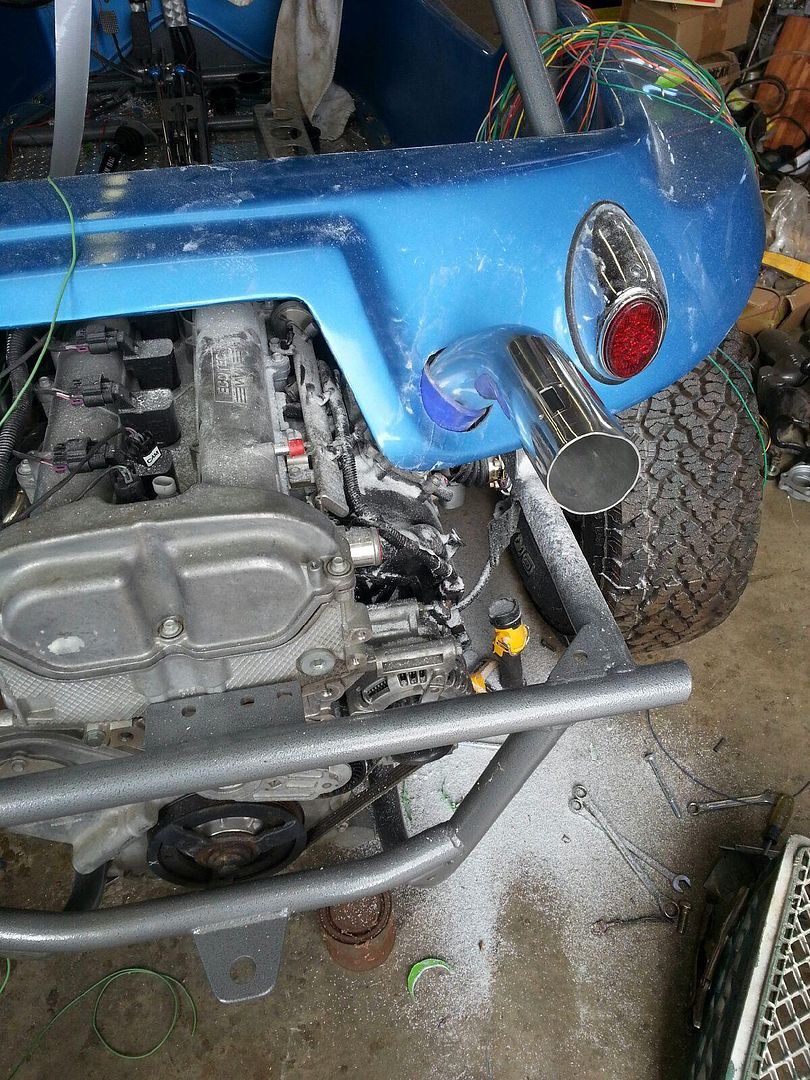
Thanks Doran, Yeah, those Hayabusa exhausts turn up everywhere!
Scott Drolet
MC Vice President
MC 47, DSB, RBC, Long Haul League, '64 Monocoque, '67 Manx, '73 Manxter, '64 Stainless Burro, '64 Corvair Burro, '65 Corvair Burro
http://www.ManxClub.com" onclick="window.open(this.href);return false;
http://www.SeaToSeaSafari.com" onclick="window.open(this.href);return false;
http://www.BurroBuggies.com" onclick="window.open(this.href);return false;
MC Vice President
MC 47, DSB, RBC, Long Haul League, '64 Monocoque, '67 Manx, '73 Manxter, '64 Stainless Burro, '64 Corvair Burro, '65 Corvair Burro
http://www.ManxClub.com" onclick="window.open(this.href);return false;
http://www.SeaToSeaSafari.com" onclick="window.open(this.href);return false;
http://www.BurroBuggies.com" onclick="window.open(this.href);return false;
-
- Posts: 400
- Joined: Mon Mar 01, 2010 6:00 am
Updating my '67 Manx UPDATED PHOTOS
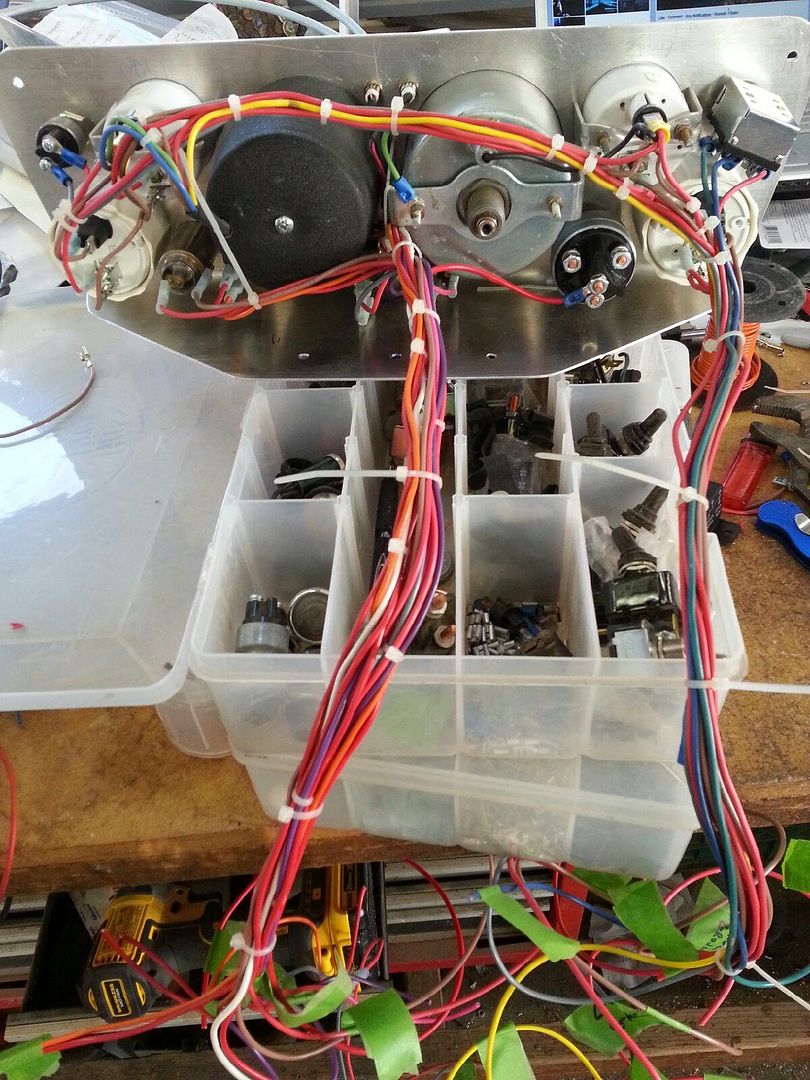
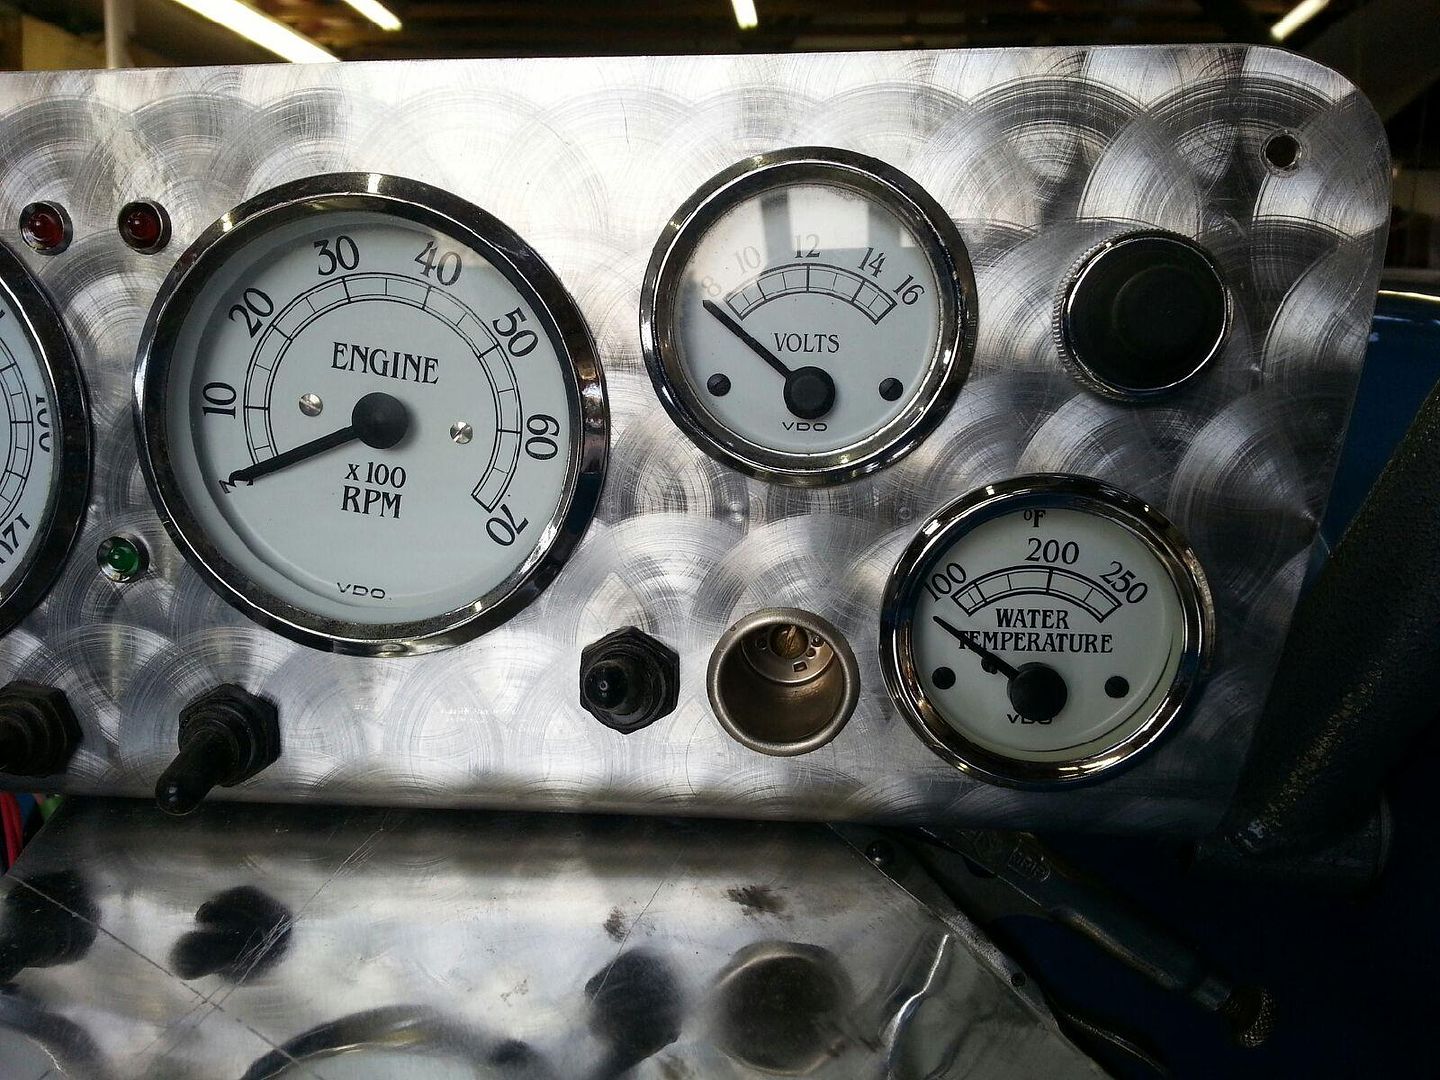
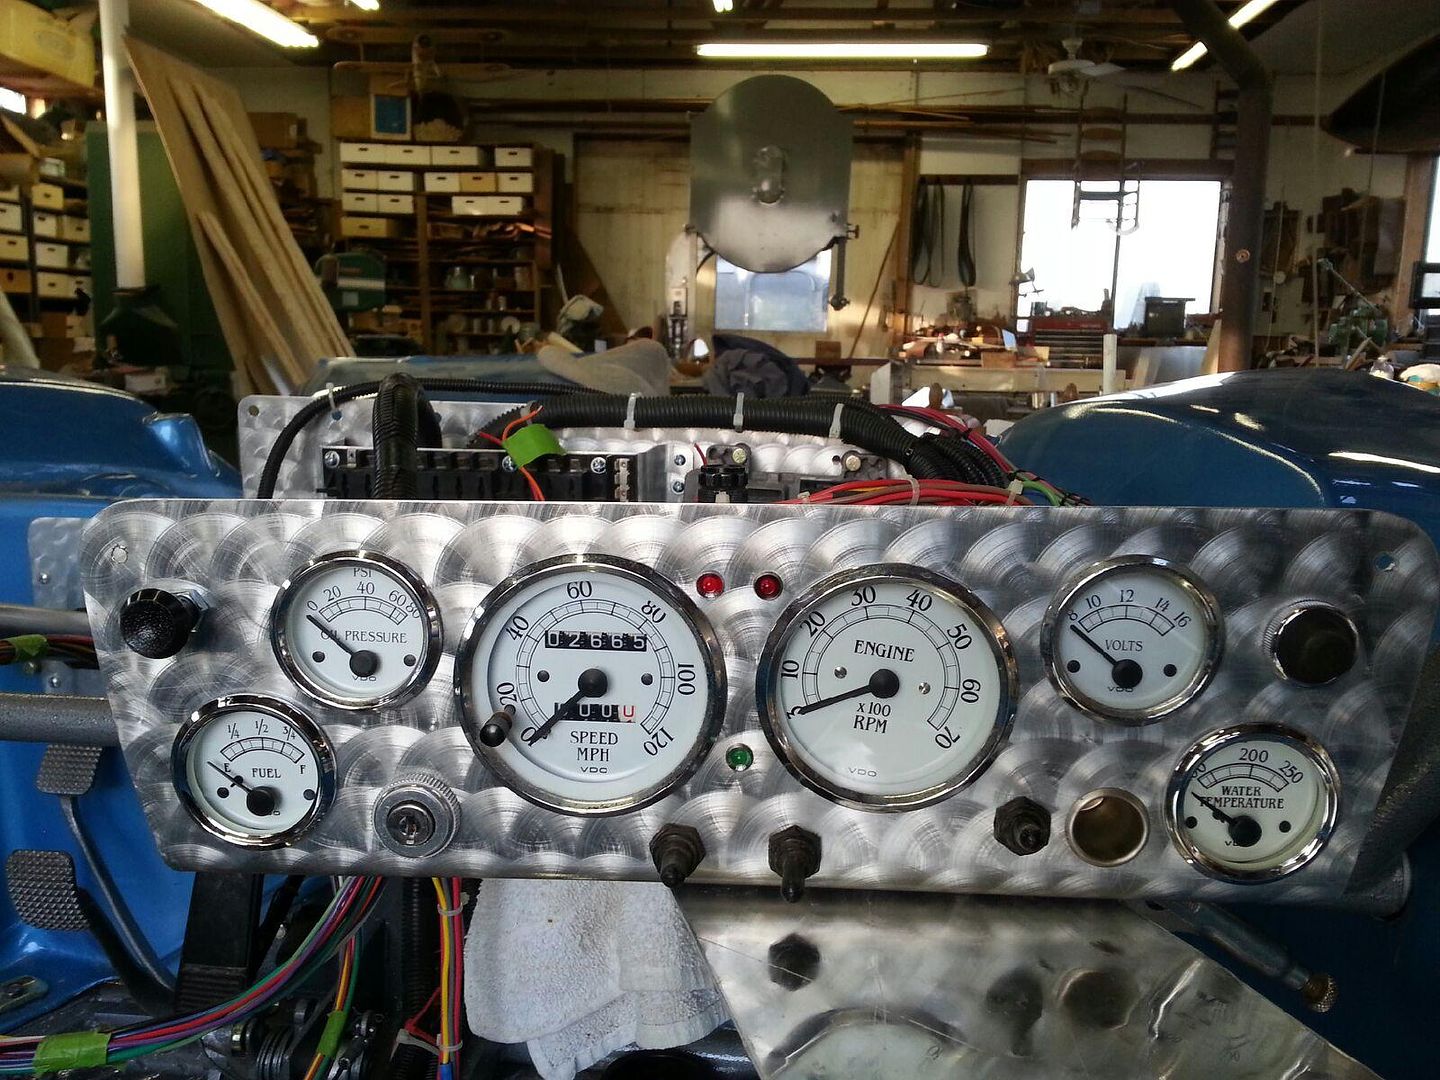
Work is continuing on gauge installation and completion on the wiring of the drop down dash:
RPM gauge was a little crooked . . .fixed now
Scott Drolet
MC Vice President
MC 47, DSB, RBC, Long Haul League, '64 Monocoque, '67 Manx, '73 Manxter, '64 Stainless Burro, '64 Corvair Burro, '65 Corvair Burro
http://www.ManxClub.com" onclick="window.open(this.href);return false;
http://www.SeaToSeaSafari.com" onclick="window.open(this.href);return false;
http://www.BurroBuggies.com" onclick="window.open(this.href);return false;
MC Vice President
MC 47, DSB, RBC, Long Haul League, '64 Monocoque, '67 Manx, '73 Manxter, '64 Stainless Burro, '64 Corvair Burro, '65 Corvair Burro
http://www.ManxClub.com" onclick="window.open(this.href);return false;
http://www.SeaToSeaSafari.com" onclick="window.open(this.href);return false;
http://www.BurroBuggies.com" onclick="window.open(this.href);return false;
- vincent9993
- Posts: 793
- Joined: Tue Apr 13, 2010 5:00 am
Updating my '67 Manx UPDATED PHOTOS
Very nice Scott, I'm not sure if you thought of moving some gages around now that all that wiring is ziptied and very neat but you may want to consider swapping the whole cluster. Obviously all buggies are different and you're taller than me but I found that most of the left gages were hidden by my right hand on the wheel and ended up mounting the important gauges on the right. I opted to mount the Speedometer, oil pressure and fuel on the right where I could seem them all the time and the other gauges on the left where I had to move my had or lean a little to see them. Perhaps a quick dry fit will tell the story for you.Scott Drolet wrote:
Again looking great!
Last edited by vincent9993 on Thu Jan 30, 2014 4:45 am, edited 1 time in total.
Vincent Parisien
MC Director - MC 2696
Long Haul League, '69 Kick-Out-S.S., '59 Berrien Nostalgia, '73 Manxter (in progress)
Trips
MC Director - MC 2696
Long Haul League, '69 Kick-Out-S.S., '59 Berrien Nostalgia, '73 Manxter (in progress)
Trips
- 2009 Montreal California (7K miles)
- 2010 Montreal Key West (4K miles)
- 2011 Montreal Alaska (7,5K miles)
- 2012 Montreal California (8K miles)
- 2013 Montreal California (7K miles)
- 2014 ECVW (7,5K miles)
- 2015 ECVW (7,5K miles)
-
- Posts: 400
- Joined: Mon Mar 01, 2010 6:00 am
Updating my '67 Manx UPDATED PHOTOS
Thank you Vincent. I'm fine with the dash. David and I spoke about it when I was test fitting where the seat should be mounted. I can see all of them fine. Not to be outdone, David also emailed me this explanation, that I have to admit cracked me up:
I agree about the important gauges going on the right side of the dash, that is why I put the tach over there. Scott has enough buggies to drive on the street and this one is being built to the off road leanings. I have driven and ridden with Scott enough to know he never looks at the speedo . . .And, I think the tach is more important. But, with a redline of 6300 he may not need a tach either.
See you at the next run!
David Barrett
Scott Drolet
MC Vice President
MC 47, DSB, RBC, Long Haul League, '64 Monocoque, '67 Manx, '73 Manxter, '64 Stainless Burro, '64 Corvair Burro, '65 Corvair Burro
http://www.ManxClub.com" onclick="window.open(this.href);return false;
http://www.SeaToSeaSafari.com" onclick="window.open(this.href);return false;
http://www.BurroBuggies.com" onclick="window.open(this.href);return false;
MC Vice President
MC 47, DSB, RBC, Long Haul League, '64 Monocoque, '67 Manx, '73 Manxter, '64 Stainless Burro, '64 Corvair Burro, '65 Corvair Burro
http://www.ManxClub.com" onclick="window.open(this.href);return false;
http://www.SeaToSeaSafari.com" onclick="window.open(this.href);return false;
http://www.BurroBuggies.com" onclick="window.open(this.href);return false;
-
- Posts: 200
- Joined: Tue Mar 30, 2010 5:00 am
- Location: Ventura, CA
Updating my '67 Manx UPDATED PHOTOS
I have driven and ridden with Scott enough to know he never looks at the speedo . .
At least Dave knows & understands who & what he is dealing with!
Michael Cates
ManxManiac
#958
Ventura, CA
Original Meyers Manx "Xena"
M1609C8S22
ManxManiac
#958
Ventura, CA
Original Meyers Manx "Xena"
M1609C8S22
-
- Posts: 400
- Joined: Mon Mar 01, 2010 6:00 am
Updating my '67 Manx UPDATED PHOTOS
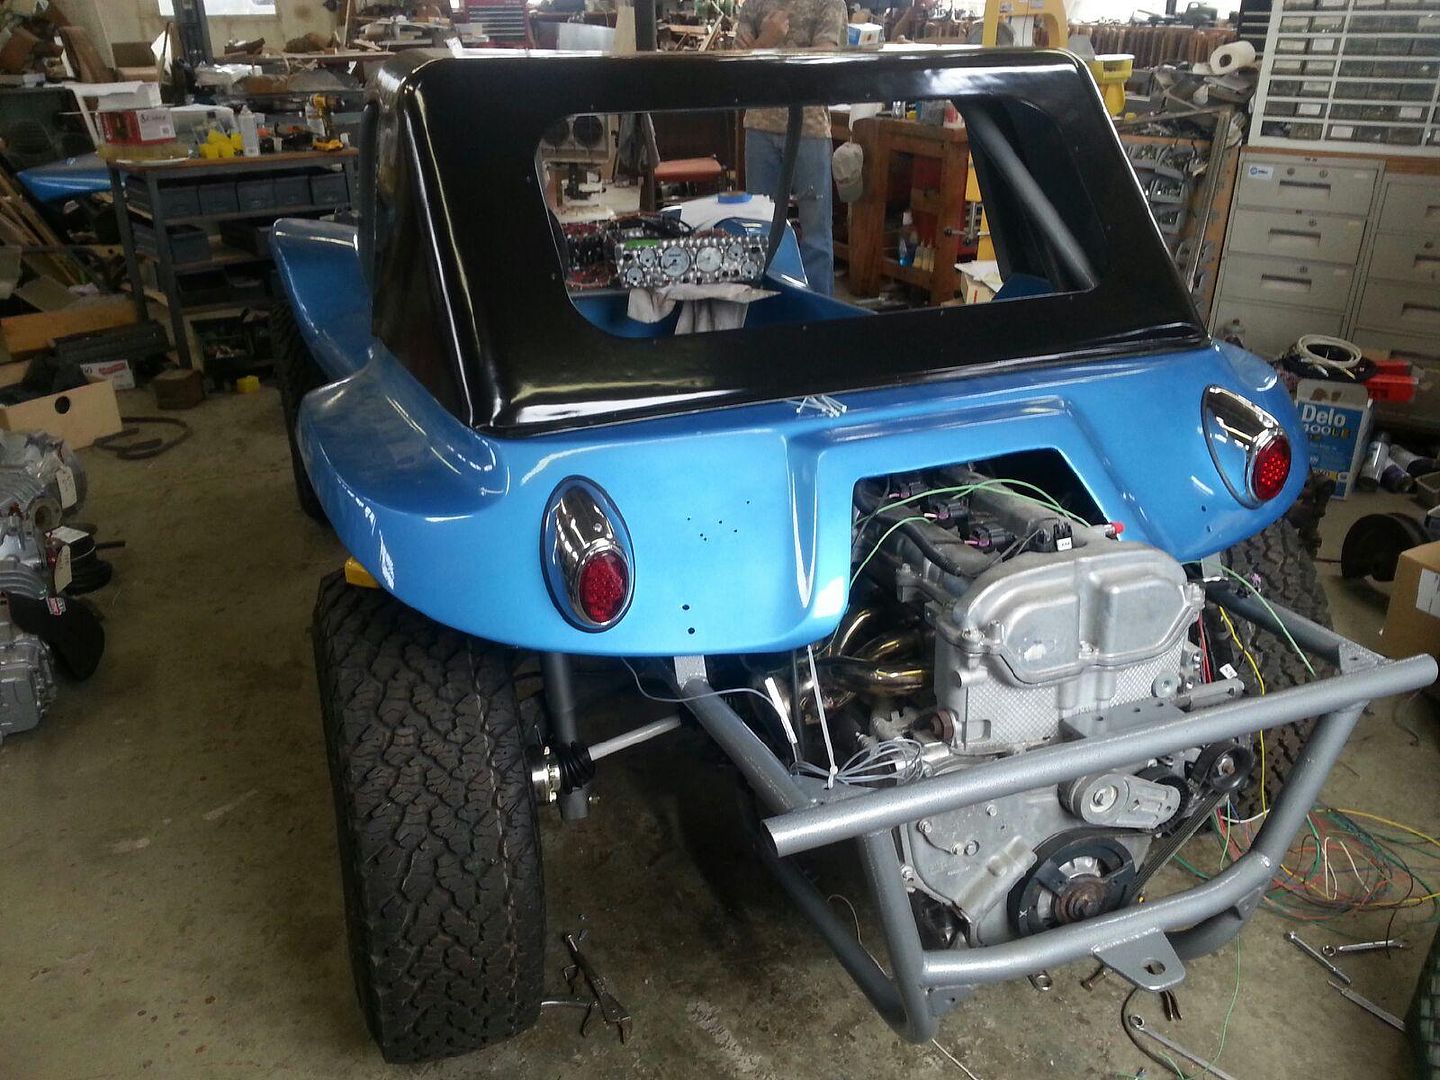
Here's the latest photos from Manx Chassis. David actually has it running now . . .
Scott Drolet
MC Vice President
MC 47, DSB, RBC, Long Haul League, '64 Monocoque, '67 Manx, '73 Manxter, '64 Stainless Burro, '64 Corvair Burro, '65 Corvair Burro
http://www.ManxClub.com" onclick="window.open(this.href);return false;
http://www.SeaToSeaSafari.com" onclick="window.open(this.href);return false;
http://www.BurroBuggies.com" onclick="window.open(this.href);return false;
MC Vice President
MC 47, DSB, RBC, Long Haul League, '64 Monocoque, '67 Manx, '73 Manxter, '64 Stainless Burro, '64 Corvair Burro, '65 Corvair Burro
http://www.ManxClub.com" onclick="window.open(this.href);return false;
http://www.SeaToSeaSafari.com" onclick="window.open(this.href);return false;
http://www.BurroBuggies.com" onclick="window.open(this.href);return false;
Updating my '67 Manx UPDATED PHOTOS
Wow that looks pretty serious!!
-
- Posts: 400
- Joined: Mon Mar 01, 2010 6:00 am
Updating my '67 Manx UPDATED PHOTOS
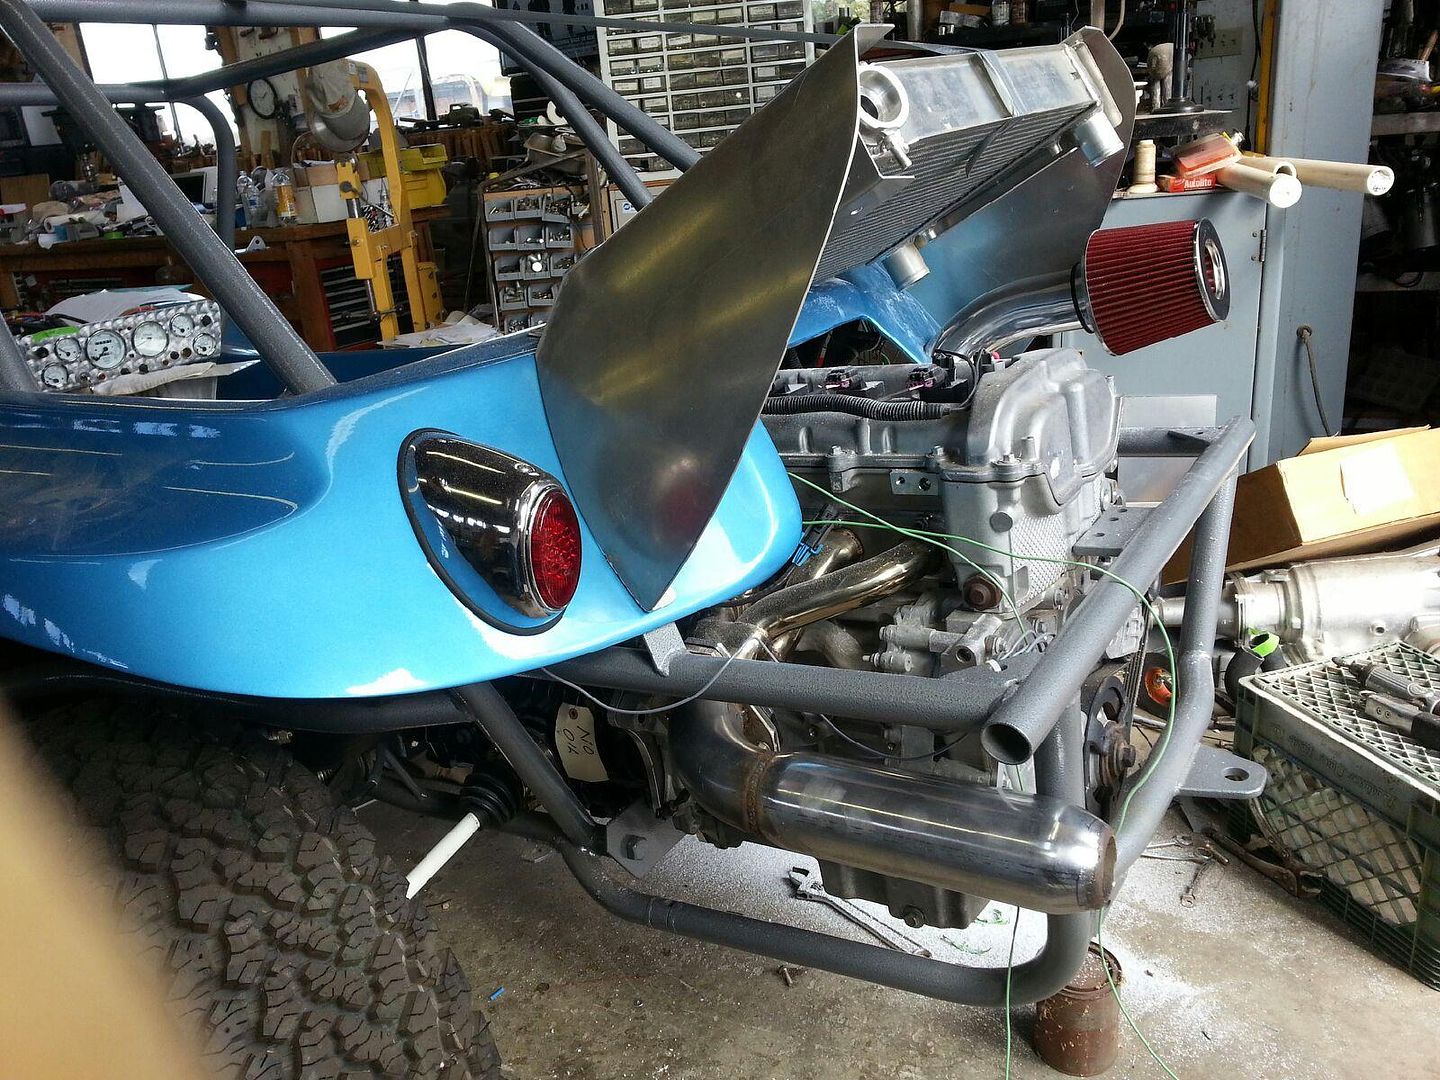
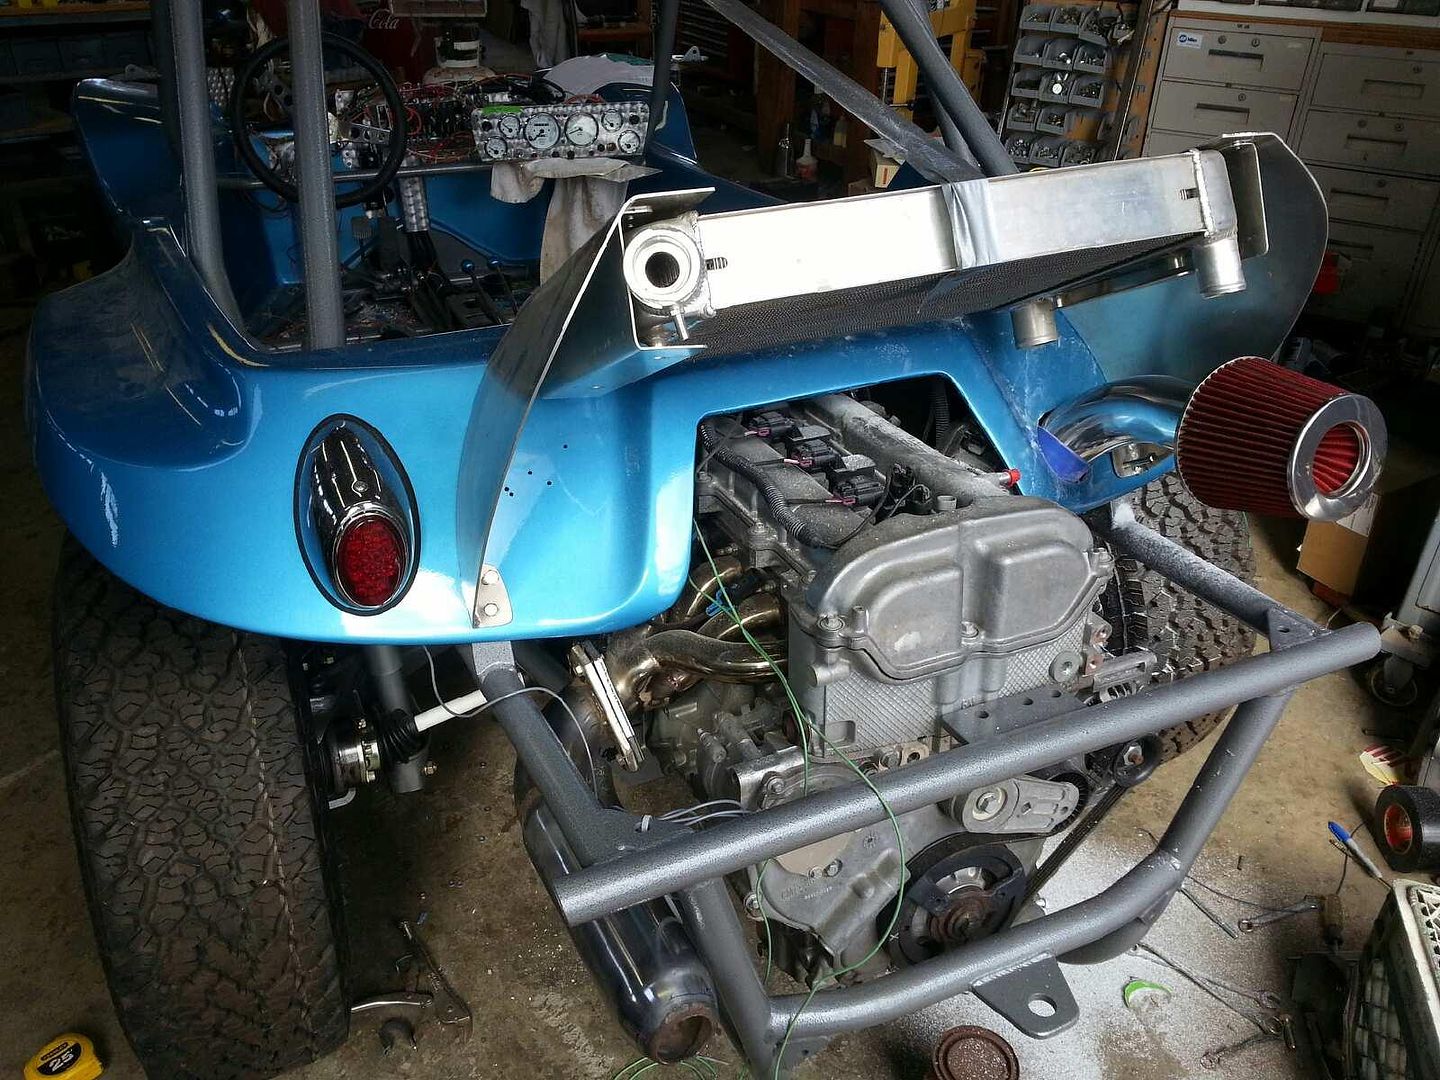
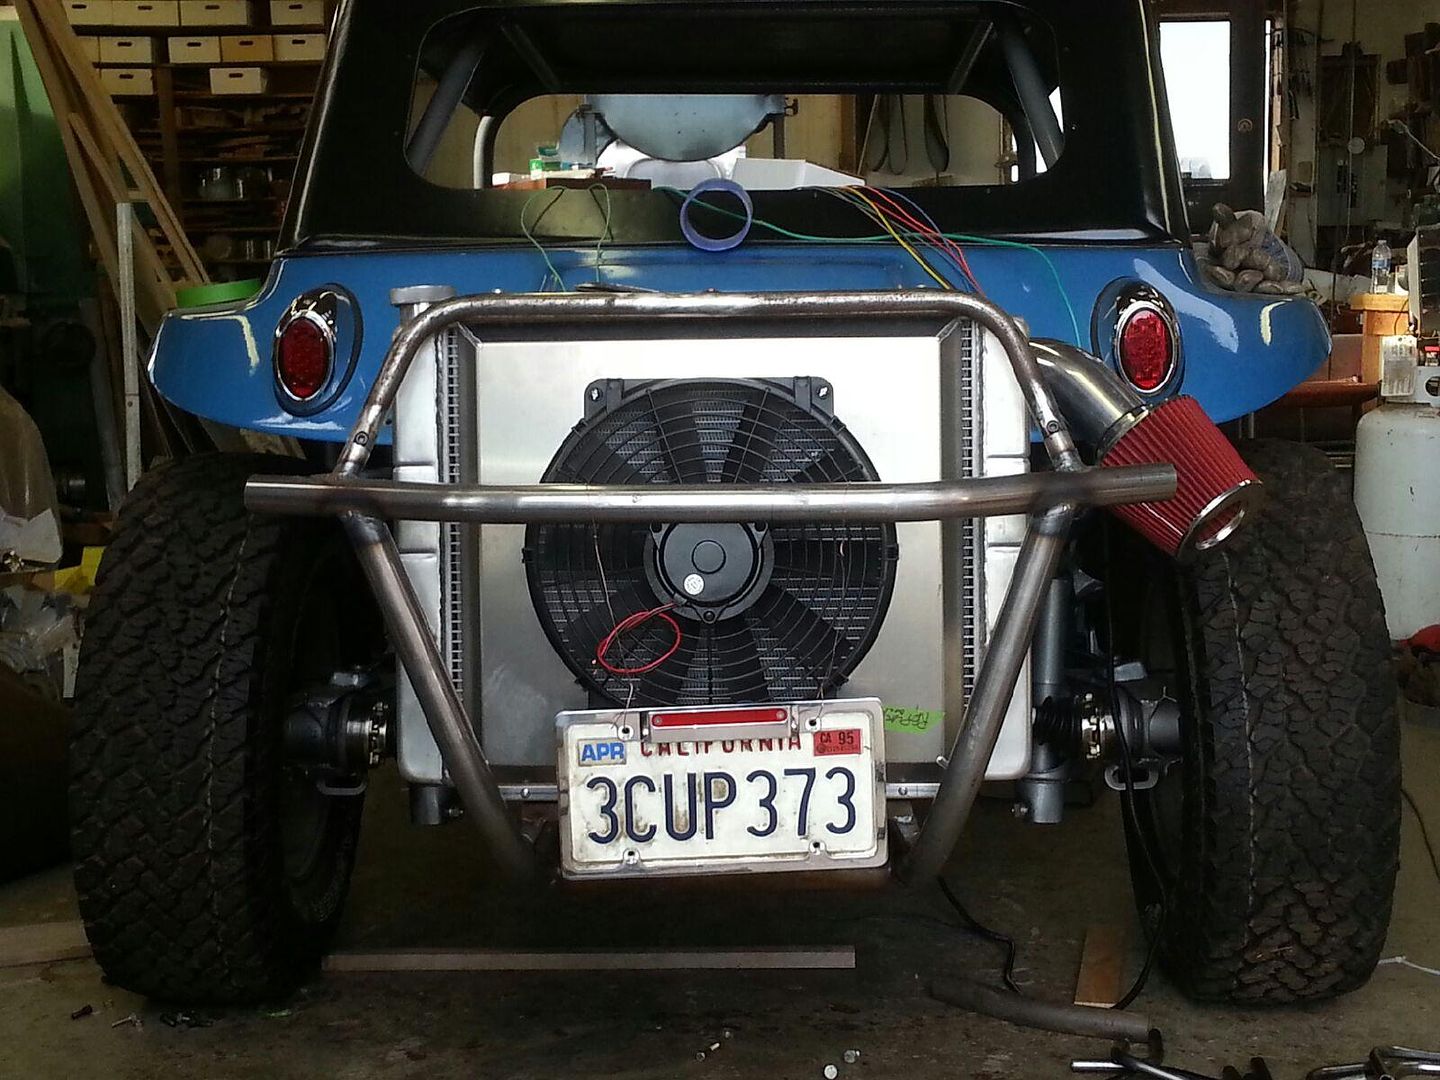
Neither David or I were crazy about the radiator wing . . . So it's going to go behind the engine instead. It'll increase the bumper length a tad, but it looks way better!
Last edited by Scott-Drolet on Mon Mar 03, 2014 1:16 am, edited 1 time in total.
Scott Drolet
MC Vice President
MC 47, DSB, RBC, Long Haul League, '64 Monocoque, '67 Manx, '73 Manxter, '64 Stainless Burro, '64 Corvair Burro, '65 Corvair Burro
http://www.ManxClub.com" onclick="window.open(this.href);return false;
http://www.SeaToSeaSafari.com" onclick="window.open(this.href);return false;
http://www.BurroBuggies.com" onclick="window.open(this.href);return false;
MC Vice President
MC 47, DSB, RBC, Long Haul League, '64 Monocoque, '67 Manx, '73 Manxter, '64 Stainless Burro, '64 Corvair Burro, '65 Corvair Burro
http://www.ManxClub.com" onclick="window.open(this.href);return false;
http://www.SeaToSeaSafari.com" onclick="window.open(this.href);return false;
http://www.BurroBuggies.com" onclick="window.open(this.href);return false;
- Mike-Presley
- Posts: 107
- Joined: Mon Dec 27, 2010 6:00 am
- Location: Barstow, Calif.
Updating my '67 Manx UPDATED PHOTOS
Tell us a little about the top, home made? What material, fiberglass or plastic, side curtains? I'm just trying to come up with some ideas to keep some water out if its a rainy day. The buggy looks like a fantastic project, everything is very clean.
-
- Posts: 400
- Joined: Mon Mar 01, 2010 6:00 am
Updating my '67 Manx UPDATED PHOTOS
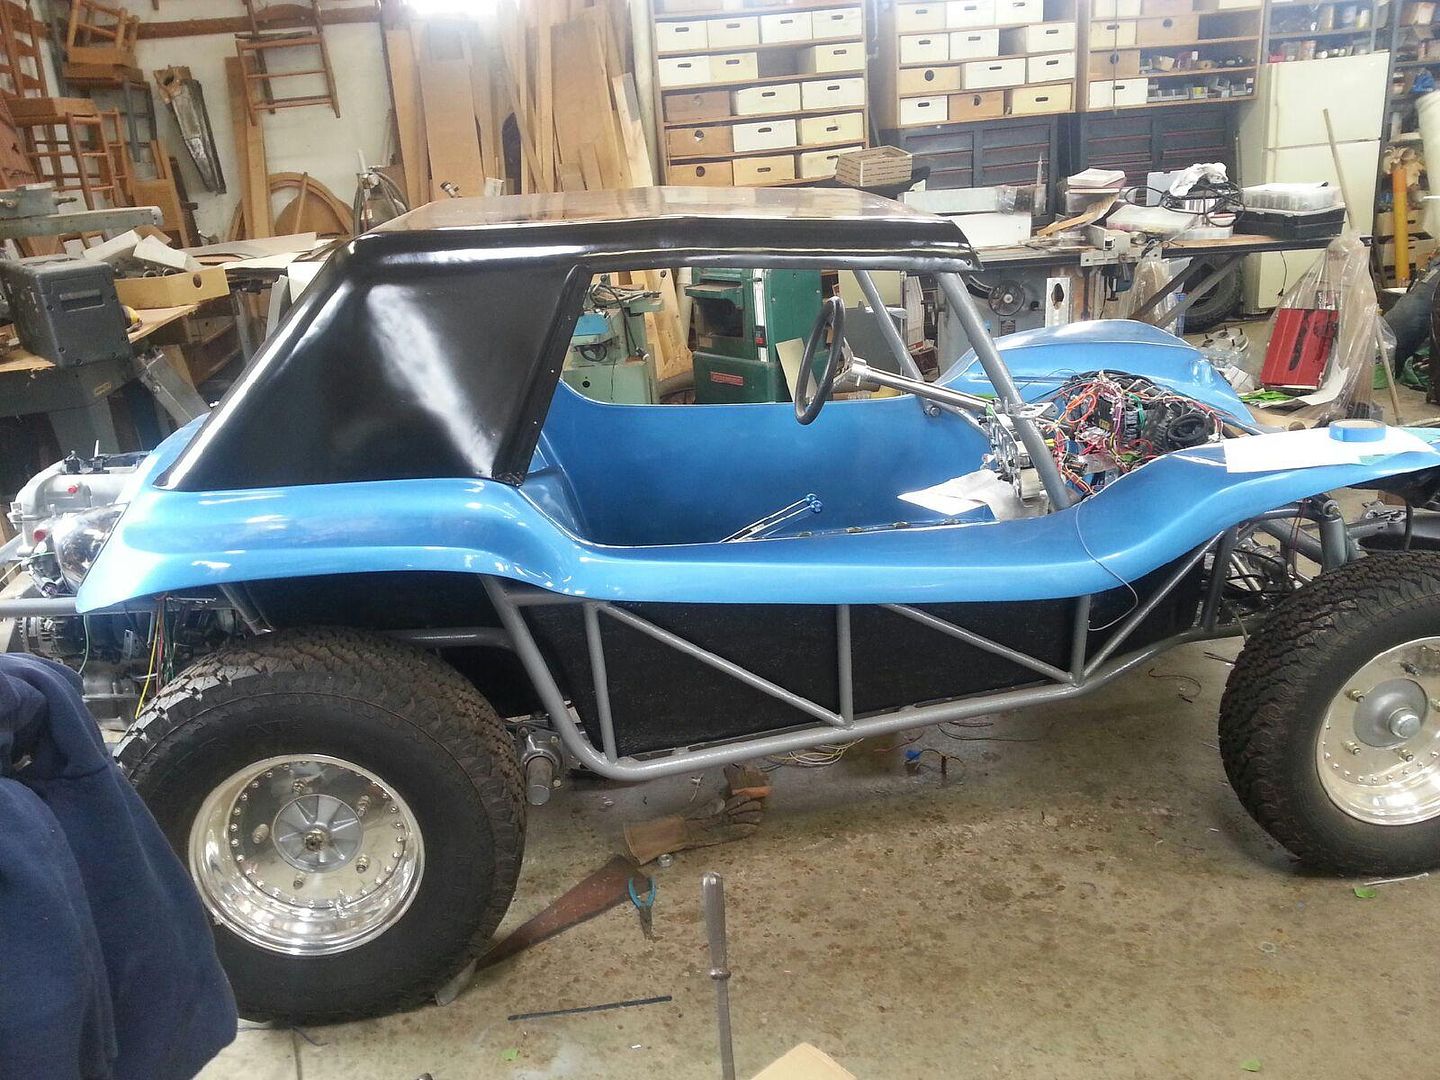
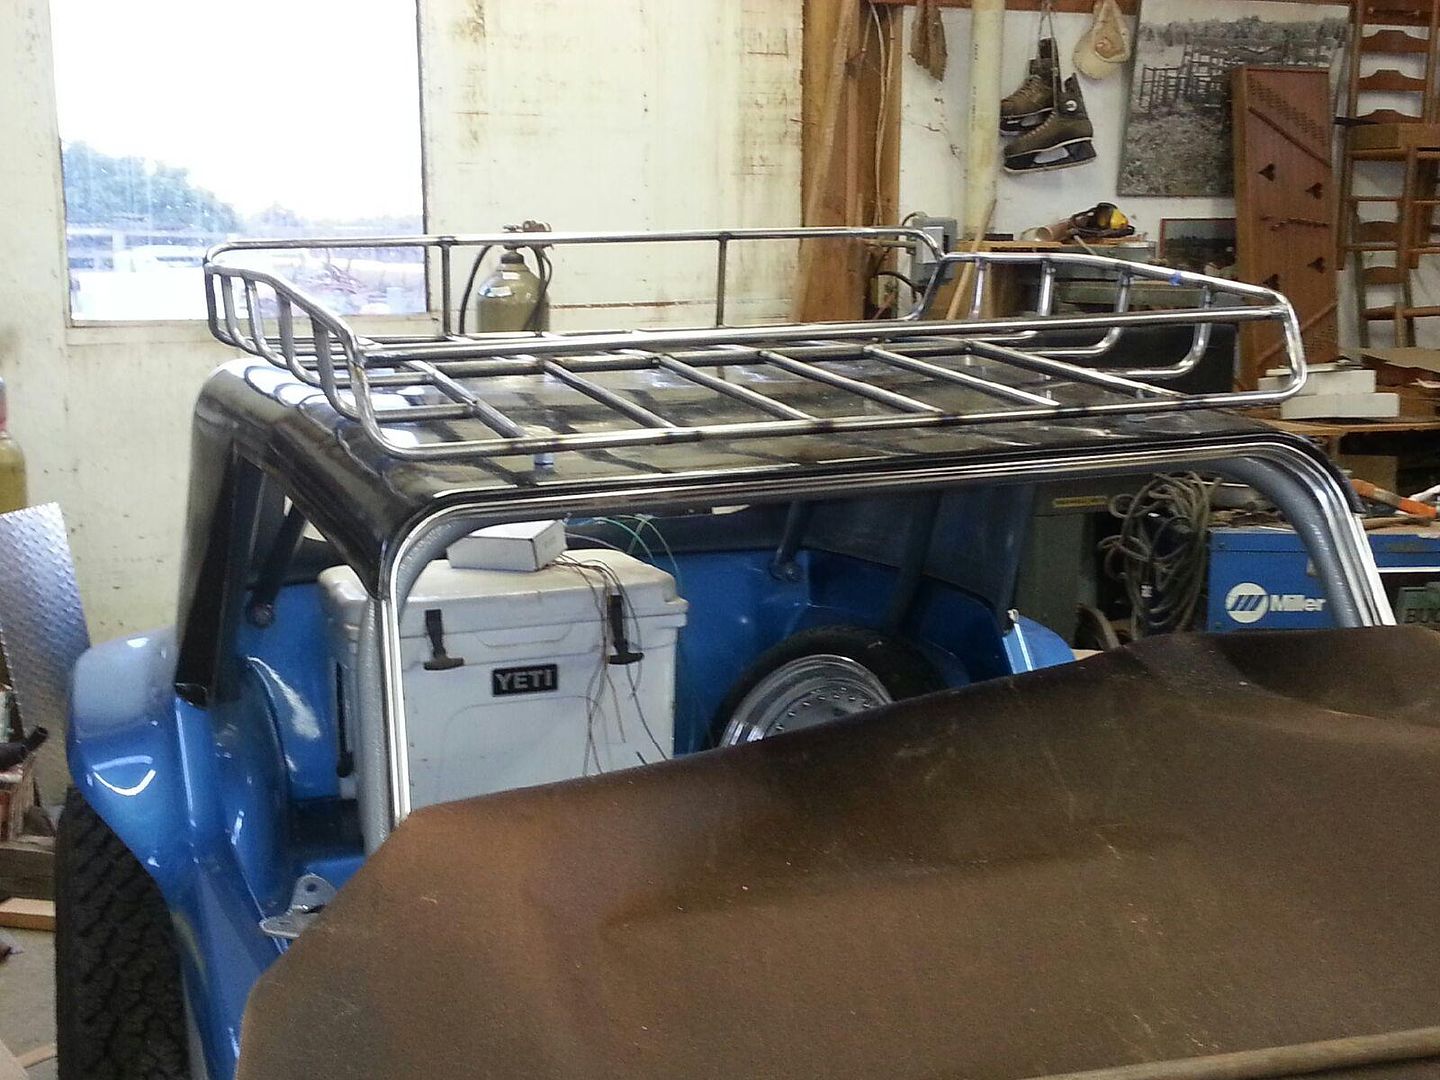
Hi Mike, I've gotten a couple questions about it. David Barrett ended up with it when he bought a used Meyers Manx 15 years ago. It's a one-off built by the guy he bought it from. Epoxy glass, hand laid cloth, and it even has a glass rear window. I saw it at Manx Chassis when I took my Manx in for David to restore and thought it was the nicest I had seen. It reminded me of the fiberglass top you used to be able to buy for the VW Thing 181. It never had a finish coat of paint on it until now. Anyway, long story short, David was willing to part with it and I'm the proud new owner. David had thought about producing them, but couldn't compete with the plastic ones. This top would have to sell for about $1,200- to cover the costs and make a small profit. It doesn't have side curtains . .yet. But I've got some ideas on how I could do that once it comes back home.
Scott Drolet
MC Vice President
MC 47, DSB, RBC, Long Haul League, '64 Monocoque, '67 Manx, '73 Manxter, '64 Stainless Burro, '64 Corvair Burro, '65 Corvair Burro
http://www.ManxClub.com" onclick="window.open(this.href);return false;
http://www.SeaToSeaSafari.com" onclick="window.open(this.href);return false;
http://www.BurroBuggies.com" onclick="window.open(this.href);return false;
MC Vice President
MC 47, DSB, RBC, Long Haul League, '64 Monocoque, '67 Manx, '73 Manxter, '64 Stainless Burro, '64 Corvair Burro, '65 Corvair Burro
http://www.ManxClub.com" onclick="window.open(this.href);return false;
http://www.SeaToSeaSafari.com" onclick="window.open(this.href);return false;
http://www.BurroBuggies.com" onclick="window.open(this.href);return false;
- Mike-Presley
- Posts: 107
- Joined: Mon Dec 27, 2010 6:00 am
- Location: Barstow, Calif.
Updating my '67 Manx UPDATED PHOTOS
Nice score on the top. It will make a nice addition to the buggy. It does give me some ideas.
-
- Posts: 400
- Joined: Mon Mar 01, 2010 6:00 am
Updating my '67 Manx UPDATED PHOTOS
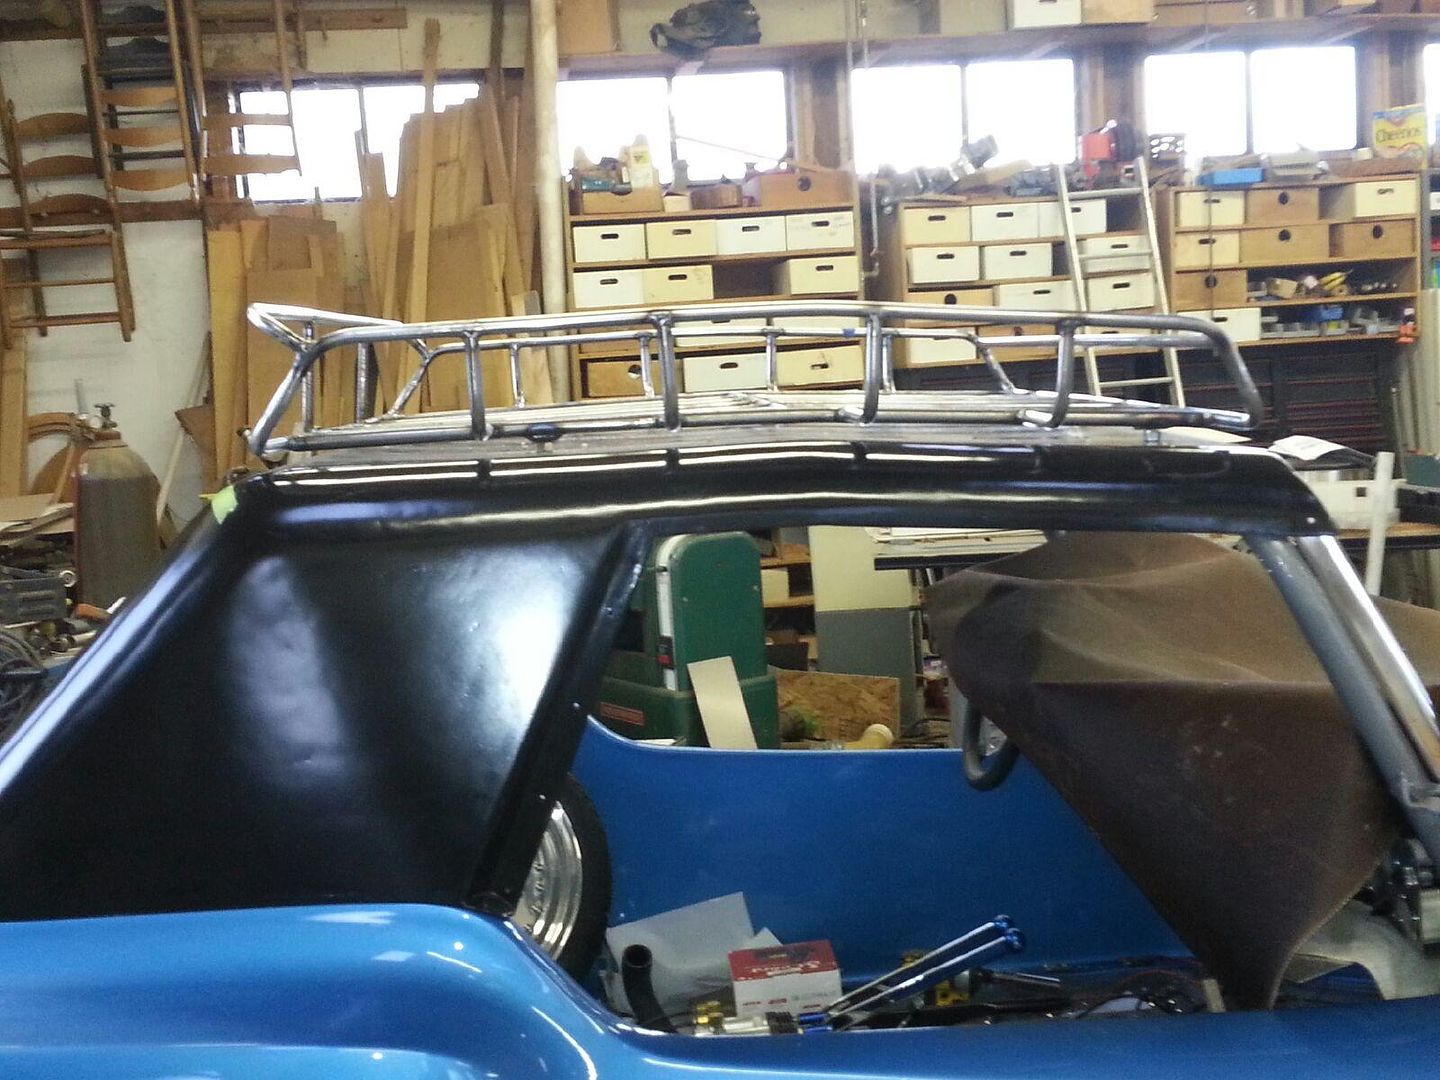
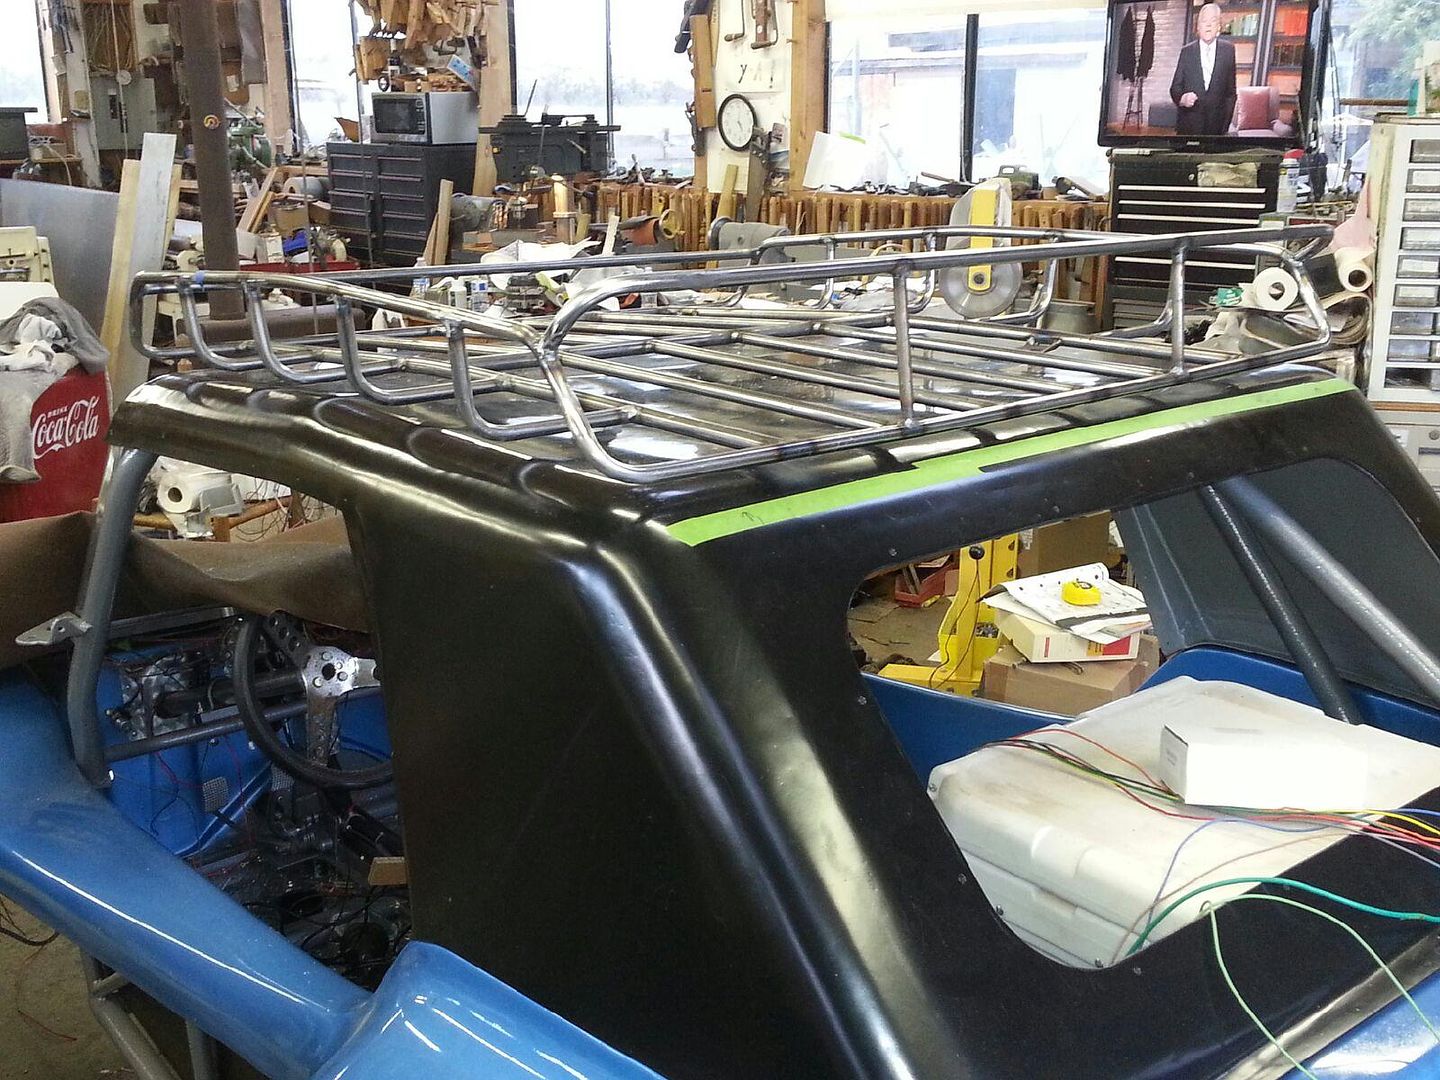
Here's some pictures of the roof rack. It has the angle in it to match the one in the top and bolts through the fiberglass top onto the roll cage.
Scott Drolet
MC Vice President
MC 47, DSB, RBC, Long Haul League, '64 Monocoque, '67 Manx, '73 Manxter, '64 Stainless Burro, '64 Corvair Burro, '65 Corvair Burro
http://www.ManxClub.com" onclick="window.open(this.href);return false;
http://www.SeaToSeaSafari.com" onclick="window.open(this.href);return false;
http://www.BurroBuggies.com" onclick="window.open(this.href);return false;
MC Vice President
MC 47, DSB, RBC, Long Haul League, '64 Monocoque, '67 Manx, '73 Manxter, '64 Stainless Burro, '64 Corvair Burro, '65 Corvair Burro
http://www.ManxClub.com" onclick="window.open(this.href);return false;
http://www.SeaToSeaSafari.com" onclick="window.open(this.href);return false;
http://www.BurroBuggies.com" onclick="window.open(this.href);return false;