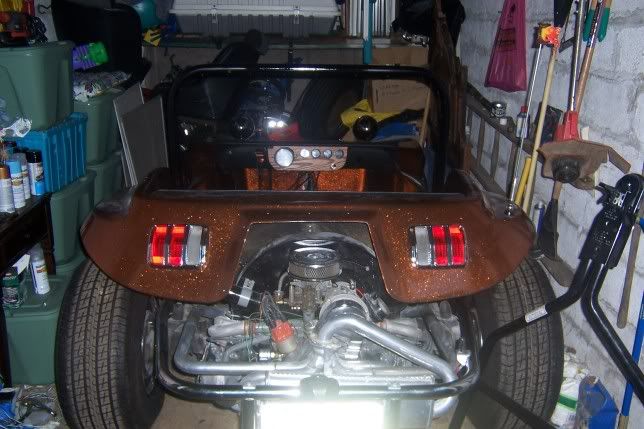
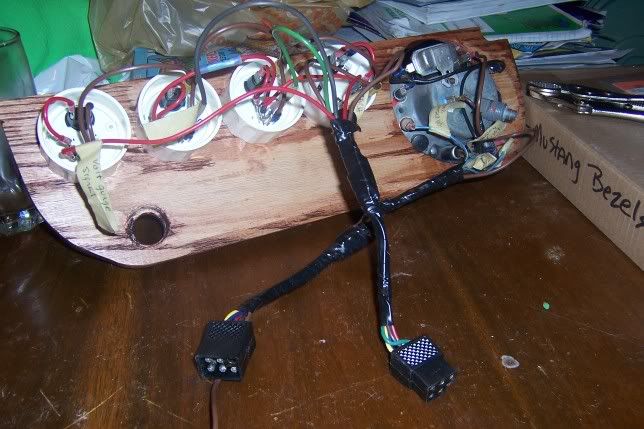
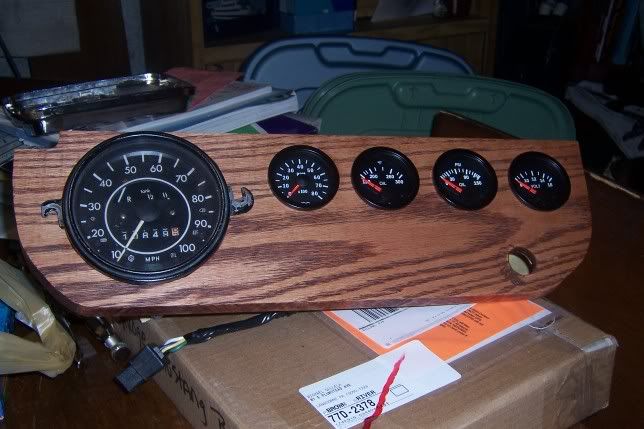
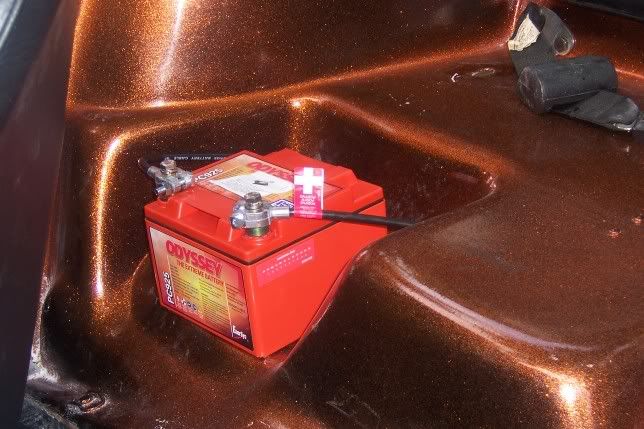
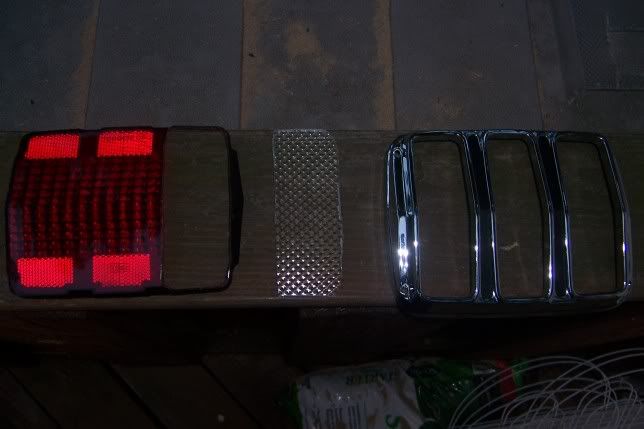
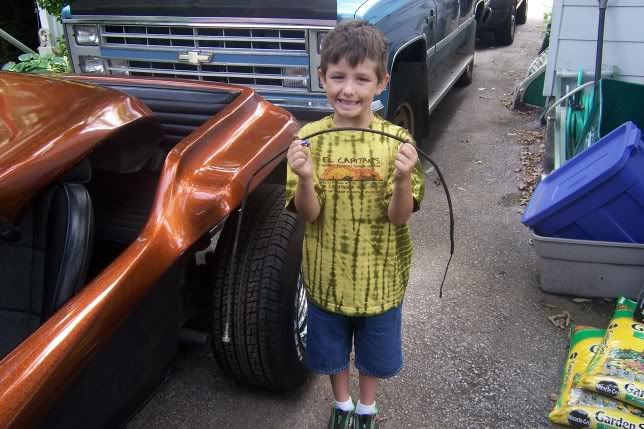
looking good. got the wheels and tires on. got the dash plate cut out nd stained last night. cut the dash to make room for the new gauges.wiring is done except for installing the senders. (need the right size wrench to get the stock one out).stripped and painted the roll bar. got the new little battery installed. going to repaint with epoxy appliance paint for a tougher finish. got the clear lenses cut out and frosted and then installed into the tail light bezels. hopefully final sand the dash plate tonight and get the gauges in.maybe even bolt it up and put the hood back on if i get enough time! and my helper changed out the old speedo wire. looking at next week to be back on the road! :driving:
Good job getting it back together... I know what it takes. I'm a little anoyed the YOU get to work on your ride week nights! I only get week-ends... BTW, doubt you're going to get 90 volts out of that small battery, time to change your name!!! lol
90, You may want to expand the speedo hole and install it from the rear. It will make for a cleaner installation. You would simply have two small bolts next to the speedo. Otherwise, look great.
i don't know if i could do that. the wood is an inch thick. that would look cleaner though. hope i don't think that everytime i look at it now ! LOL. but its already a bit wide at the top in order to get it to fit from the front, so the bezel is covering that up some.
I think I have to agree with SiggyManx about considering mounting the spedo from the back side especially for looks. If you are any good with a router then you could pretty easily use a straight fluted router bit and mortise the back side of the plate to about a quarter of an inch or so from the front side. Then you could use a Roman OG type bit to radius the remaining front edge for a nice appearance but leave the back (recessed) side flat so that the spedo mounts firmly. It will be very easy to measure and pre set your straight flute cut depth for a nice smooth recess. Then as with Siggymanx's dash panel all you would have are (2) small bolt holes either side and if you are really good you can recess those as well and then use matching and stained wood plugs to cover the (2) mounting bolts. Just my :2cents: worth. Nice job 90 volts now get back to work on it so you can get it back on the road while the weather is good.
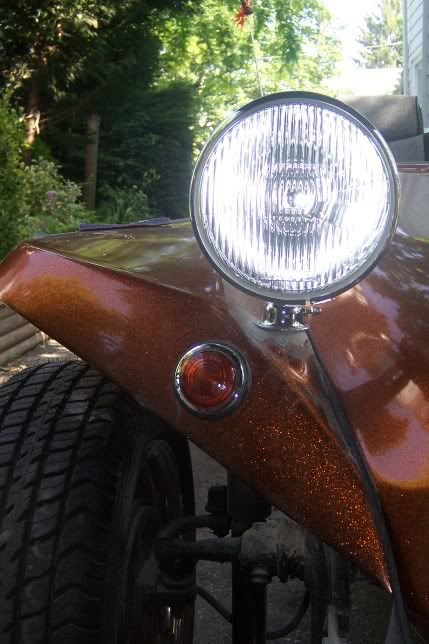
well, so much for that idea the headlight mount broke, so now i have fiberglass to repair. then i tried to start it. nothing. just turns over, doesn't start. i am really getting tired of this. as much money as i have in this thing it should run like a new car! looks like the spark is getting at least to the distributor cap. good fuel pressure. and now i can't even find my muir book great- just great!
Check to see that the fuel is squirting too. I chased a starting problem on my pinto buggy for days, I got pissed at it and smacked the air plenum with a mallet. I think that did something to the needle and seat because it fired right up. It is usually something simple, just be careful with the hammers.
well, looks like the headlight mount is fixed anyway. i really hated digging into the new paint with the 60 grit! now just need to wet sand finish and go see if they have any of that metalflake left to touch it up with. but it is still moving along. just a speed bump. i think i am getting used to them now!
Mike, You didn't say exactly what the problem was with the headlight mount but one thing I have been doing to prevent the nut from pushing thru the fiberglass is to make a fiberglass plug for the cup that mounts to the body. Originally the pivot cup was a solid piece and there were no problems with the headlight pedestal. Pictures with captions are on this page. http://www.manxgallery.org/gallery/album224?page=2
thanks. i used that actually. it works GREAT!those cups made a perfect support. this was a hole - the mount boss just broke through and i had a hole in the body.i think the problem was that it was all torn away before and it was repaired by the paint shop when it went in and they did a ****ty job of it. real thin. and it broke through. i redid it and layered it twice on the underside and a coat on the top to grab on there also and then formed it again. worked out and looks real strong as far as i can tell.
all thats left now are the seats and windshield! need to extend a few wires that came out too short.and to get it running again. but thats it. bolted up the dash (winter project to go make a new one with speedo from the back and having the speedo refurbed), roll bar repainted with epoxy paint and bolted back in,wired up the horn, wired up the buggywhip (what a pain running wires through tube bmpers!),tailights finished and bolted up. looking at next week (is there an emoticon for crossed fingers?). looking at my deadline of july 4th for the parade here in town.still looking good.
WTG 90 !!! Your geting there. Sorry to hear about your glass repair.. That sux. All in all, its looking good. Hope tp see you on the road soon! :driving:

 but it is still moving along. just a speed bump. i think i am getting used to them now!
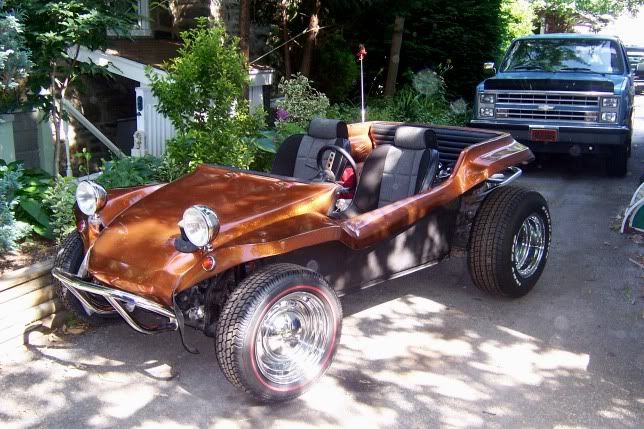


 Pictures with captions are on this page. http://www.manxgallery.org/gallery/album224?page=2