Wreckers 8" Beam Fit & Roll Cage
-
Scott-Drolet
- Posts: 400
- Joined: Mon Mar 01, 2010 6:00 am
Wreckers 8" Beam Fit & Roll Cage
You do great work Jay. You should market those mirrors, having something that adjustable would be terrific!
Scott Drolet
MC Vice President
MC 47, DSB, RBC, Long Haul League, '64 Monocoque, '67 Manx, '73 Manxter, '64 Stainless Burro, '64 Corvair Burro, '65 Corvair Burro
http://www.ManxClub.com" onclick="window.open(this.href);return false;
http://www.SeaToSeaSafari.com" onclick="window.open(this.href);return false;
http://www.BurroBuggies.com" onclick="window.open(this.href);return false;
-
marklandon

- Posts: 62
- Joined: Sat Jul 02, 2011 5:00 am
- Location: BHC
Wreckers 8" Beam Fit & Roll Cage
What is the name of the shop that did the roll bar??? Thanks
Wreckers 8" Beam Fit & Roll Cage
The Roll Bar was made at Jonny Lightning 520 Railroad St. Corona, Calif. ( 951 278-2233 ) ( http://www.jonnylightning.net/ )
Jay - We Sacrifice Quality So You Can Save
1969 Sand Rover T pickup
1962 Baja / 1986 CT110 Honda Trailbike
1973 Thing / Yorba Linda,Ca.
MC 2693, RBC, DSB, SoCalBajas, hondatrailcts, BurroBuggies
1969 Sand Rover T pickup
1962 Baja / 1986 CT110 Honda Trailbike
1973 Thing / Yorba Linda,Ca.
MC 2693, RBC, DSB, SoCalBajas, hondatrailcts, BurroBuggies
Wreckers 8" Beam Fit & Roll Cage
Good stuff!
Mike Dario
Mohave Valley, AZ
Manx Club #957
Manx Club President
Tow'd (Hers)
Manxvair (His)
Manxter Dual Sport #30 Baja Edition #2 (Ours)
Resorter #19-Fuscia(under construction)
Mohave Valley, AZ
Manx Club #957
Manx Club President
Tow'd (Hers)
Manxvair (His)
Manxter Dual Sport #30 Baja Edition #2 (Ours)
Resorter #19-Fuscia(under construction)
Re: Wreckers 8" Beam Fit & Roll Cage
Before Wrecker's first outing we decided to try our hand in making a top. We picked up some canvas material at the local fabric shop, I drew out a pattern and Christy did the hard work of cutting it out and sewing it together. We really liked the design of it but ran into a few problems. The canvas from the yardage shop stretched too much and allowed the windshield mount to come undone.
So now we are working on top #2. We picked up our new material at
Keyston Bros. 1151 No. Kraemer Place Anaheim, CA 92806-1923 714-238-0049 http://www.keystonbros.com/
They sell a lot of automotive and marine material. We bought sun6028 Sunbrella Toast 60" wide $18.43 a yard I bought 3 yards $55.29
We bought a little extra yardage to play with and allow for mistakes.
We used an aluminum insert for the windshield. On line most everything I read gave you a thickness measurement on the insert but now how much material you were using. You do need both measurements for a tight fit. The tighter the better.
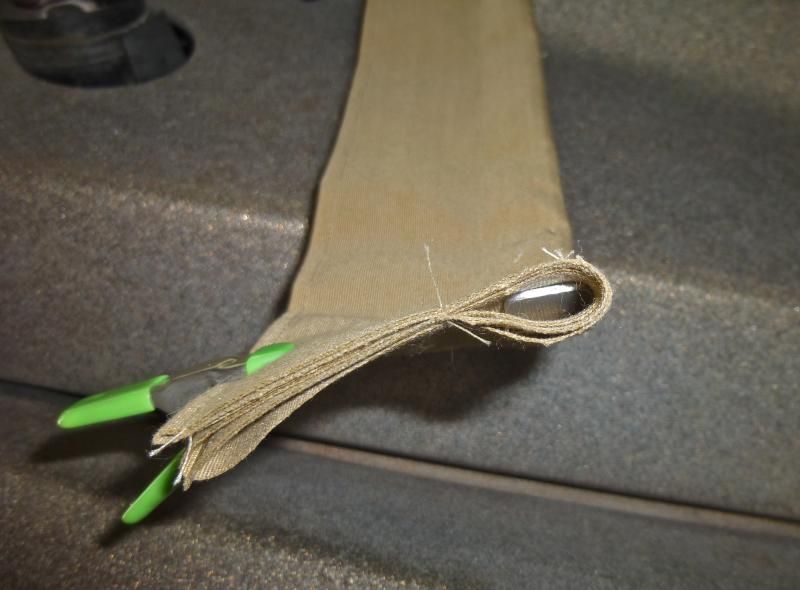
We found that a tight pocket worked best and didn't sew it closed at the end. This allows you to remove the aluminum insert. The insert does not have to be pre-bent to the windshield, this allowed Christy to sew the pocket with the insert in. If it was pre-bent Christy's machine was unable to sew the pocket correctly due to the bend. Afterwards to my surprise, Christy grabbed the front of the top, tilted it vertical, inserted her end then started to bend it into the slot, just like she knew what she was doing. We left the end open to allow for removal of the insert and to be able to wash the top. Plus, if the fit isn't tight you can get a thicker insert. Our aluminum insert was about .062 ( Schorr Metals Inc. 837 S. Kraemer Blvd. Placentia, Ca. 92870 714 630-1962
http://www.schorrmetals.com/ They cut me two pieces for $8.14 ) and we used 3 fold overs our canvas material which is 6 thicknesses of material measuring at .021 X 6 = .126 with a total of .188. Windshield gap is close to .200 and 1/2 " deep. Please use my calculations as a guide and not as a true measurement. Our first attempt of material insert was under the .200 but would not fit into the groove completely. Who would have thought, we think the material was gathering a little that is why it is important to keep the insert pocket tight.
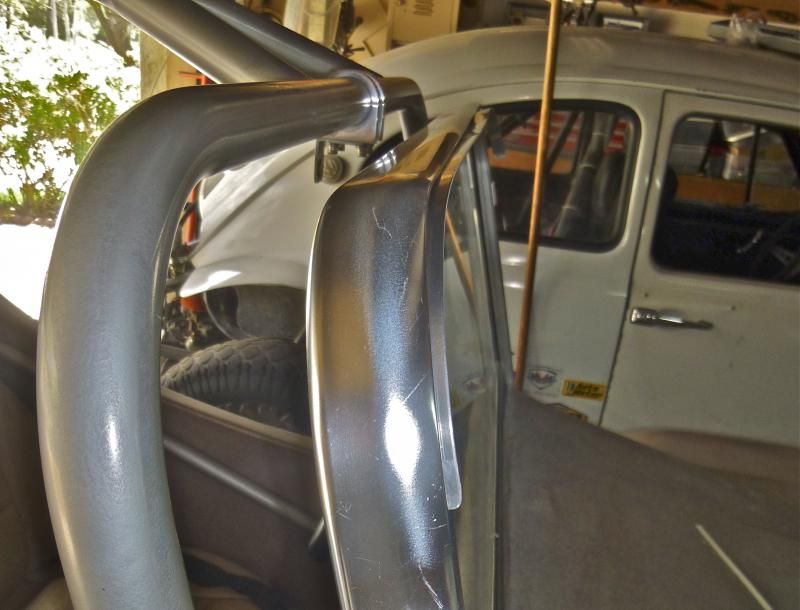
This photo shows the insert installed in the windshield gap.
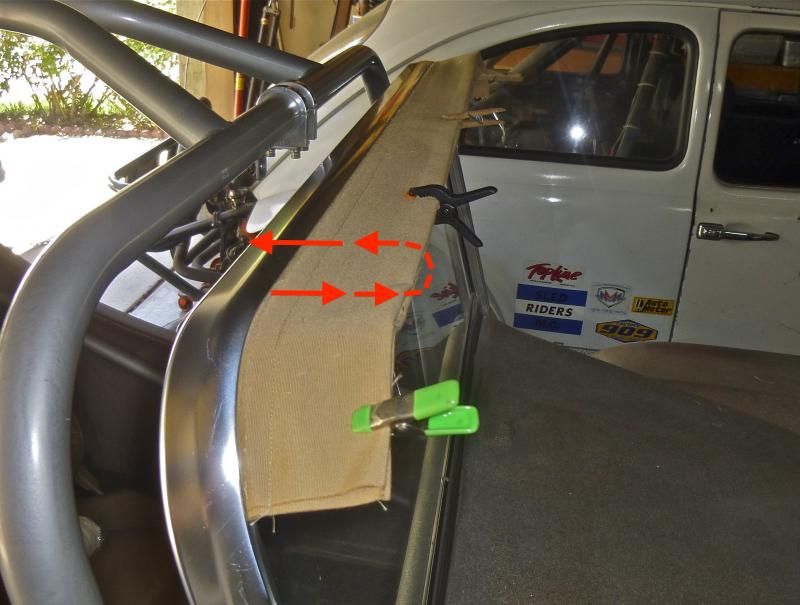
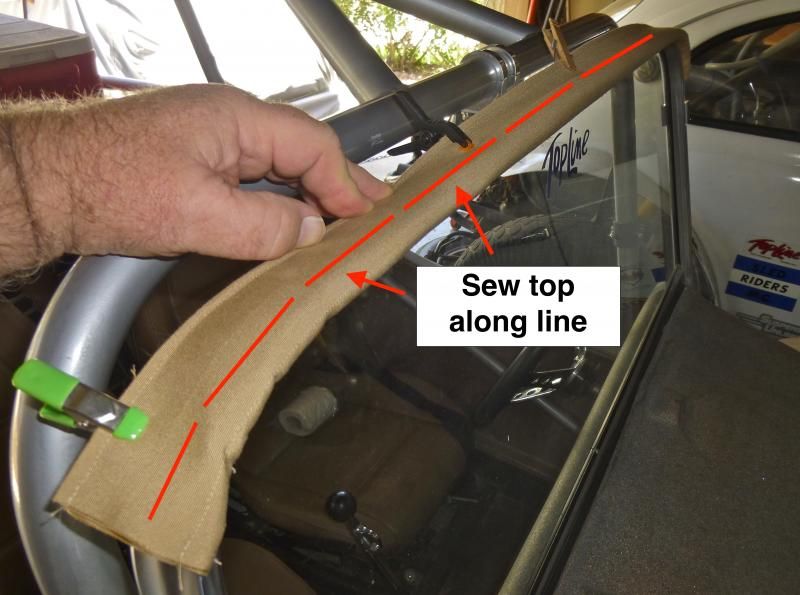
Red line shows where to sew the top on. Closer to the front made the top look like one piece.
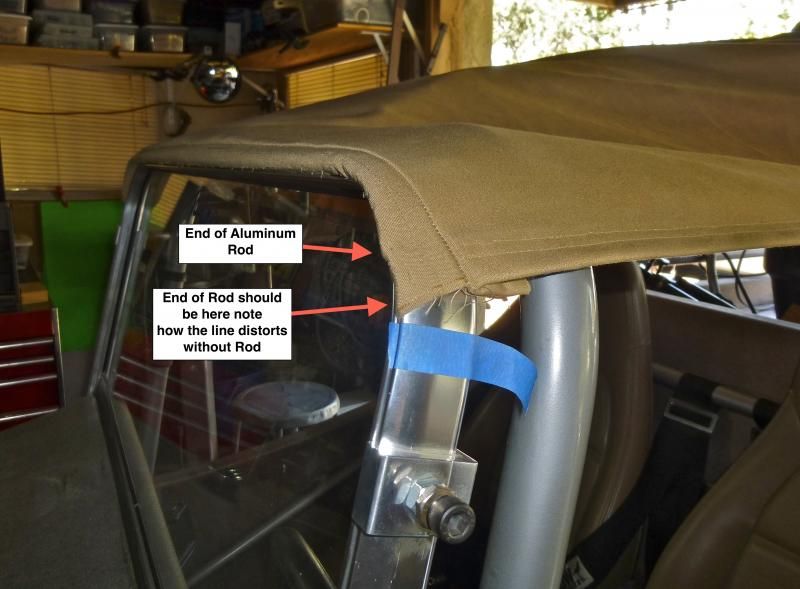
We had to lengthen our aluminum insert from 41" to 44" the new top width. Note in the photo how it pulls funny from the end of the old insert.
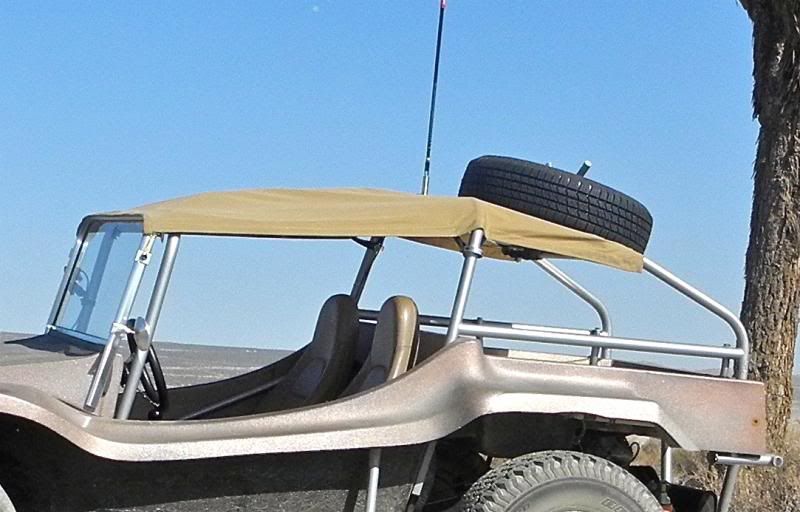
With the length of my top, we added some side attaching points. Christy found the same color elastic plus she made the side hem 3 folds which helped stabilize the top.
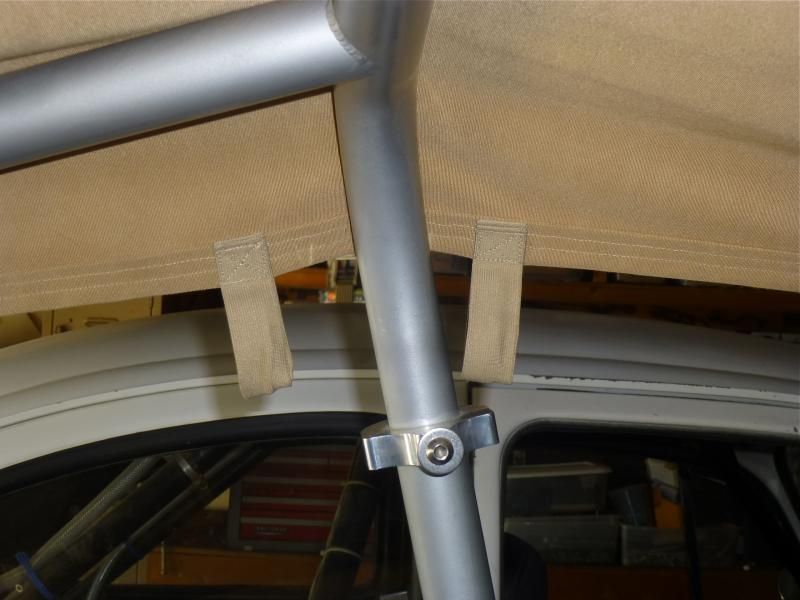
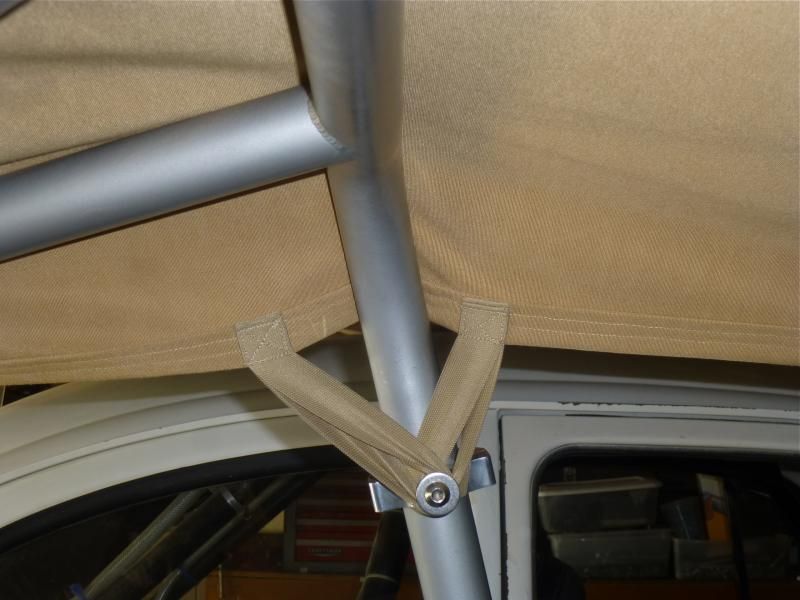
At the rear of the top we used 2 different sizes of Parachute buckles purchased at JoAnn's fabric shop in Yorba LInda.

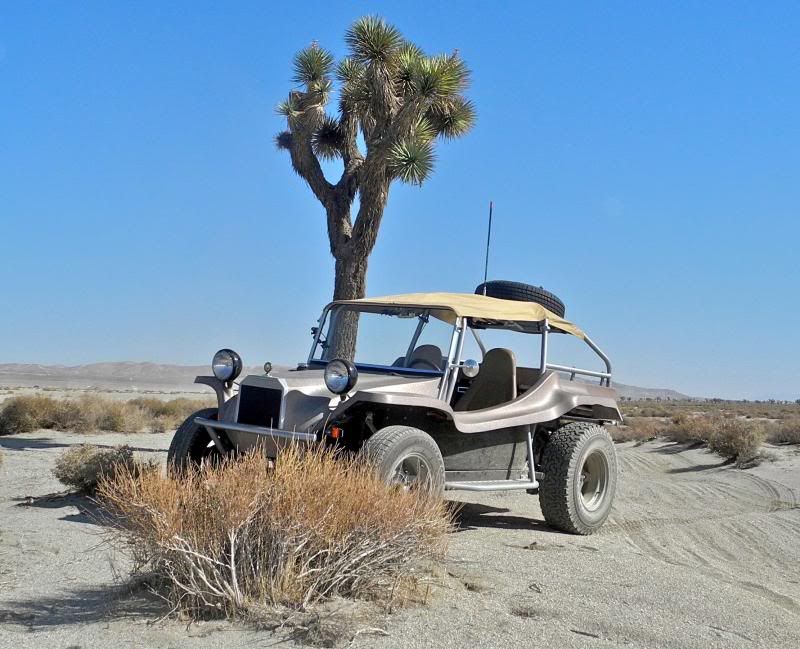
The top is not completed yet, I did a test run on the freeway at 65 mph so far so good. I'll post any updates.
So now we are working on top #2. We picked up our new material at
Keyston Bros. 1151 No. Kraemer Place Anaheim, CA 92806-1923 714-238-0049 http://www.keystonbros.com/
They sell a lot of automotive and marine material. We bought sun6028 Sunbrella Toast 60" wide $18.43 a yard I bought 3 yards $55.29
We bought a little extra yardage to play with and allow for mistakes.
We used an aluminum insert for the windshield. On line most everything I read gave you a thickness measurement on the insert but now how much material you were using. You do need both measurements for a tight fit. The tighter the better.
We found that a tight pocket worked best and didn't sew it closed at the end. This allows you to remove the aluminum insert. The insert does not have to be pre-bent to the windshield, this allowed Christy to sew the pocket with the insert in. If it was pre-bent Christy's machine was unable to sew the pocket correctly due to the bend. Afterwards to my surprise, Christy grabbed the front of the top, tilted it vertical, inserted her end then started to bend it into the slot, just like she knew what she was doing. We left the end open to allow for removal of the insert and to be able to wash the top. Plus, if the fit isn't tight you can get a thicker insert. Our aluminum insert was about .062 ( Schorr Metals Inc. 837 S. Kraemer Blvd. Placentia, Ca. 92870 714 630-1962
http://www.schorrmetals.com/ They cut me two pieces for $8.14 ) and we used 3 fold overs our canvas material which is 6 thicknesses of material measuring at .021 X 6 = .126 with a total of .188. Windshield gap is close to .200 and 1/2 " deep. Please use my calculations as a guide and not as a true measurement. Our first attempt of material insert was under the .200 but would not fit into the groove completely. Who would have thought, we think the material was gathering a little that is why it is important to keep the insert pocket tight.
This photo shows the insert installed in the windshield gap.
Red line shows where to sew the top on. Closer to the front made the top look like one piece.
We had to lengthen our aluminum insert from 41" to 44" the new top width. Note in the photo how it pulls funny from the end of the old insert.
With the length of my top, we added some side attaching points. Christy found the same color elastic plus she made the side hem 3 folds which helped stabilize the top.
At the rear of the top we used 2 different sizes of Parachute buckles purchased at JoAnn's fabric shop in Yorba LInda.
The top is not completed yet, I did a test run on the freeway at 65 mph so far so good. I'll post any updates.
Re: Wreckers 8" Beam Fit & Roll Cage
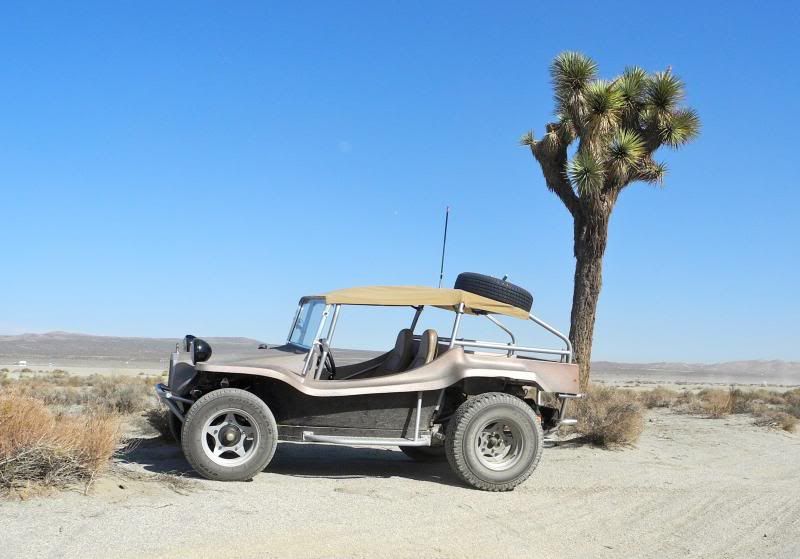
A day trip to El Mirage Dry lake Calif.
Re: Wreckers 8" Beam Fit & Roll Cage
Volkswagen of orange Car show.

Re: Wreckers 8" Beam Fit & Roll Cage
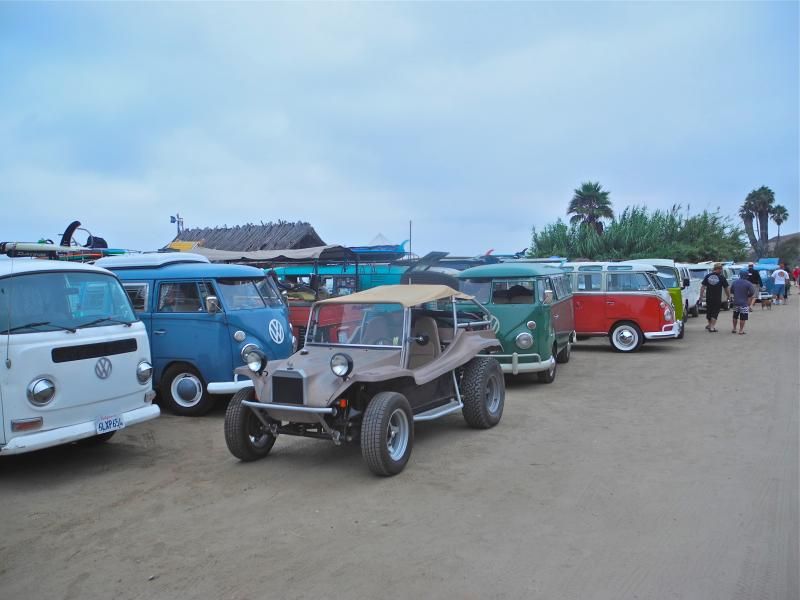
" Big Wednesday " at San Onofre State Beach August 13 2014 -