Storage Box Build
Posted: Thu Jan 15, 2015 5:03 am
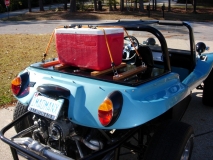
About eight years ago I went in search of a solution to the problem of how to store and secure items in our dune buggy when we were out and about. The first thing I found was a fiberglass storage box made by Bandit Buggies in NV. Since the removable box was a bit pricey I wanted to make sure it would fit in the seating area of our Manx. Initially they were helpful in providing some dimensions but then stopped communicating with me. On to plan "B". Since I know my way around a table saw I figured I might be able to build one out of plywood that would meet my needs. What you'll see in the following pictures is what I built all those years ago and still use. Since I've been asked about this box from time to time I'll try to provide as much information as I can remember. I hope this might help someone.
There are more pictures in my gallery.
Bud
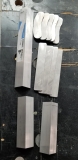
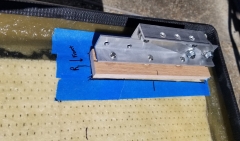
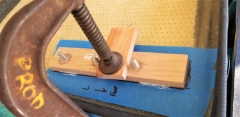
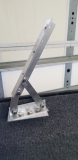
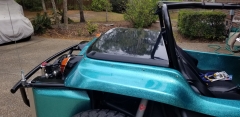
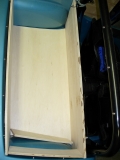
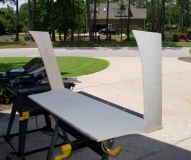
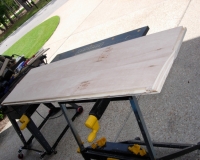
First thing I learned, as others have too, is that our beloved dune buggy bodies are not symmetrical therefore this box had to be built one piece at a time in the buggy. I started with the bottom/seat piece and cut it in the the shape to fit the seating area. Second piece was the back. While this might sound simple, remember what I said about a lack of symmetry. Third piece was the front. I knew I wanted the box to fit snug but not tight (so I could remove it but it wouldn't slide around) so I mocked up the front piece to have the same angle as the roll bar. Additionally, I wanted this box to be sturdy so I notched along the bottom edge of the front/face piece to fit over the bottom. Additionally, I wanted the sides and back pieces to sit above the edge of the seating area and I would "groove" the top to fit over them creating a water tight fit (you'll see this in later pictures. I used 3/8 inch sanded plywood for the box base, back, and sides. I used 3/4 inch sanded plywood for the front/face and top. In order to get the front/face piece to fit between the roll bar and the tire wells, I have to bevel the edges around the tire well. Here are some pictures:
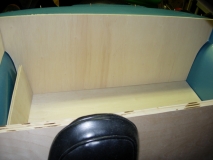
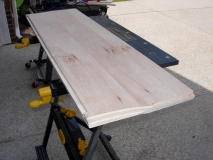
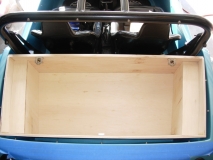
Next came the side pieces. I again "grooved" the front/face piece for the sides to fit and secure to the front more securely. Each side is VERY different from one another.
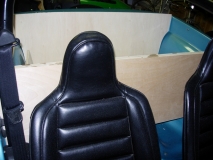
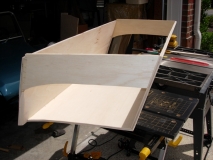
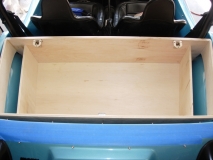
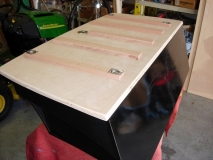
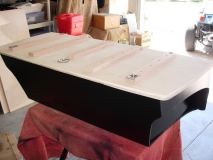
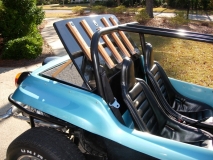
You can see in this picture how the sides and the back extend higher than the front. The top will fit over the sides and back creating a tight fit:
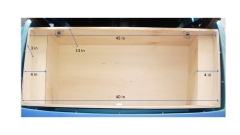
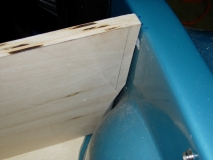
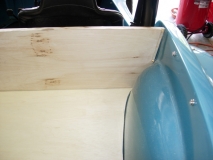
In these pictures you can see the multiple grooves and bevels cut into the front piece for the base, the sides, and fitment around the wheel wells.
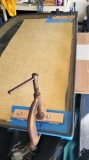
Next step was to enclose the interior by building "wheel wells" around the wheel wells.
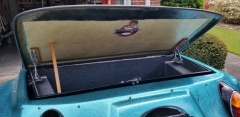
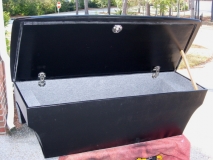
The top: there are multiple details about the top, first I used a router to cut a groove all the way around the interior of the top for the sides and back to fit into. What I didn't do is cut the groove past the front edge of the side. This way you won't see the groove when the top is down. Next was I had to grind down the trialing edge (back edge/lip of the top - edge over the motor) down so that when the top was closed it wouldn't hit the body. Oh in case you didn't know the body isn't flat across the back. Lastly I used cabinet hinges, instead of a piano hinge on the front, so that you wouldn't see them.
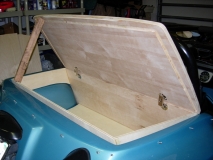
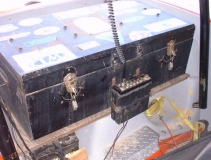
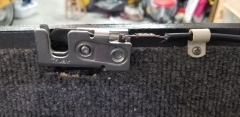
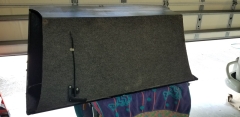
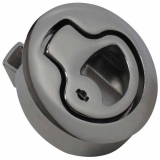
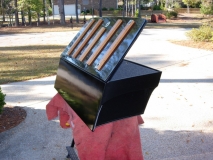
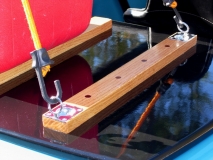
I added a little personal touch to the top of the top. I decided I wanted tie downs in case I needed to carry something that didn't fit in the box. To protect the finish on the lid I added oak slats. The tie downs are marine latch rings. Additionally I wanted to be able to lock the box so I added a marine flat latch (lockable). I have no illusions that if someone wants in the box they could "spring" the lid.
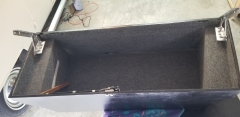
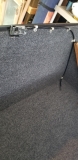
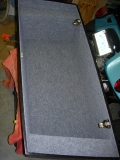
To give the box a little more finished look I glued in cheap indoor/outdoor carpet from Lowes (the stuff that they cut from a huge roll).
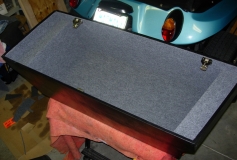
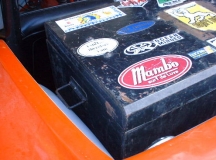
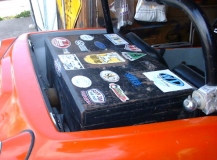
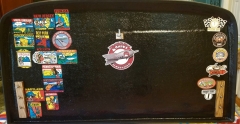
I painted the whole box with Krylon gloss black and then added about six to eight layers of Kylon clear on the top and front/face. After eight years the finish has held up pretty well and the box has met all my expectations.
There are more pictures in my gallery.
Bud
First thing I learned, as others have too, is that our beloved dune buggy bodies are not symmetrical therefore this box had to be built one piece at a time in the buggy. I started with the bottom/seat piece and cut it in the the shape to fit the seating area. Second piece was the back. While this might sound simple, remember what I said about a lack of symmetry. Third piece was the front. I knew I wanted the box to fit snug but not tight (so I could remove it but it wouldn't slide around) so I mocked up the front piece to have the same angle as the roll bar. Additionally, I wanted this box to be sturdy so I notched along the bottom edge of the front/face piece to fit over the bottom. Additionally, I wanted the sides and back pieces to sit above the edge of the seating area and I would "groove" the top to fit over them creating a water tight fit (you'll see this in later pictures. I used 3/8 inch sanded plywood for the box base, back, and sides. I used 3/4 inch sanded plywood for the front/face and top. In order to get the front/face piece to fit between the roll bar and the tire wells, I have to bevel the edges around the tire well. Here are some pictures:
Next came the side pieces. I again "grooved" the front/face piece for the sides to fit and secure to the front more securely. Each side is VERY different from one another.
You can see in this picture how the sides and the back extend higher than the front. The top will fit over the sides and back creating a tight fit:
In these pictures you can see the multiple grooves and bevels cut into the front piece for the base, the sides, and fitment around the wheel wells.
Next step was to enclose the interior by building "wheel wells" around the wheel wells.
The top: there are multiple details about the top, first I used a router to cut a groove all the way around the interior of the top for the sides and back to fit into. What I didn't do is cut the groove past the front edge of the side. This way you won't see the groove when the top is down. Next was I had to grind down the trialing edge (back edge/lip of the top - edge over the motor) down so that when the top was closed it wouldn't hit the body. Oh in case you didn't know the body isn't flat across the back. Lastly I used cabinet hinges, instead of a piano hinge on the front, so that you wouldn't see them.
I added a little personal touch to the top of the top. I decided I wanted tie downs in case I needed to carry something that didn't fit in the box. To protect the finish on the lid I added oak slats. The tie downs are marine latch rings. Additionally I wanted to be able to lock the box so I added a marine flat latch (lockable). I have no illusions that if someone wants in the box they could "spring" the lid.
To give the box a little more finished look I glued in cheap indoor/outdoor carpet from Lowes (the stuff that they cut from a huge roll).
I painted the whole box with Krylon gloss black and then added about six to eight layers of Kylon clear on the top and front/face. After eight years the finish has held up pretty well and the box has met all my expectations.