How to post pictures on the ManxClub hosted forum. To complete this, the ?short version? is as follows: 1) Get the picture (must be JPEG type) you want on your hard drive. 2) Transfer the picture from your hard drive to a web site somewhere. 3) Copy the ?http? link from that web site to the Image link on the NEW ManxClub post. Here?s the ?detailed version? of how to do it: 1) Get the original picture on your hard drive. Any picture can be used as long as it?s a JPEG type (some other types will work, but, JPEG?s are pretty universal). Picture sources are from digital cameras and scanners (I?ll assume you know how to get these on your hard drive as it?s your equipment and there are specifics in the equipment manual) or you can capture a picture from the web by ?right clicking? on the picture you find and a popup menu will appear with one of the possible selection items listed as ?Save Picture as?? (or, something like that), then just do a ?save as? the way you normally do by selecting the location on your hard drive (I use a temp location) and naming the file. The picture only needs to be on your hard drive until you transfer it to the web site, after that you can delete it from your hard drive if you want. 2) Transfer the picture from your hard drive to a web site somewhere. Find a FREE web picture hosting site. There are many (you can do a Google search), but the one I like is Photobucket. No spam emails, no cost, no problems? they never bug you! And. It?s pretty easy to use. Go to ->
http://www.photobucket.com/ (bookmark this web address) and get your free photo album, record your username and password somewhere (so you can get back into your photo album in the future). Once you?ve got your photo album set up you?ll see this screen (there is other stuff there, but this is the important area).
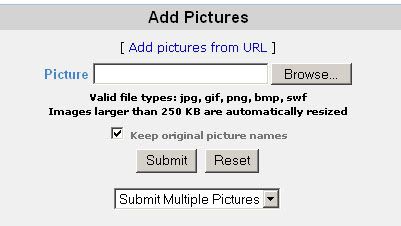
You use the ?Browse? button shown above to find the picture on your hard drive, then click the ?Submit? button to transfer the picture from your hard drive to the Photobucket web site. I only transfer one picture at a time, as the ?submit multiple pictures? choice doesn?t seem to always work. 3) Once the image is loaded into your photo album, scroll down the photobucket screen to find your picture, should look something like this?
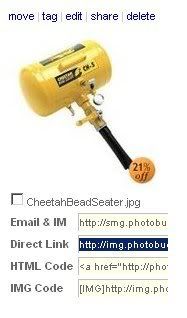
You want to COPY (?Ctrl-C?) the ?DIRECT? link, the one that starts with "
http://img...", i.e. the SECOND one (NOT the EMAIL & IM, HTML or IMG, these work sometimes, but not always, the best is the SECOND one, the DIRECT link). Make sure you get the entire URL line by clicking and holding your mouse button on the far left side and then dragging to the right until you select it all (I?ve selected the line above as indicated by the blue background). When you post a message to the ManxClub (I recommend that you use the ?Guided Mode? Interface, NOT the ?Enhanced? Interface),
?place your insertion cursor in your message where you want the picture to appear (always good to have a blank line above and below the insertion point as it provides some nice white space around the picture) and click on the IMAGE button shown below. Looks like this?

Continued on next post...
 Click in the white space and just do a PASTE (?Ctrl-V?) and it should look like this? (except your exact path will be different)
  Then click ?OK? on the ?Script Prompt? window and the message area will look like this? If you?re using the ?Guided? Interface.
  Of course the exact letters after the [IMG] will be different, because what I?m showing above is from my photobucket album. - - - - - - - - - - - - - - - - - - - - - - - - - - - - - - - - - - - - - - - - If you want to put more than one picture in a single post, I?d recommend that each picture be on a separate line with a blank line above and below the picture. In most cases if you have more than one picture on a line, the pictures will cause your viewers to have to scroll out to the right, in fact all previous and later text posts for that specific message thread will have to scroll out to the right and that?s annoying to everyone. - - - - - - - - - - - - - - - - - - - - - - - - - - - - - - - - - - - - - - - - Now for a word about picture sizes anywhere on a web site. It would be good to have your pictures sized correctly. This means both in physical size to fit nicely on a computer monitor and the best resolution for a computer monitor. For the physical size, a good rule is to make your horizontal dimension about 6 or 7 inches. It doesn?t matter if your picture is a vertical or a horizontal, in the longest dimension. This will allow the picture to be fairly large for easy viewing, but not so large that the person viewing your picture has to scroll sideways to see all of it. For the best resolution, the only thing that matters is the number of pixels per inch. All computer monitors, no matter what type or who made them, the highest resolution that can be displayed is 72 pixels per inch. Anything larger, like 300 pixels per inch, is like trying to teach pigs to fly, it wastes the teacher?s time and annoys the pigs. In the case of pictures on a web site, it takes too long to load the picture and makes the file size way too large (thus the slow speed), therefore, wastes our time and annoys us. To achieve both of these items: correct physical size and correct resolution, you need to probably edit the digital picture in some software. If you have a PC with Windows, look around for a program that was probably included in the Microsoft bundle when you purchased your computer, it?s called ?PictureIt!?. You already paid for it and its pretty good at doing simple things like this. Another program is Adobe Photoshop ?ELEMENTS?, this is the little brother of the expensive Adobe Photoshop and costs about 25% or less of Photoshop (and it has a lot of the expensive Photoshop functions in it). Look in your Sunday paper advertising section for additional savings on Photoshop ELEMENTS. - - - - - - - - - - - - - - - - - - - - - - - - - - - - - - - - - - - - - - - - It?s really just the three steps I mentioned way back at the top. However, I thought I?d give you the nitty gritty details with screen captures. Once you do it a couple of times you can get it done in a very short time. Enjoy? and let?s see lots of pictures from you.