Page 5 of 14
Re: First Build thread of 2015 and of the new Forum - Lorett
Posted: Fri Jan 23, 2015 7:55 am
by joescoolcustoms
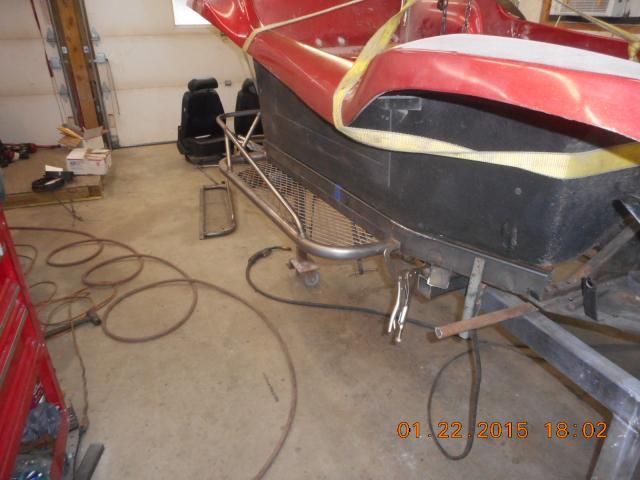
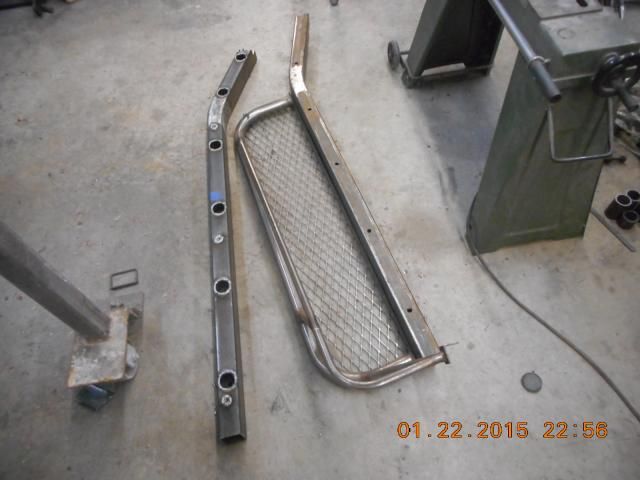
More detail work. Brian purchased a set of Meyers Manx Nerf Bars from the Manx store and they need mounting. Some weld them on and some bolt them on. These Nerf Bars are getting set up to be bolted on.
Trial fitting and marking the position.
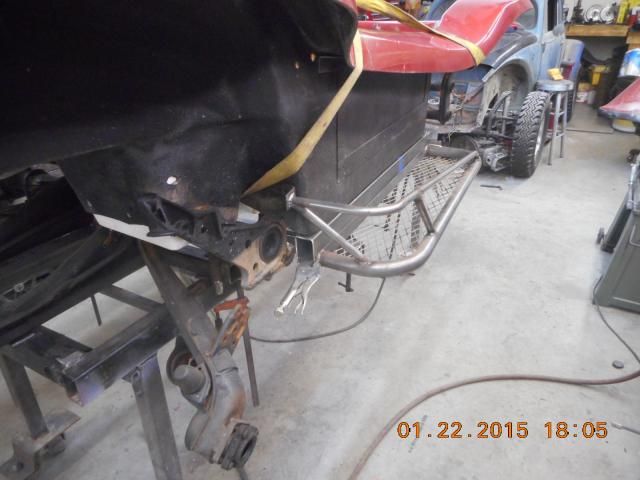
Since the body to chassis bolts are now hidden, it needs another way to bolt up to the chassis. Flush mounted threaded inserts. I start with a simple 1 3/4 inch long threaded Hex connecting bolt, and turn the hex off to make it round.
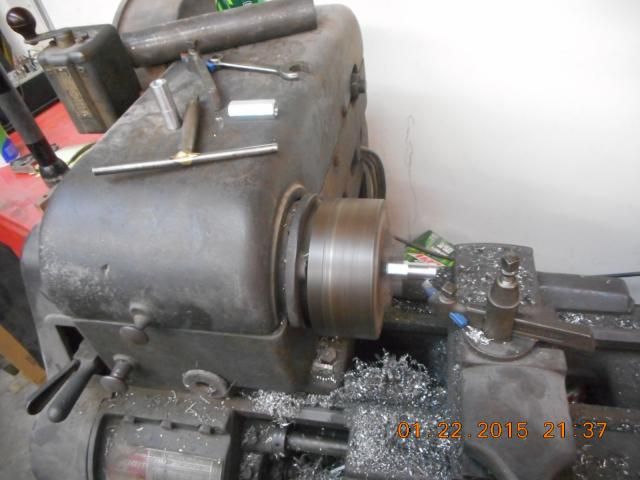
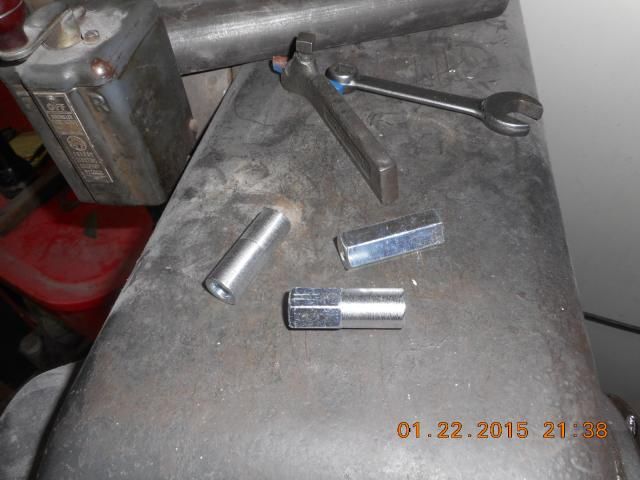
Then cut them in half giving a 7/8 inch long threaded slug.
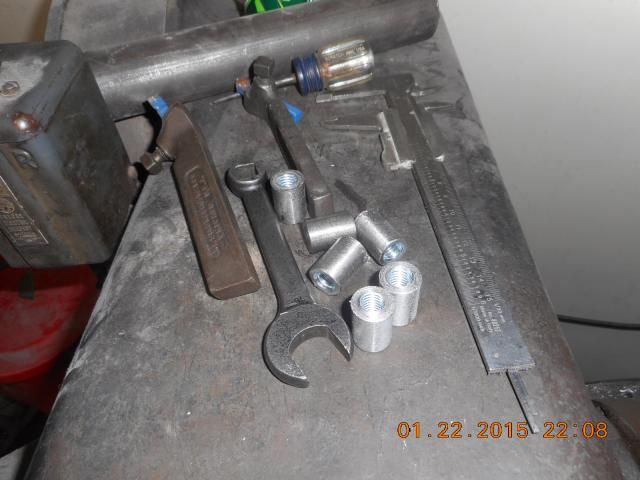
Drill the marked holes slightly bigger than the OD of the threaded slug. I used a standard 60* counter sink bit to bevel the hole for better welding without ruining the threads in the slug.

Use a magnet to flush hold the threaded slug in the hole. (Picture of the 60* standard counter sink bit)
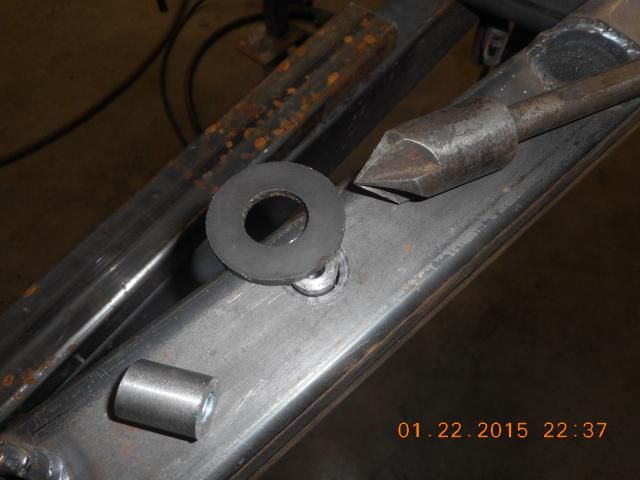
The beveled hole makes a nice finish weld with very little clean up needed to give a flat surface for the Nerf Bar to anchor to.
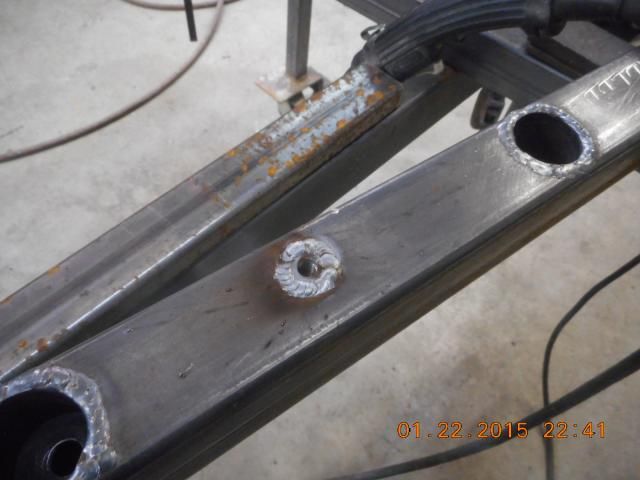
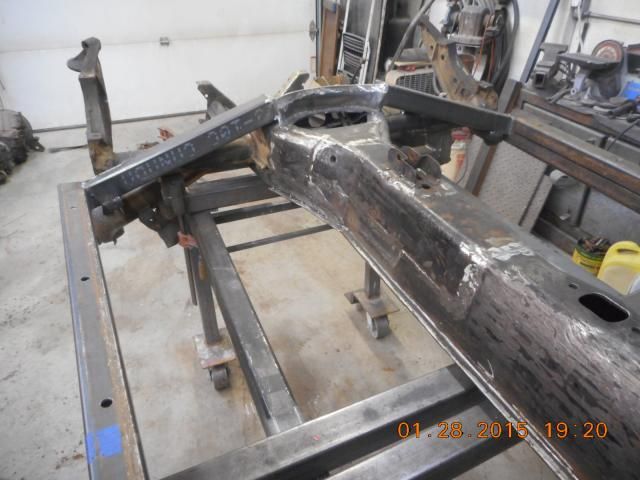
Finished side rails, trimmed to length, custom fitted for the front attachment onto the Napoleons hat, Sunken body/chassis bolts, flush threaded mounts for the Nerf Bars.
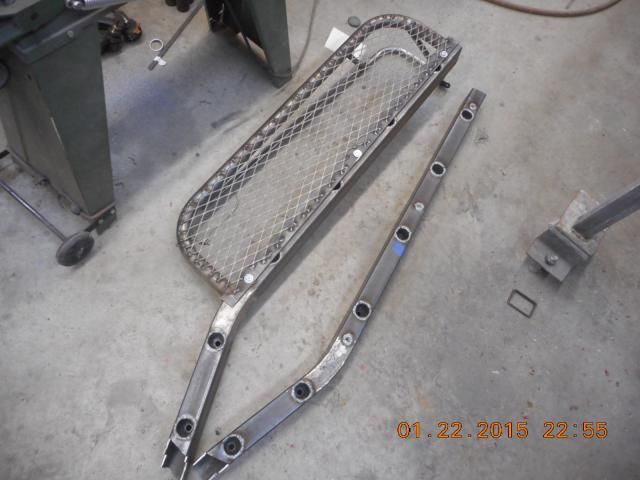
A lot of detail time spent on just the side rails, but time very well spent. Friday will be the day the chassis takes shape.
Re: First Build thread of 2015 and of the new Forum - Lorett
Posted: Fri Jan 23, 2015 8:44 am
by Laxkraap
Simply beautiful.
Re: First Build thread of 2015 and of the new Forum - Lorett
Posted: Fri Jan 23, 2015 2:04 pm
by abgiles
Laxkraap wrote:Simply beautiful.
Agreed!
Re: First Build thread of 2015 and of the new Forum - Lorett
Posted: Fri Jan 23, 2015 2:43 pm
by manxvair
Awesome work Joseph, Brian is one lucky buggy owner!
Sent from my iPhone using Tapatalk
Re: First Build thread of 2015 and of the new Forum - Lorett
Posted: Fri Jan 23, 2015 3:31 pm
by joescoolcustoms
Thanks for the kind words guy's!
I like the modifications that no one sees, hidden things that make a buggy more user friendly, comfortable and versatile. When I built my Puzzle Manx, I put a slew of hidden modifications in it that do not change the buggy persona, but bring it more in line with modern technology/safety and comfort. It is still a learning process for me because nothing is permanent, it is always changing.
Re: First Build thread of 2015 and of the new Forum - Lorett
Posted: Fri Jan 23, 2015 10:28 pm
by TSFR
Wow doesn't even begin to cover your work Joe! What welder are you using? I see it is a Hobart, but what model. I see I am going to need to learn how to weld...really weld.
Re: First Build thread of 2015 and of the new Forum - Lorett
Posted: Thu Jan 29, 2015 12:53 am
by joescoolcustoms
TSFR wrote:Wow doesn't even begin to cover your work Joe! What welder are you using? I see it is a Hobart, but what model. I see I am going to need to learn how to weld...really weld.
Thanks! Self taught on the welding. I suggest read some books on welding, they tell you how to weld patterns for best penetration in certain positions like upside down and vertical joints. They also tell about heat settings, metal differences. Did you know you can weld mild steel to Cast Iron? I read how to do it and have done it several times on race cars running 700 + horsepower and the welds held.
This Hobart is my second MIG welder and I bought it in about 1991. It is a Hobart Beta-MIG 250. I think it was about $ 1800.00 then. The large Hobarts are no longer sold, only the small suit case style. I think I remember seeing that Miller bought out Hobart, so, some of my replacement parts are Miller part numbers.
Depending on what you intend to get into, I would pick a welder appropriate for that. I have built trailers, waste sewage treatment plants, load bearing structures and dump truck beds with mine. Plus one or two roll cages. My buddy David has a small 220 volt Hobart he bought about 2 years ago and has built two buggy's with it, and it has done the job very well, but not for real heavy plate. 1/4 inch and thinner.
Re: First Build thread of 2015 and of the new Forum - Lorett
Posted: Thu Jan 29, 2015 1:18 am
by joescoolcustoms
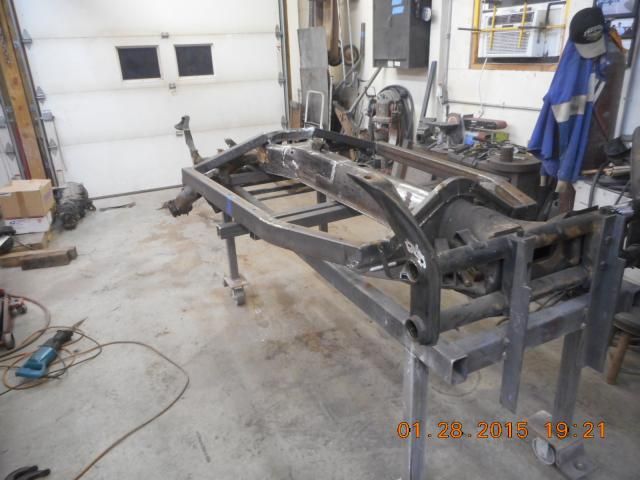
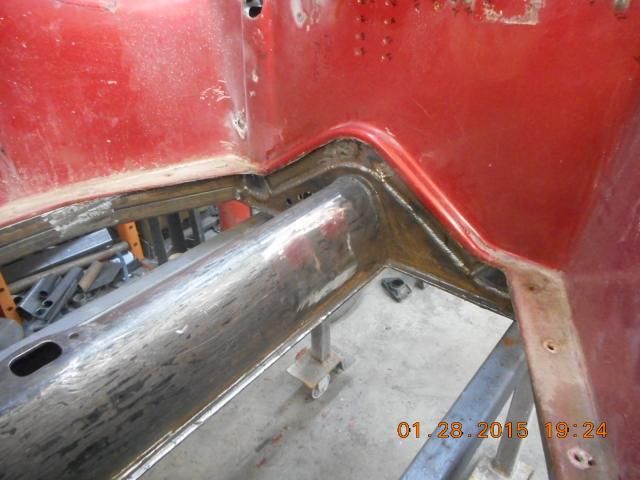
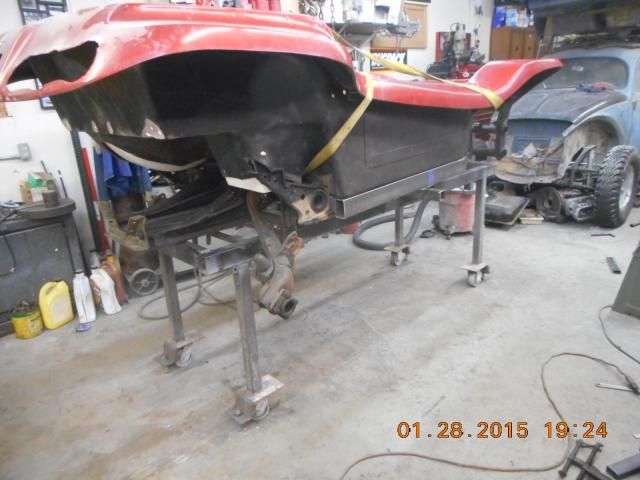
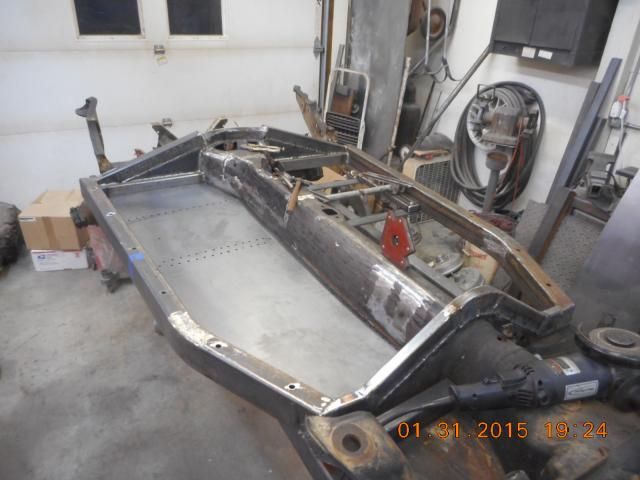
I kind of got knocked back on my heels on this chassis. I completed the perimeter chassis body lift, then struggled to like what I built. Lost some wind in my sails over the weekend, re-grouped, cut it apart and did it again, differently. I did not take pictures of what I built first and then cut out, so, it is hard to describe without a visual, and I am OK not showing it.
Here is a rough finished chassis/body lift. Some splatter cleanup, a little flapper wheel work and it will look nice under the body. Just because something has to be strong, does not mean it also has to look ugly.

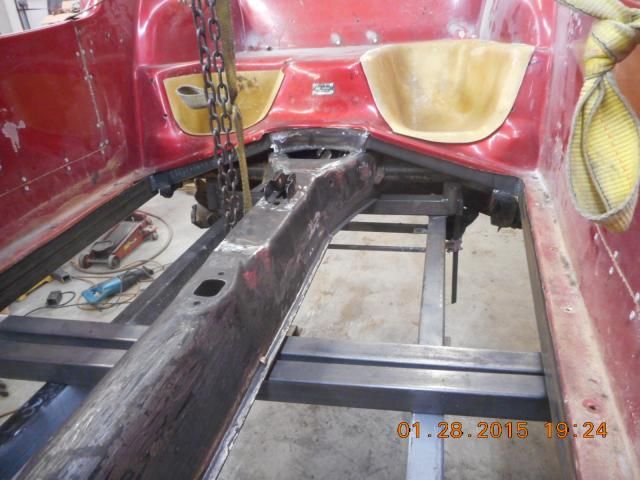
Next is to fabricate the roll cage seal plate out of 2 X 1/4 inch plate and mount the body down tight, then make the seat mounts to position them in place. The seat mounts have to come now because the floor will cover them and be hidden, revealing a smooth, clutter free floor. Then fiberglass repair starts while the body is held in it's final position so no strain and warping later.
Re: First Build thread of 2015 and of the new Forum - Lorett
Posted: Thu Jan 29, 2015 3:05 am
by abgiles
Is it ok if I say that I'm "Giddy like a little school girl" ?
Re: First Build thread of 2015 and of the new Forum - Lorett
Posted: Thu Jan 29, 2015 11:57 pm
by joescoolcustoms
Yes, giddy is part of the equation!
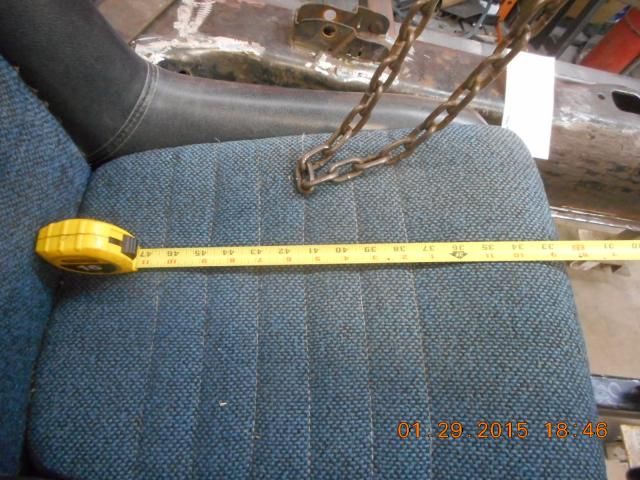
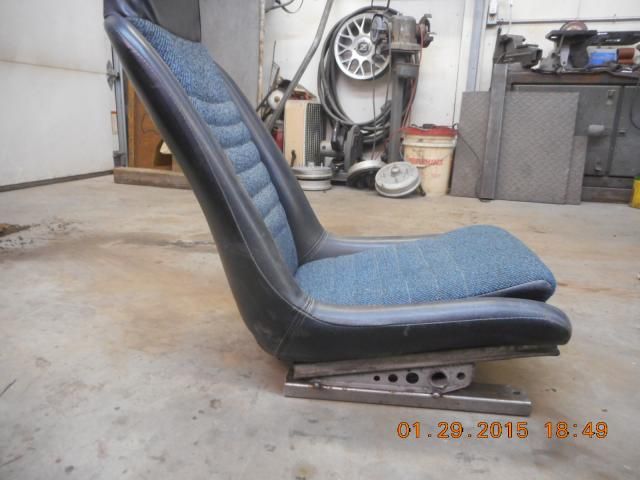
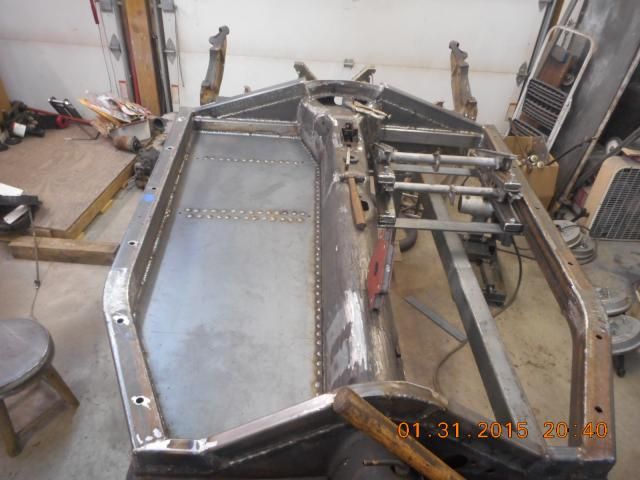
Seat mounts today. Wow! These 914 seats fit in a buggy like butter on bread. The flat floor allows for the seat to go all the way back until it hits the body. (Just mocked up to mark where the hidden mounts will be located).
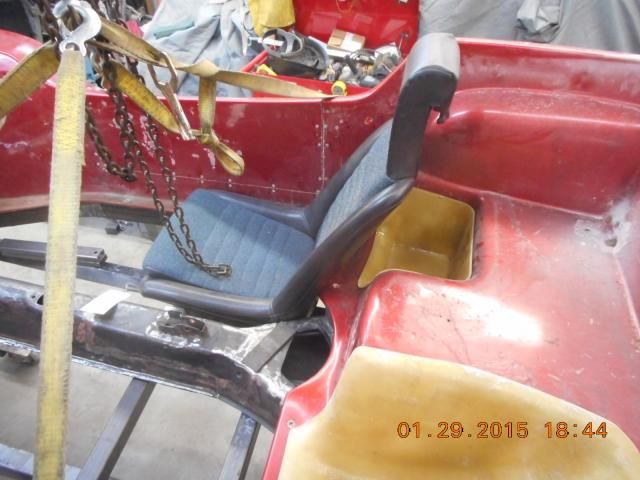
They even fit in between the tunnel and the body wall without touching. But are still comfortable seats for distance traveling.
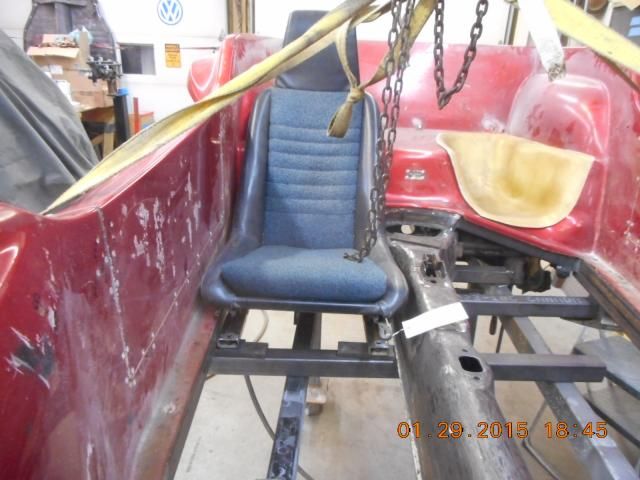
Mounted in this position, they have about 5 inches of forward travel so when Tanya kicks Brian out of the D-Side, she can pull it forward and be comfortable too. Moved to the rear-most position, there is 49 inches between the seat bottom back and the front firewall. So, for me at 6' 2", I would have to point my toes a little to touch the front. Should be no problem getting comfortable in this buggy.
The seats are also mounted on the original incline, so, as the seat moves forward, thy also move upwards.
And, of course, the "Hostetler Brackets" are welded on too.
Re: First Build thread of 2015 and of the new Forum - Lorett
Posted: Sun Feb 01, 2015 2:16 am
by joescoolcustoms
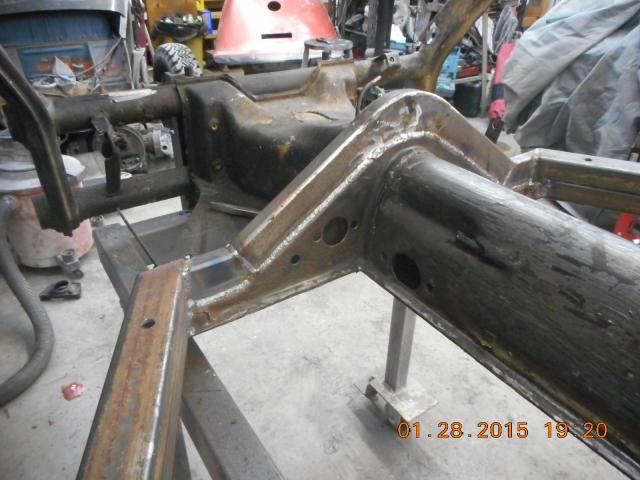
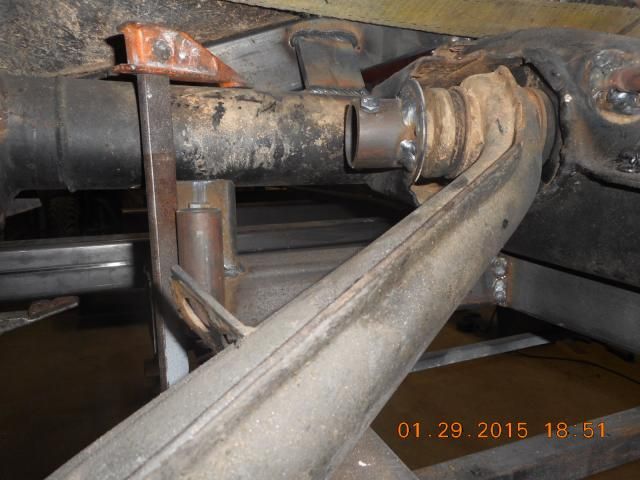
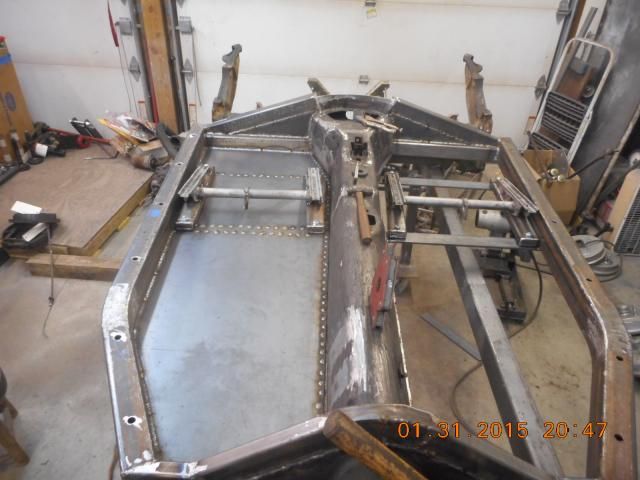
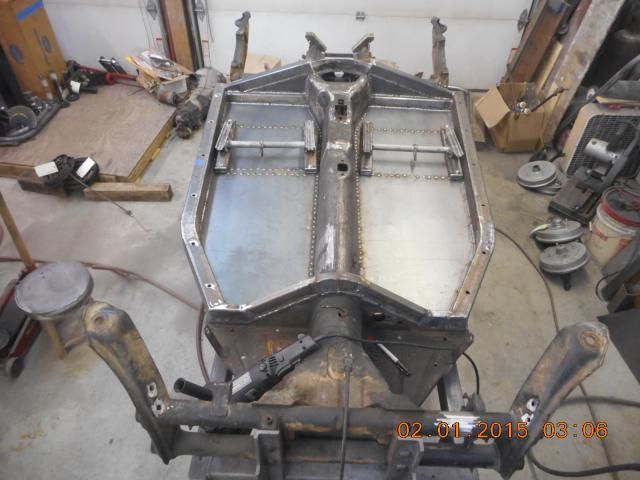
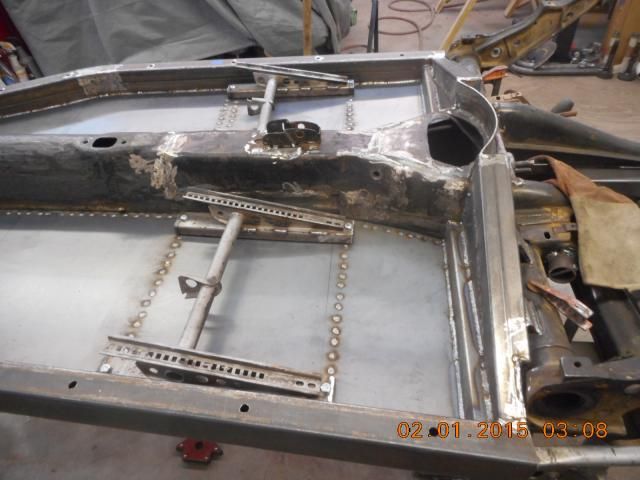
Continued on with chassis fabrication. Added in horizontal bars at the rear of the floor section to triangulate the chassis and the torsion housing. Several extensions were added from the housing to the chassis boxed tubing to distribute the stress and strength. This way several points are connected to the torsion housing and not just the "J" hook which is prone to breaking with heavy use and allows the chassis to flop and flex.
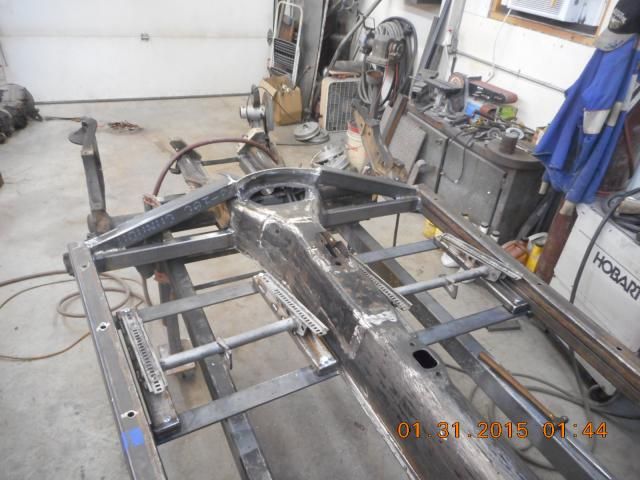
Added in the seat mounts. 1/4 inch thick X 2 inch wide plate welded on each end. The seat is anchored at the edges next to the weld to make the mount super strong. The middle of the plate does not carry weight or load.
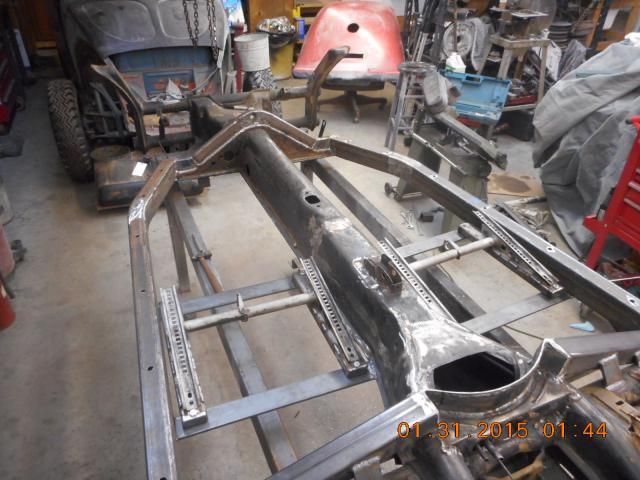
Used 14 gauge plate and cut the small triangles to close the rear firewall area.

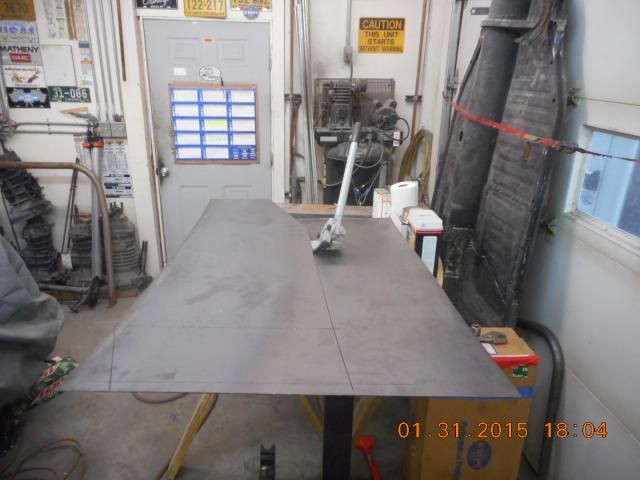
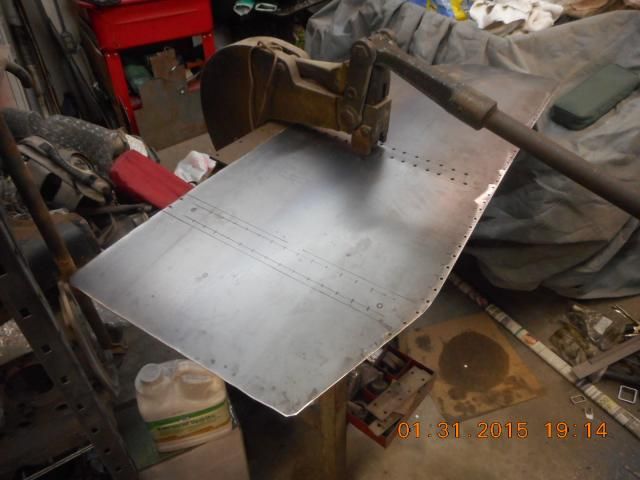
Transferred the floor dimensions to a flat plate of 14 gauge steel to create the outline, then got to use my new throatless shear. Wow, what a difference than cutting this with 4 or 5 4-inch cut off wheels, not to mention no mess.
Next, punched the spot weld holes.
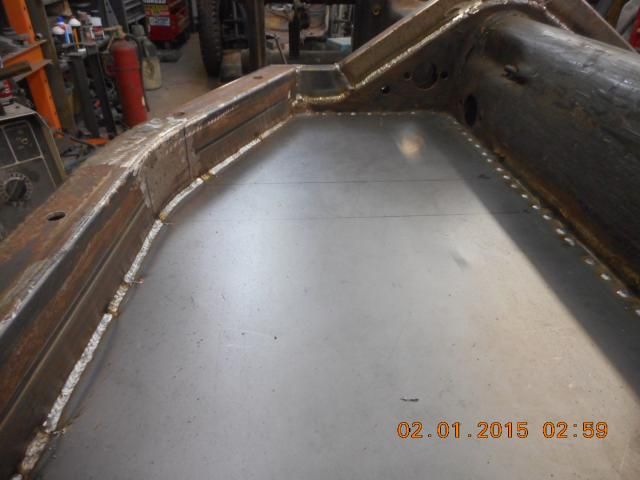
Test fit the floor and slightly ground a couple edges for a nice tight fit.
Welded the floor pan in. Totally flat for ease in seat mounting and extra stowage behind the seat on those long hauls.
Now just to duplicate it for the other side. Before welding in the Passenger side floor, I tried it in the drivers side and it fit, so, the chassis is a mirror side-to-side.
Other than clean up, media blast and coat, the chassis fabrication is basically done. Itchfest 2015 is about to happen.

Re: First Build thread of 2015 and of the new Forum - Lorett
Posted: Sun Feb 01, 2015 3:30 am
by vwmanx
Joe,
What make of throatless shear is that and where did you get it?
Nice punch too!
Re: First Build thread of 2015 and of the new Forum - Lorett
Posted: Sun Feb 01, 2015 5:03 am
by joescoolcustoms
Hey Chris!
The throatless shear is a Woodward Fab, 5 inch shear. I got it off of eBay. It's max rating is 14 gauge and I can already tell that about 3 to 4 sets of floors the shear faces will need dressed. I would have liked to have bought a Beverly Shear, but could not justify the cost differential. I drilled 3 additional holes in my bender stand to make it usable with large sheets of steel.
The Whittney Punch I picked up at a equipment auction in 1985 for $ 5.00, and the die's for an addition $ 10.00. It weighs at least $ 300 pounds, but is very nice to have for these purposes.
Re: First Build thread of 2015 and of the new Forum - Lorett
Posted: Sun Feb 01, 2015 8:19 am
by joescoolcustoms
Finished off the floor. Just need to make a small depression for the peddle cluster and a backstop for the brace/clutch.
The flat floor works nicely for getting the seats as far back as the package trey. Also give up a little room for cramming items during long trips/vacations.
Re: First Build thread of 2015 and of the new Forum - Lorett
Posted: Sun Feb 01, 2015 8:42 am
by bhdeloach
Joe, that's one awesome job you are doing! You do need to sync your camera time though, LOL.