First Build thread of 2015 and of the new Forum - Loretta
-
Mike-Presley

- Posts: 107
- Joined: Mon Dec 27, 2010 6:00 am
- Location: Barstow, Calif.
Re: First Build thread of 2015 and of the new Forum - Lorett
I can see the later ones, thanks, looks like fun
-
joescoolcustoms

- Posts: 286
- Joined: Mon Jun 03, 2013 5:00 am
- Location: Saint Albans, WV
Re: First Build thread of 2015 and of the new Forum - Lorett
Here is another test on posting pictures.
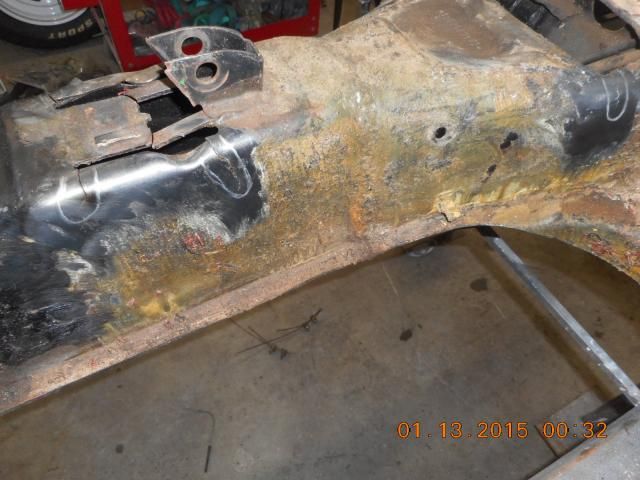
Pulled the beam apart so adjusters can be installed.
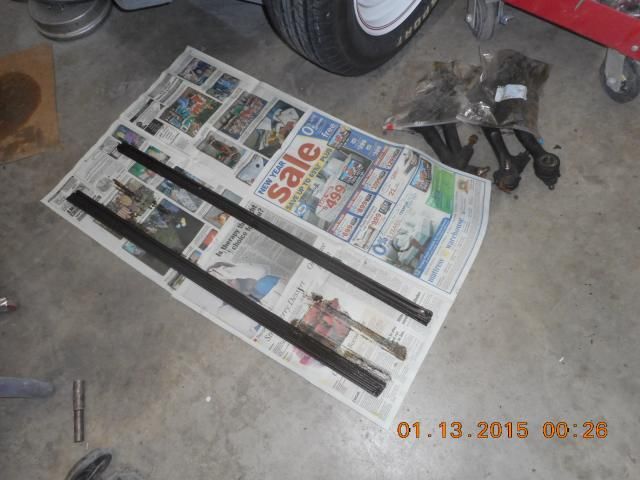
Can everyone see this???
Pulled the beam apart so adjusters can be installed.
Can everyone see this???
Last edited by joescoolcustoms on Tue Jan 13, 2015 6:04 am, edited 3 times in total.
-
joescoolcustoms
- Posts: 286
- Joined: Mon Jun 03, 2013 5:00 am
- Location: Saint Albans, WV
Re: First Build thread of 2015 and of the new Forum - Lorett
Well, I think that is working.
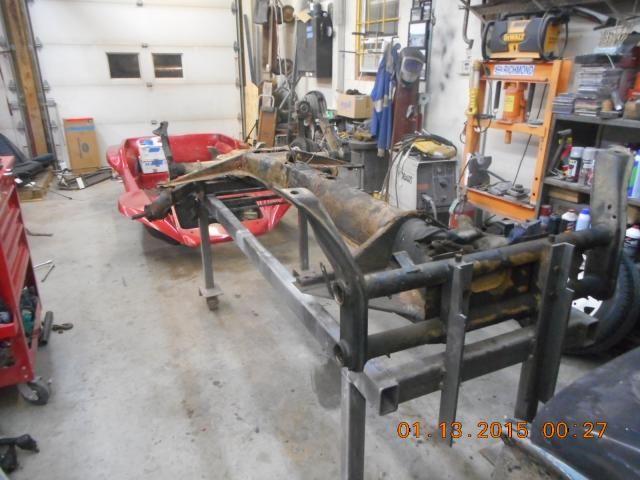
Continued with pulling apart the entire buggy. Everything except the rear trailing arms. Need the trailing arms to check against the body to establish how much body lift is needed for the arms to clear the soon to bo repaired battery and spare tire wells.
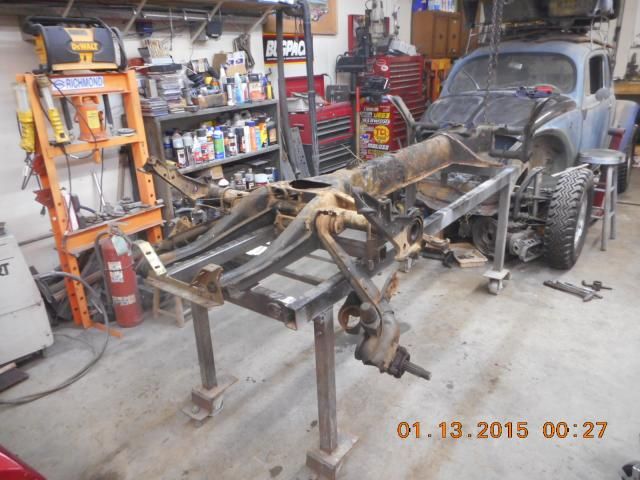
Since the chassis is on the Chassis table, I checked it for straightness and it is better than most stock Beetle pans. About 3/32" out of square, which can be compensated with the suspension adjustments.
Removed most of the former PO's attempted hacks on the spare tire well and battery well. These were done to clear a IRS suspension.

Inventoried and labeled Loretta's parts.
More parts and a pile of trash of the former PO's crappy Fiberglass repairs.

Cracks found in the chassis tunnel coming from the E-Brake area. One is almost half the height of the tunnel!
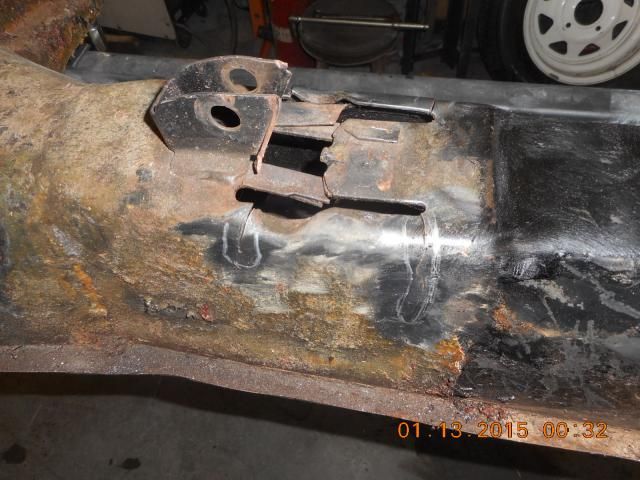
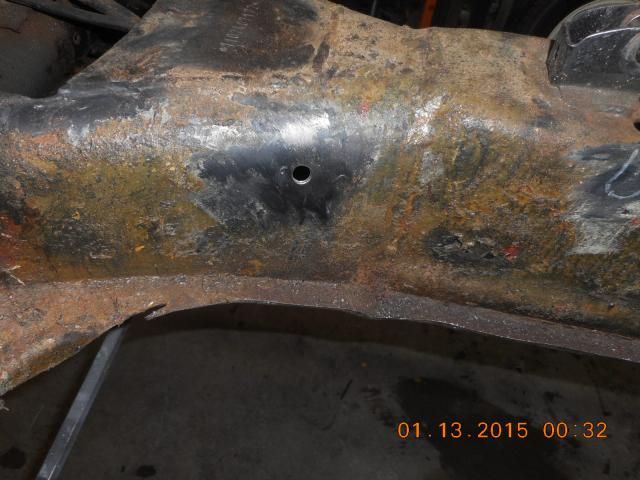
Cracks on the opposite side too. And another crack in the shift rod coupler access hole.
Ha Ha Ha Ha! The builder drilled and tapped the tunnel for seat belt bolts. That thin tunnel metal would not have held up if it was called upon to protect the passengers.
Continued with pulling apart the entire buggy. Everything except the rear trailing arms. Need the trailing arms to check against the body to establish how much body lift is needed for the arms to clear the soon to bo repaired battery and spare tire wells.
Since the chassis is on the Chassis table, I checked it for straightness and it is better than most stock Beetle pans. About 3/32" out of square, which can be compensated with the suspension adjustments.
Removed most of the former PO's attempted hacks on the spare tire well and battery well. These were done to clear a IRS suspension.
Inventoried and labeled Loretta's parts.
More parts and a pile of trash of the former PO's crappy Fiberglass repairs.
Cracks found in the chassis tunnel coming from the E-Brake area. One is almost half the height of the tunnel!
Cracks on the opposite side too. And another crack in the shift rod coupler access hole.
Ha Ha Ha Ha! The builder drilled and tapped the tunnel for seat belt bolts. That thin tunnel metal would not have held up if it was called upon to protect the passengers.
Last edited by joescoolcustoms on Tue Jan 13, 2015 6:10 am, edited 1 time in total.
-
joescoolcustoms
- Posts: 286
- Joined: Mon Jun 03, 2013 5:00 am
- Location: Saint Albans, WV
Re: First Build thread of 2015 and of the new Forum - Lorett
Hummm! The pictures must be too big, the post is only showing half the picture. Will keep trying to figure my way about this.

Re: First Build thread of 2015 and of the new Forum - Lorett
I can see them pretty clearly. Nice and big. Are you saying they've been cut off?
I re-posted mine due to having to clean up my photobucket page. It was way too dis-organized for me.
Looking like a lot of progress already Joe! Yes, the previous owner was quite a hack artist. I am more and more appreciative of you taking this on for me!
I re-posted mine due to having to clean up my photobucket page. It was way too dis-organized for me.
Looking like a lot of progress already Joe! Yes, the previous owner was quite a hack artist. I am more and more appreciative of you taking this on for me!
(Loretta) Manx # M2940D910E on customized 1970 chassis that has been "Wheelerized" by Joescoolcustoms
(Scarlett) Manx Resorter #12 (R0012B931S) on 1969 chassis.
(Gunther) Manx 2 # A0202A035E
Tow'dster # TF530G913S
Original Home built buggy that I learned to drive in back in 1995 (the one that started my passion).
Club Member # 4436
Loretta: http://www.manxclub.com/forum/viewtopic ... t=3365Manx" onclick="window.open(this.href);return false;
Re: First Build thread of 2015 and of the new Forum - Lorett
You've also done more in one day than I could have done full time in a week!
(Loretta) Manx # M2940D910E on customized 1970 chassis that has been "Wheelerized" by Joescoolcustoms
(Scarlett) Manx Resorter #12 (R0012B931S) on 1969 chassis.
(Gunther) Manx 2 # A0202A035E
Tow'dster # TF530G913S
Original Home built buggy that I learned to drive in back in 1995 (the one that started my passion).
Club Member # 4436
Loretta: http://www.manxclub.com/forum/viewtopic ... t=3365Manx" onclick="window.open(this.href);return false;
(Scarlett) Manx Resorter #12 (R0012B931S) on 1969 chassis.
(Gunther) Manx 2 # A0202A035E
Tow'dster # TF530G913S
Original Home built buggy that I learned to drive in back in 1995 (the one that started my passion).
Club Member # 4436
Loretta: http://www.manxclub.com/forum/viewtopic ... t=3365Manx" onclick="window.open(this.href);return false;
-
joescoolcustoms
- Posts: 286
- Joined: Mon Jun 03, 2013 5:00 am
- Location: Saint Albans, WV
Re: First Build thread of 2015 and of the new Forum - Lorett
I went back and edited the posts. I used the pictures from my Photo bucket account. I was trying to link the pictures from this site's gallery and they are posting way too big to get everything in the posted area. Just have to figure it out.

Re: First Build thread of 2015 and of the new Forum - Lorett
Brian,
I asked about Jeff because we have his site on the MOTB website and I thought you might have found him through that.
Joe,
Very nice work. looks like some interesting welding on that tunnel.
Vince
I asked about Jeff because we have his site on the MOTB website and I thought you might have found him through that.
Joe,
Very nice work. looks like some interesting welding on that tunnel.
Vince
Re: First Build thread of 2015 and of the new Forum - Lorett
Vince,
I did see it on there, but I already had talked with him before. If it helps, I did use the MOTB to find him once I had decided to get the trans re-done.
I did see it on there, but I already had talked with him before. If it helps, I did use the MOTB to find him once I had decided to get the trans re-done.
(Loretta) Manx # M2940D910E on customized 1970 chassis that has been "Wheelerized" by Joescoolcustoms
(Scarlett) Manx Resorter #12 (R0012B931S) on 1969 chassis.
(Gunther) Manx 2 # A0202A035E
Tow'dster # TF530G913S
Original Home built buggy that I learned to drive in back in 1995 (the one that started my passion).
Club Member # 4436
Loretta: http://www.manxclub.com/forum/viewtopic ... t=3365Manx" onclick="window.open(this.href);return false;
(Scarlett) Manx Resorter #12 (R0012B931S) on 1969 chassis.
(Gunther) Manx 2 # A0202A035E
Tow'dster # TF530G913S
Original Home built buggy that I learned to drive in back in 1995 (the one that started my passion).
Club Member # 4436
Loretta: http://www.manxclub.com/forum/viewtopic ... t=3365Manx" onclick="window.open(this.href);return false;
Re: First Build thread of 2015 and of the new Forum - Lorett
Brian,
Thanks for letting me know. I was not sure if anyone knew what "Gear Garage" was.
Joe,
Did you push those fiberglass "repairs" out with you hand? They look pretty clean.
Vince
Thanks for letting me know. I was not sure if anyone knew what "Gear Garage" was.
Joe,
Did you push those fiberglass "repairs" out with you hand? They look pretty clean.
Vince
-
joescoolcustoms
- Posts: 286
- Joined: Mon Jun 03, 2013 5:00 am
- Location: Saint Albans, WV
Re: First Build thread of 2015 and of the new Forum - Lorett
Vince, I was in heaven once I saw the crappy Fiberglass work of a former PO. They laid the glass right on the gell coat, no scuffing or sanding. A couple hits with a gloved hand from underneath and out they came. Even though it is still a serious repair awaiting, the finishing part just got a lot easier.
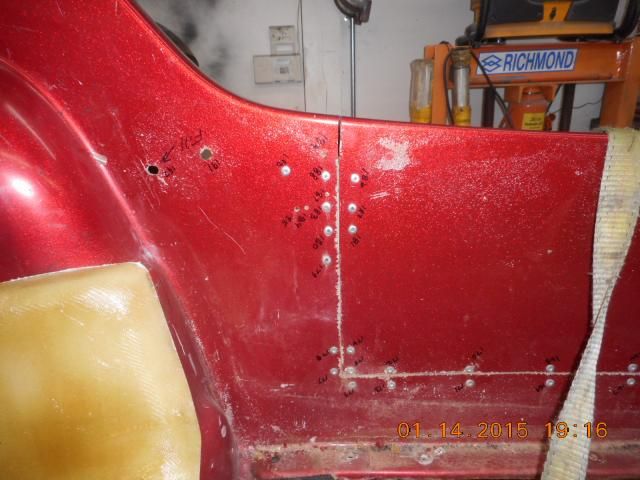
As a side note, my Puzzle Manx has 286 holes I filled. Last night I counted the holes in Loretta. Are you ready? 336 holes to fill! That did not include the two "doors", so, basically, 338 holes.
As a side note, my Puzzle Manx has 286 holes I filled. Last night I counted the holes in Loretta. Are you ready? 336 holes to fill! That did not include the two "doors", so, basically, 338 holes.
Re: First Build thread of 2015 and of the new Forum - Lorett
338 Holes? Merely a flesh wound! I don't know if I would have counted that high. I would have started crying about the 100 mark.
(Loretta) Manx # M2940D910E on customized 1970 chassis that has been "Wheelerized" by Joescoolcustoms
(Scarlett) Manx Resorter #12 (R0012B931S) on 1969 chassis.
(Gunther) Manx 2 # A0202A035E
Tow'dster # TF530G913S
Original Home built buggy that I learned to drive in back in 1995 (the one that started my passion).
Club Member # 4436
Loretta: http://www.manxclub.com/forum/viewtopic ... t=3365Manx" onclick="window.open(this.href);return false;
(Scarlett) Manx Resorter #12 (R0012B931S) on 1969 chassis.
(Gunther) Manx 2 # A0202A035E
Tow'dster # TF530G913S
Original Home built buggy that I learned to drive in back in 1995 (the one that started my passion).
Club Member # 4436
Loretta: http://www.manxclub.com/forum/viewtopic ... t=3365Manx" onclick="window.open(this.href);return false;
Re: First Build thread of 2015 and of the new Forum - Lorett
Cracks in the chassis are very likely from the extra flex caused by the "doors" cut into the body. I would guess the body stiffness from end to end was probably about 30-40% of original because of the doors. I saw it at MOTB and was glad to hear you planned to correct that situation.
-
joescoolcustoms
- Posts: 286
- Joined: Mon Jun 03, 2013 5:00 am
- Location: Saint Albans, WV
Re: First Build thread of 2015 and of the new Forum - Lorett
I agree Calvin. The doors sure did not help the chassis. But, that will be resolved shortly and a boxed perimeter chassis and integral roll cage will make it really tight in addition to having the doors grafted back together.
So, how does a body lift work, what is it good for, how to measure and pick what you want.
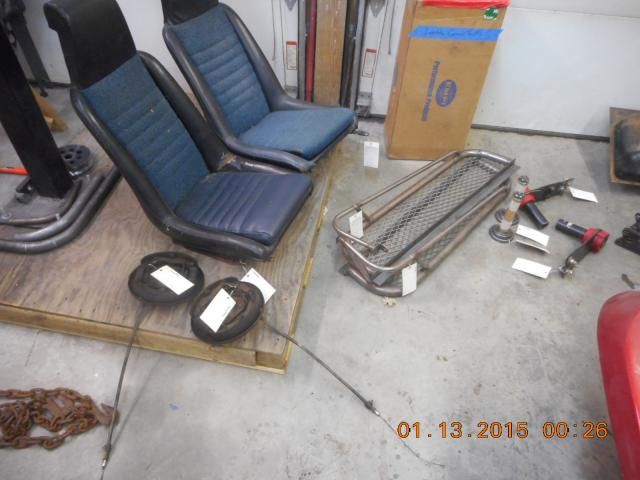
This chassis will get a boxed tube perimeter frame with a flat floor. The flat floor takes a lot of the troubles with properly and safely mounting a seat system. The original contoured VW floor is great if you will be using the stock seat tracks, but that limits the seat options. This buggy will get a very nice set of Porsche 914 seats and adjustable tracks. A body lift could be stacked on top of the pan and go, but, I will be eliminating all the stock sheet pan haves and adding some serious strength to the chassis.
In these two photos, you can see a pan section form the rear area of a pan that was shortened 14.25 inches, some scrap pieces of tubing and a level.
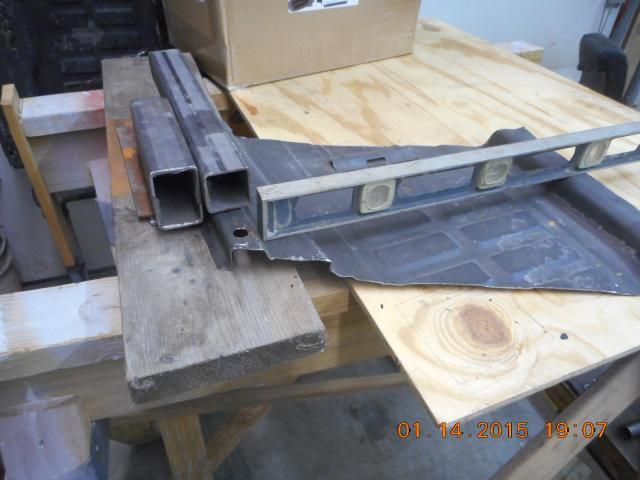
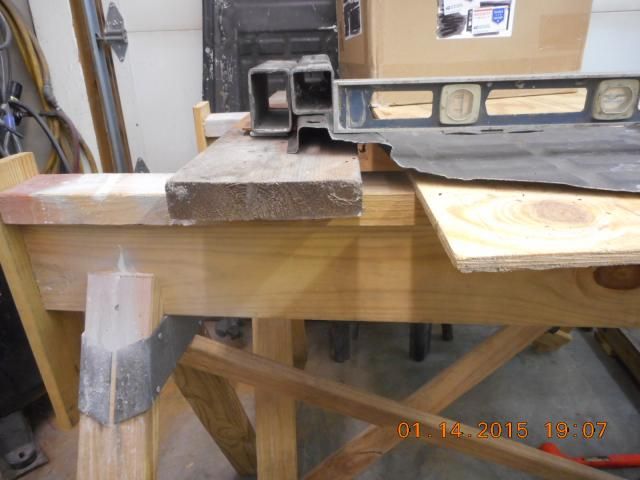
The level represents a flat floor like the front half of the pan has. The 2X2 boxed tubing is a 2 inch body lift installed on a pan. The 2X3 Rectangular tubing beside it shows how it is used to eliminate the sheet metal pan and stacked body lift. So, the side will be a clean 3 inch tall rectangular tube that will give a 2 inch body lift. This tube will also make an excellent structure to mount a full roll cage to.
So, how does a body lift work, what is it good for, how to measure and pick what you want.
This chassis will get a boxed tube perimeter frame with a flat floor. The flat floor takes a lot of the troubles with properly and safely mounting a seat system. The original contoured VW floor is great if you will be using the stock seat tracks, but that limits the seat options. This buggy will get a very nice set of Porsche 914 seats and adjustable tracks. A body lift could be stacked on top of the pan and go, but, I will be eliminating all the stock sheet pan haves and adding some serious strength to the chassis.
In these two photos, you can see a pan section form the rear area of a pan that was shortened 14.25 inches, some scrap pieces of tubing and a level.
The level represents a flat floor like the front half of the pan has. The 2X2 boxed tubing is a 2 inch body lift installed on a pan. The 2X3 Rectangular tubing beside it shows how it is used to eliminate the sheet metal pan and stacked body lift. So, the side will be a clean 3 inch tall rectangular tube that will give a 2 inch body lift. This tube will also make an excellent structure to mount a full roll cage to.
-
joescoolcustoms
- Posts: 286
- Joined: Mon Jun 03, 2013 5:00 am
- Location: Saint Albans, WV
Re: First Build thread of 2015 and of the new Forum - Lorett
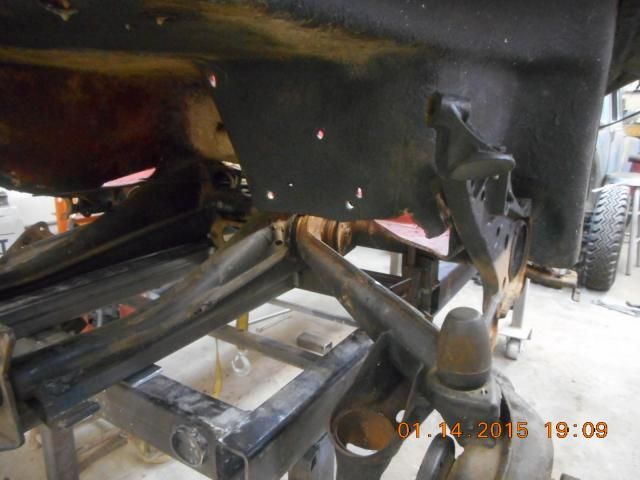
Here are some picture why a body lift will be used on this build. One of the several PO's installed this Early Manx body on a IRS chassis. The IRS rear trailing arms occupy space that a swing axle does not. When Bruce designed these body's, the IRS was not out. Later on, Bruce introduced the Manx II that had a flat rear package trey and cured all the interference problems. One of the PO's hacked the spare tire well and battery well so as to make room for the IRS trailing arms. Since these hacks will be removed and repaired to original, a compromise is needed.
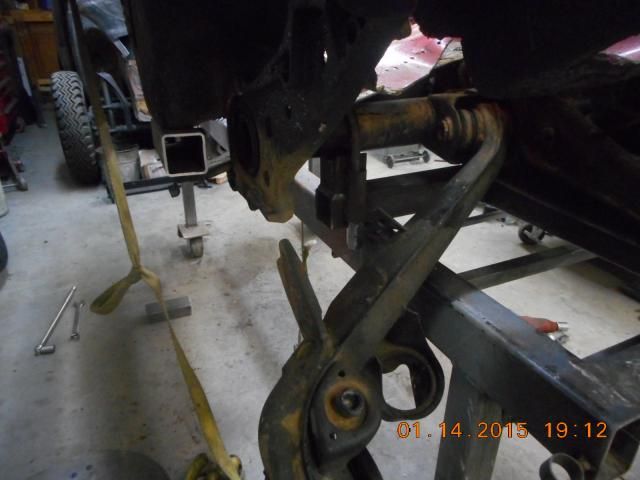
Here the interference can be seen with the arm tucked way up into the tire well area.
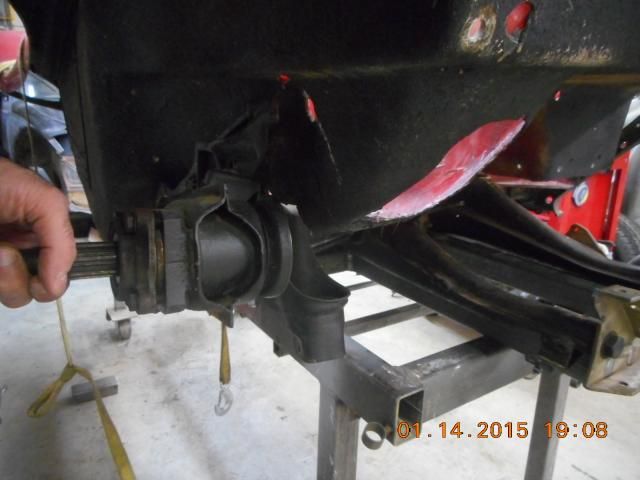
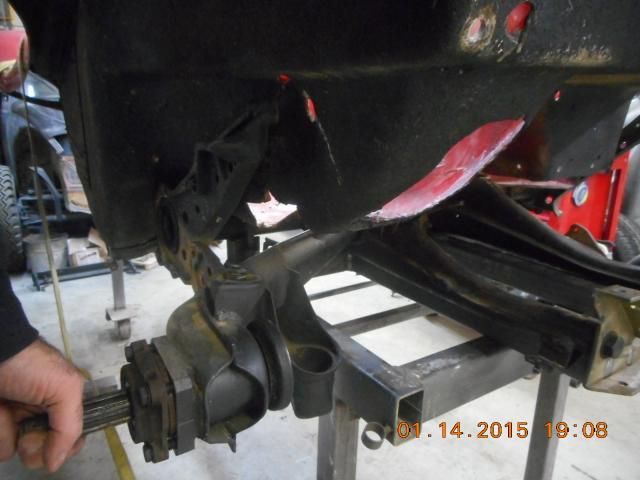
Same on the Battery Well.
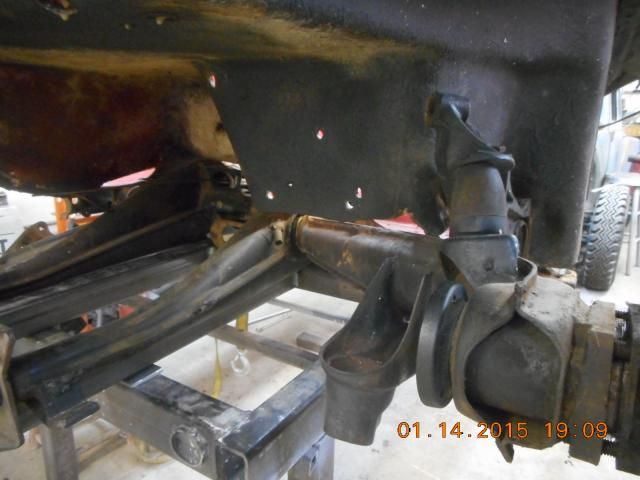
So, 2 inch tall tubing was shimmed in on the original edges of the pan to determine where at what height the body will clear the rear arms. (1 inch was tried, but not enough)
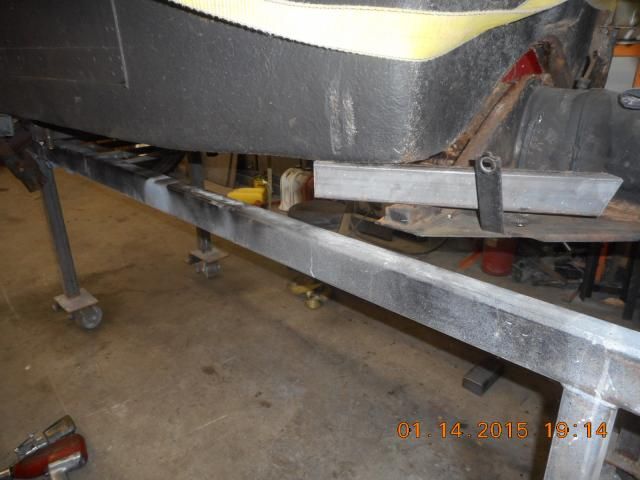
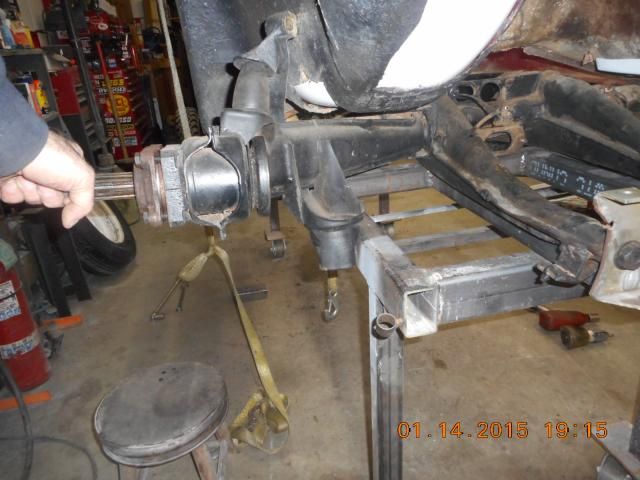
And again the arms were checked and they just clear the wells with a 2 inch body lift. This will also give room for larger tires, more headroom with a roll cage and a more Dual Sport look that Brian is after.
Here are the plugs that I paid Chris to make from a Un-Hacked Early Manx Body. They will be used to properly repair this body back to original style.
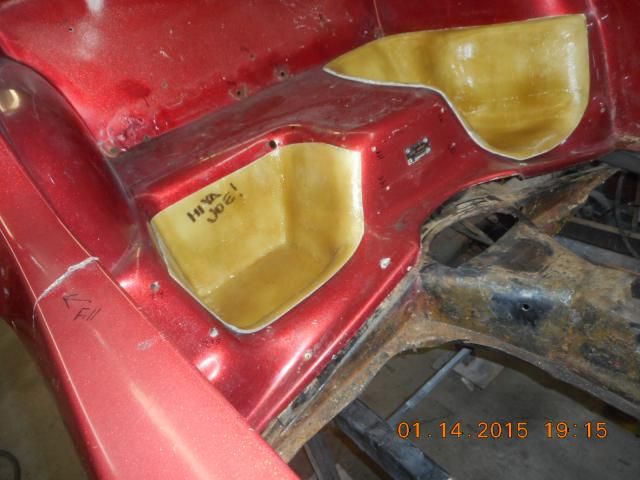
I got a little over anal last night and marked every repair needed on this body. That is when I counted the 338 holes that will get repaired.
I went to the steel plant today to order the steel needed for a flat floor and 2X3 rectangular frame. They are out and will not have any until Monday for me. So, I will move onto suspension and tunnel work to stay busy. Spring is coming and buggy's will be needed!
Here the interference can be seen with the arm tucked way up into the tire well area.
Same on the Battery Well.
So, 2 inch tall tubing was shimmed in on the original edges of the pan to determine where at what height the body will clear the rear arms. (1 inch was tried, but not enough)
And again the arms were checked and they just clear the wells with a 2 inch body lift. This will also give room for larger tires, more headroom with a roll cage and a more Dual Sport look that Brian is after.
Here are the plugs that I paid Chris to make from a Un-Hacked Early Manx Body. They will be used to properly repair this body back to original style.
I got a little over anal last night and marked every repair needed on this body. That is when I counted the 338 holes that will get repaired.
I went to the steel plant today to order the steel needed for a flat floor and 2X3 rectangular frame. They are out and will not have any until Monday for me. So, I will move onto suspension and tunnel work to stay busy. Spring is coming and buggy's will be needed!